
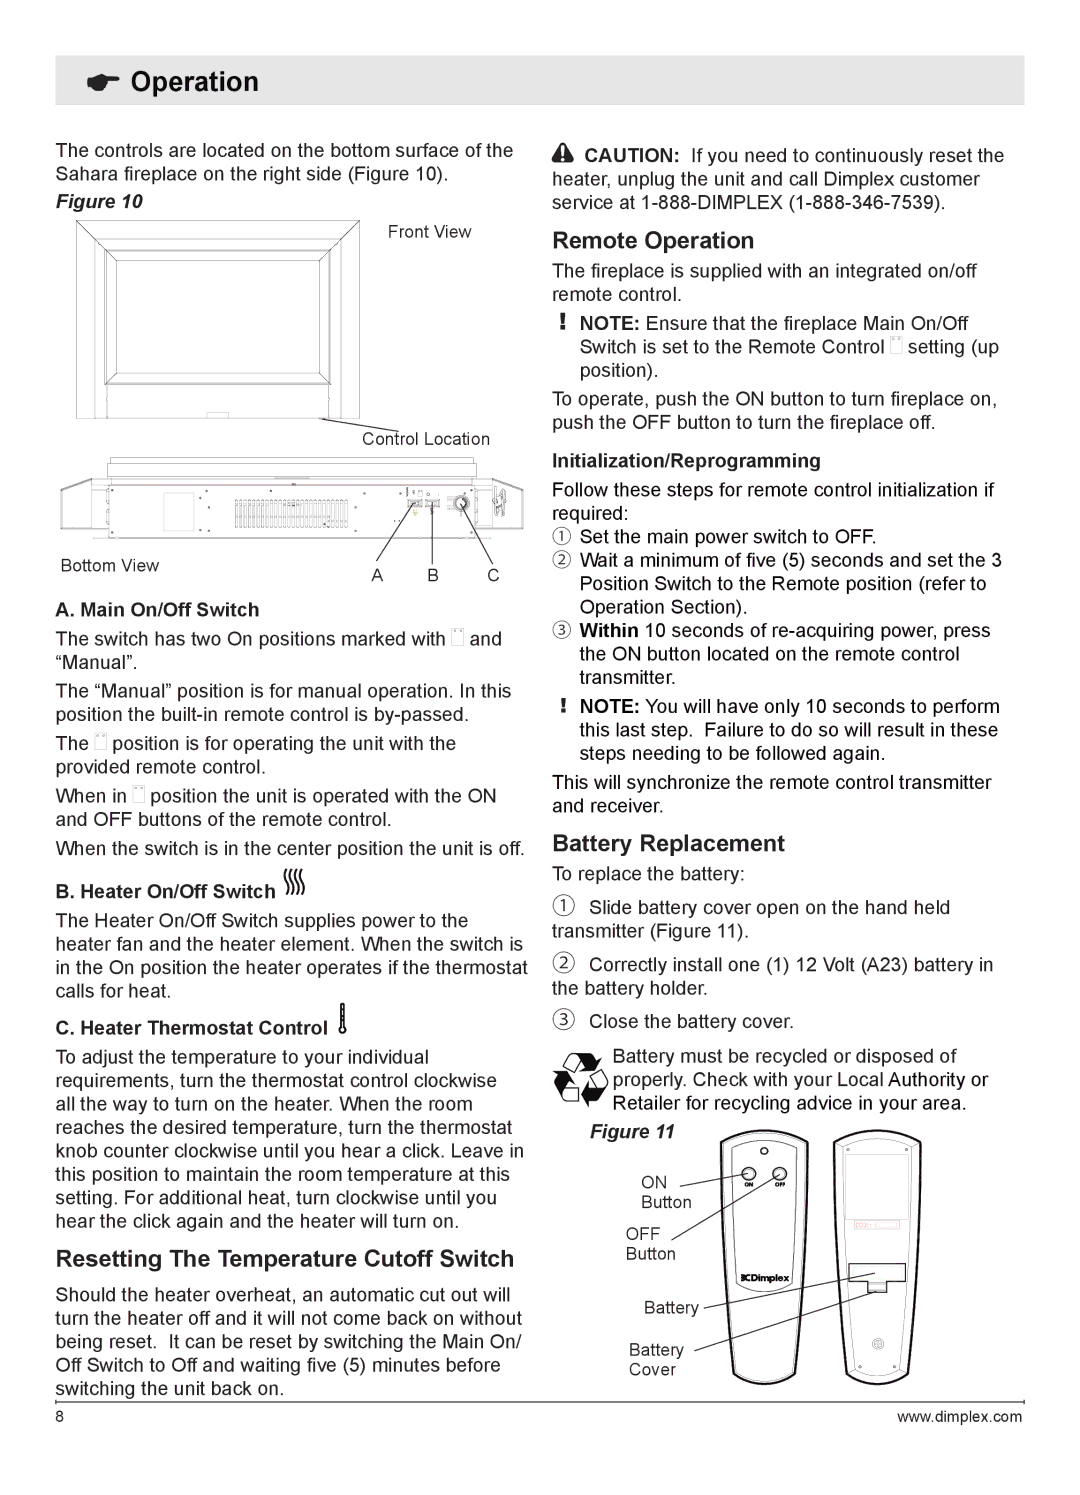
DWF1146GP specifications
The Dimplex DWF1146GP is a sophisticated and modern electric fireplace that combines both aesthetics and functionality. With its sleek design and advanced features, it has become a favorite for homeowners looking to create a cozy atmosphere without the hassle of traditional fireplaces.One of the main features of the Dimplex DWF1146GP is its realistic flame effect. Utilizing Dimplex’s patented Opti-myst technology, the fireplace produces a three-dimensional flame that mimics the look of real burning logs. This innovative technology uses ultrasonic mist to create a lifelike flame and smoke effect, providing the warm ambiance of a wood-burning fire without the associated mess and maintenance.
The DWF1146GP also offers adjustable heat settings, allowing users to customize their comfort levels. It has a powerful heater capable of providing up to 1,500 watts of heat output, which is ideal for small to medium-sized rooms. The adjustable thermostat allows for precise temperature control, ensuring that the space remains comfortable throughout the seasons.
In addition to its heat-producing capabilities, the Dimplex DWF1146GP is designed with user convenience in mind. It features an easy-to-use remote control, enabling users to turn the fireplace on and off or adjust settings from a distance. This allows for effortless operation, especially when relaxing on the couch or entertaining guests.
Safety is also a priority in the design of the DWF1146GP. The unit is equipped with an automatic shut-off feature that activates if the fireplace overheats. This ensures peace of mind for users, especially in households with children or pets. Furthermore, the unit operates quietly, making it suitable for bedrooms and living areas alike.
The Dimplex DWF1146GP boasts a contemporary aesthetic that can complement a wide range of interior designs. Its elegant appearance, combined with the dynamic flame display, makes it a focal point in any room. Easy to install and maintain, it provides a hassle-free way to enjoy the warmth and charm of a fireplace without significant renovation.
In conclusion, the Dimplex DWF1146GP electric fireplace stands out for its realistic flame technology, customizable heating options, user-friendly features, and safe operation. It is an excellent choice for those looking to enhance their living space with modern heating solutions while maintaining a stylish appearance. Whether it's a chilly evening or an atmosphere-setting gathering, the Dimplex DWF1146GP serves as an efficient and beautiful addition to any home.