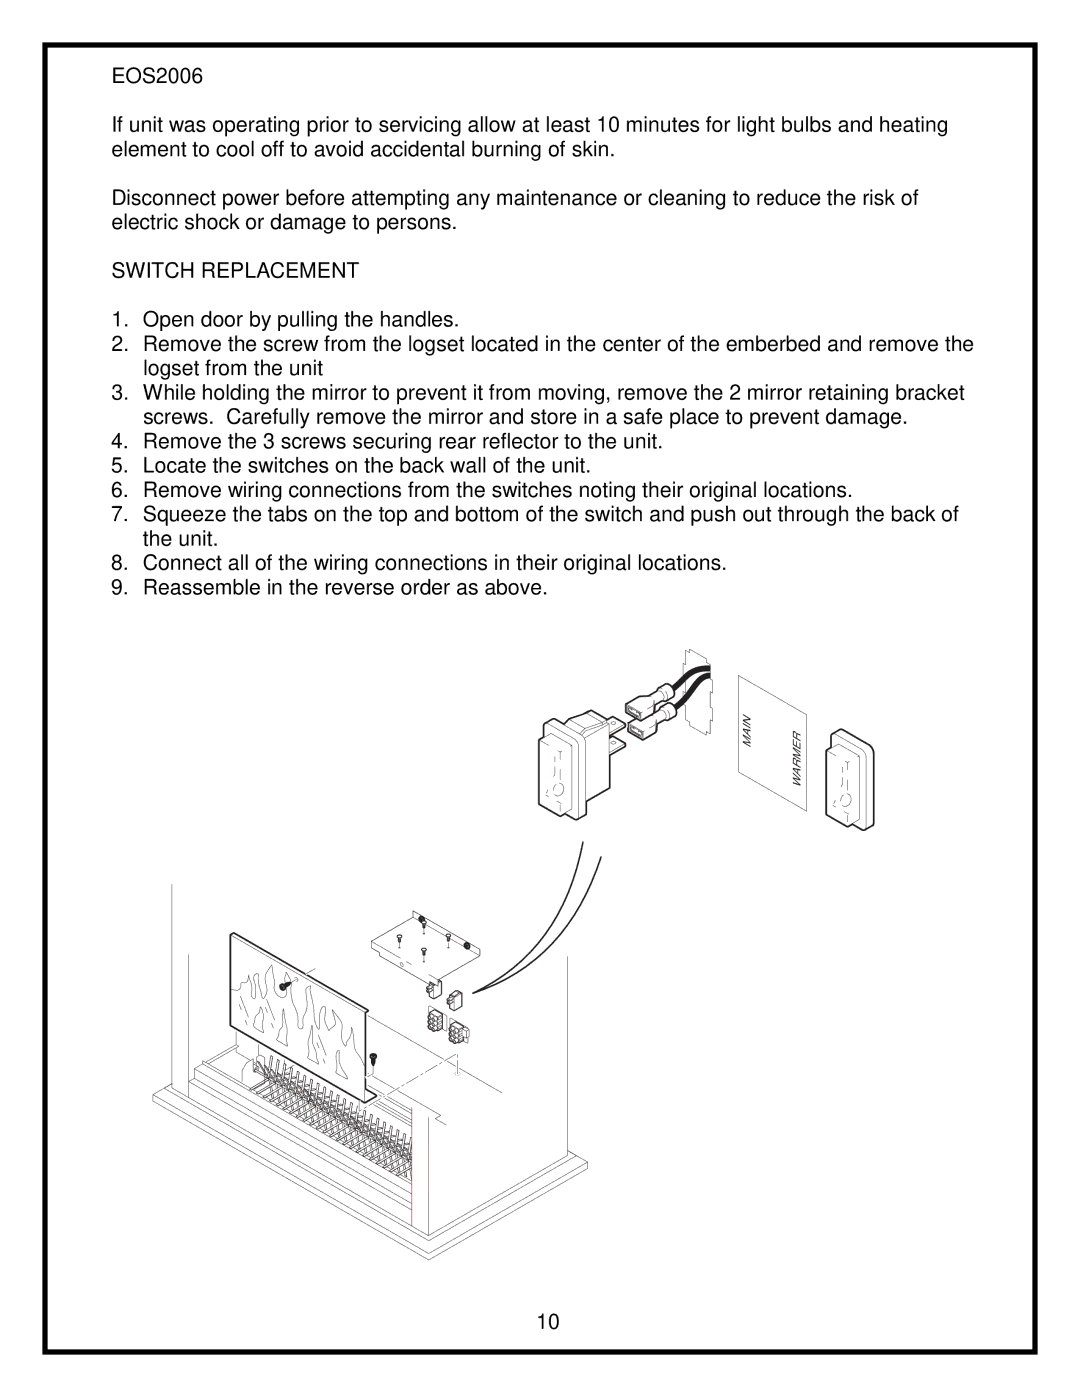
EOS2006 specifications
The Dimplex EOS2006 is a cutting-edge electric heater designed for modern living spaces, renowned for its blend of efficiency, style, and innovative technology. This versatile heating solution is engineered to provide comfortable warmth while seamlessly integrating into a variety of home aesthetics.One of the standout features of the EOS2006 is its impressive heating capacity, making it suitable for a range of room sizes. With a powerful output of 2000W, it ensures rapid and even heat distribution, effectively warding off the chill in larger areas. The unit is equipped with an advanced convection heating system, allowing it to warm the air quickly while maintaining consistent comfort levels.
The EOS2006 also showcases Dimplex's commitment to energy efficiency. It is designed with a programmable timer and thermostat, allowing users to set specific heating schedules tailored to their daily routines. This functionality not only enhances convenience but also significantly reduces energy consumption, resulting in lower utility bills over time.
Smart technology takes center stage with the EOS2006, as it features Wi-Fi connectivity and compatibility with smart home systems. Users can control their heating remotely via a dedicated app on their smartphones, making it possible to adjust settings even when away from home. This integration with smart home technology empowers users to maintain optimal comfort with minimal effort.
Safety is a paramount consideration in the design of the EOS2006. It is equipped with multiple safety features, including overheat protection and a tip-over switch, ensuring peace of mind while in use. These safety mechanisms are particularly crucial in homes with pets or children, enhancing the unit's overall reliability.
In terms of aesthetics, the Dimplex EOS2006 boasts a sleek and modern design, available in various finishes to complement any interior décor. Its minimal footprint allows for flexible placement in various locations, whether it be mounted on a wall or positioned free-standing in a room.
Overall, the Dimplex EOS2006 stands out as a versatile and efficient heating solution. With its combination of innovative technologies, user-friendly features, safety considerations, and stylish design, it is an ideal choice for those seeking to enhance their indoor comfort while being mindful of energy consumption. As homes continue to evolve, the EOS2006 exemplifies the future of electric heating in residential spaces.