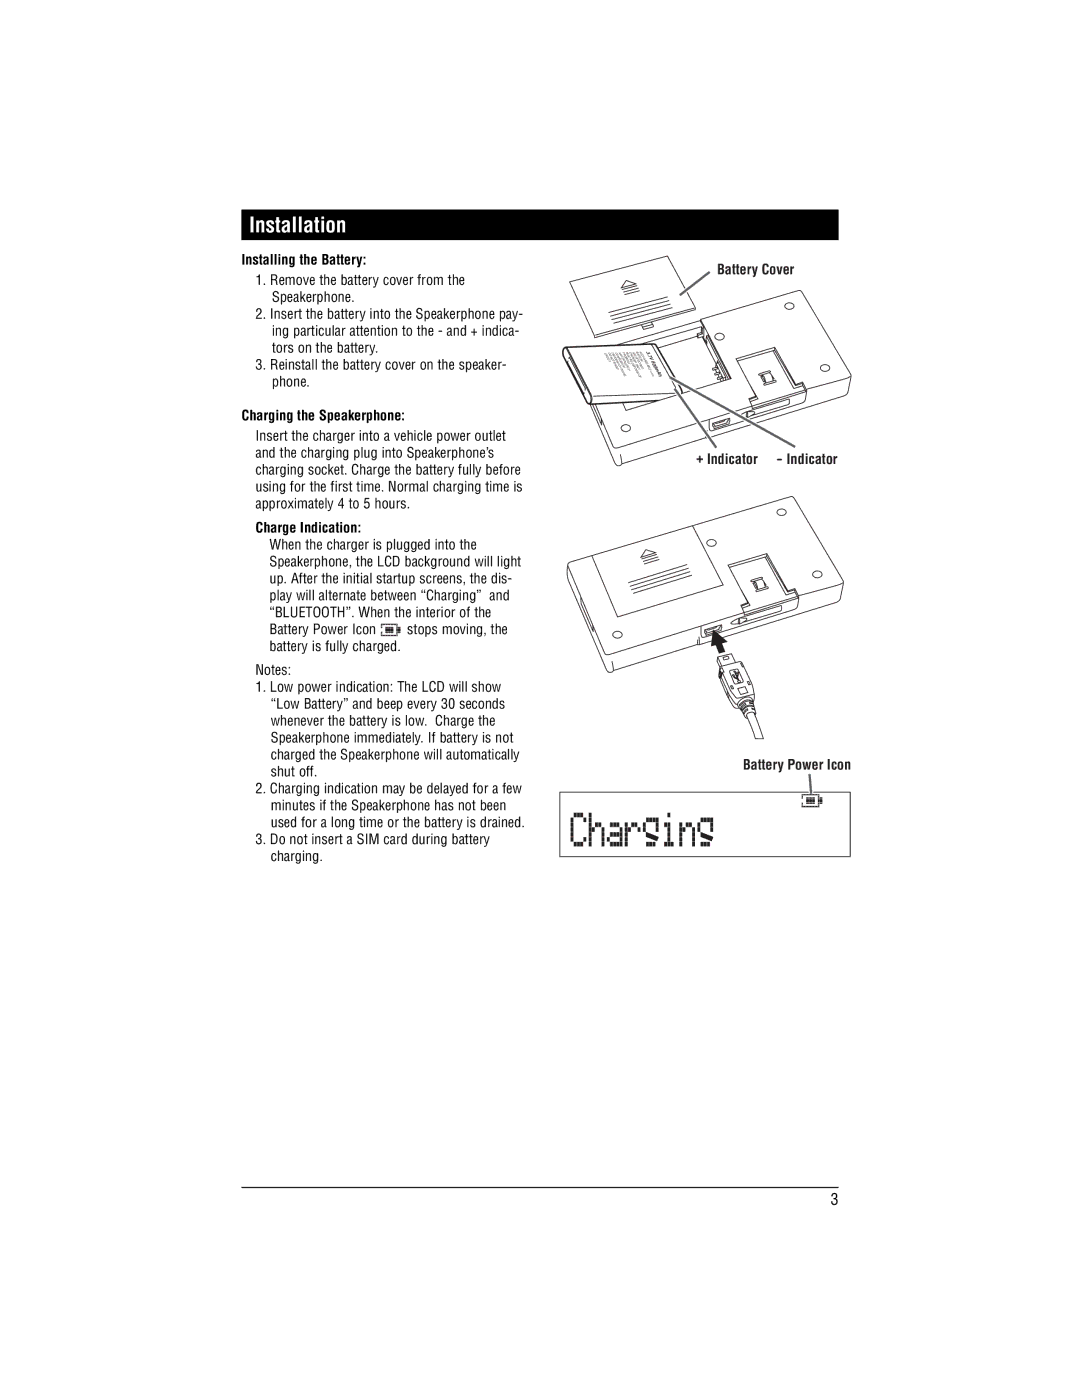
Installation
Installing the Battery:
1.Remove the battery cover from the Speakerphone.
2.Insert the battery into the Speakerphone pay- ing particular attention to the - and + indica- tors on the battery.
3.Reinstall the battery cover on the speaker- phone.
Charging the Speakerphone:
Insert the charger into a vehicle power outlet and the charging plug into Speakerphone’s charging socket. Charge the battery fully before using for the first time. Normal charging time is approximately 4 to 5 hours.
Charge Indication:
When the charger is plugged into the Speakerphone, the LCD background will light up. After the initial startup screens, the dis- play will alternate between “Charging” and “BLUETOOTH”. When the interior of the
Battery Power Icon ![]()
![]()
![]()
![]()
![]()
![]()
![]() stops moving, the battery is fully charged.
stops moving, the battery is fully charged.
Notes:
1.Low power indication: The LCD will show “Low Battery” and beep every 30 seconds whenever the battery is low. Charge the Speakerphone immediately. If battery is not charged the Speakerphone will automatically shut off.
2.Charging indication may be delayed for a few minutes if the Speakerphone has not been used for a long time or the battery is drained.
3.Do not insert a SIM card during battery charging.
Battery Cover
D DI M PRMUSCHU BA RE | 3 |
| ||
CIRCO DAMAY O | ASE TTCH . |
| ||
SPO | P T R S E | 7V |
| |
UITNOT SEAGEXP ERBEGEPE R AR |
| |||
SH DED L LY.DIR CIY. GE |
| |||
O OOROD | S ONFI | A800m | ||
R F | EI | PO LED | BL |
|
F | SEY. | ELi |
| |
F | D | - | A | |
IR | i | |||
o | h | |||
| E. | OF | n | |
+ Indicator - Indicator
Battery Power Icon
3