Wall Control Installation
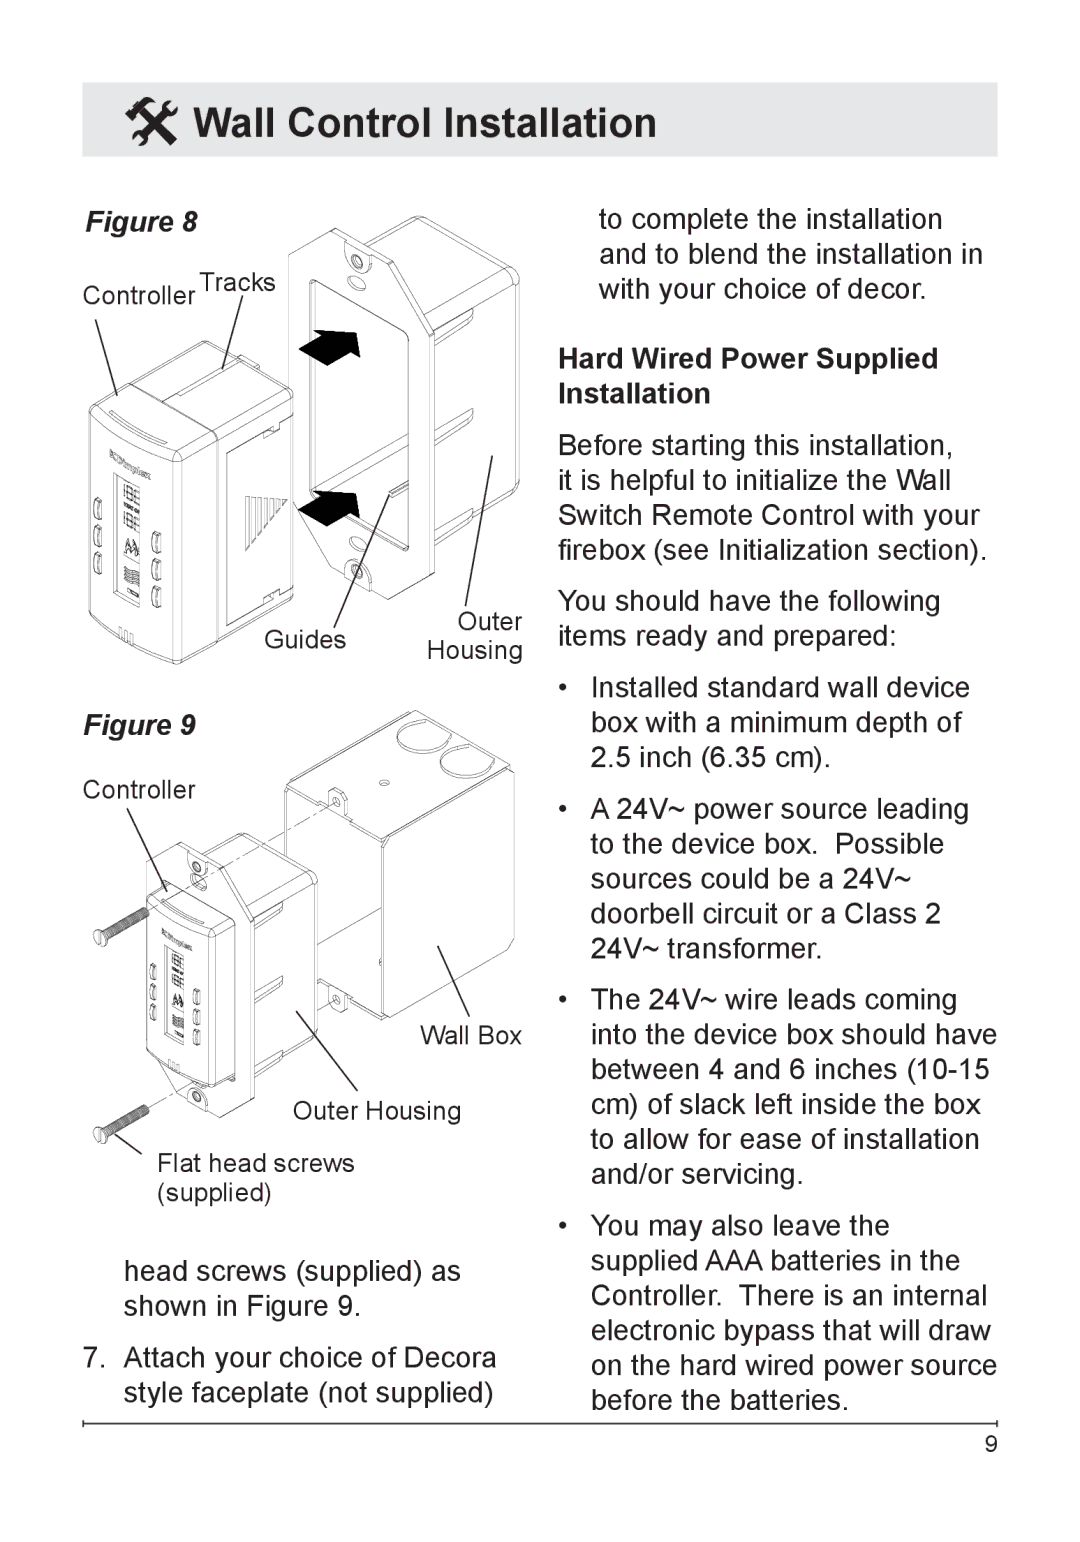
Figure 8
Controller Tracks
Outer
Guides Housing
to complete the installation and to blend the installation in with your choice of decor.
Hard Wired Power Supplied Installation
Before starting this installation, it is helpful to initialize the Wall Switch Remote Control with your firebox (see Initialization section).
You should have the following items ready and prepared:
Figure 9
Controller
Wall Box
Outer Housing
Flat head screws (supplied)
head screws (supplied) as shown in Figure 9.
7.Attach your choice of Decora style faceplate (not supplied)
•Installed standard wall device box with a minimum depth of 2.5 inch (6.35 cm).
•A 24V~ power source leading to the device box. Possible sources could be a 24V~ doorbell circuit or a Class 2 24V~ transformer.
•The 24V~ wire leads coming into the device box should have between 4 and 6 inches
•You may also leave the supplied AAA batteries in the Controller. There is an internal electronic bypass that will draw on the hard wired power source before the batteries.
9