REMOVING THE UNIT
1
2
3![]()
1.Trim ring.
2.Remove the trim ring by first detaching the face plate. Then using your fingers, press up and down at the top and bottom of the trim ring and pull out.
3.Insert the removal keys into the slots at either side of the unit until they click. Gently pull the unit sliding it out of the mount.
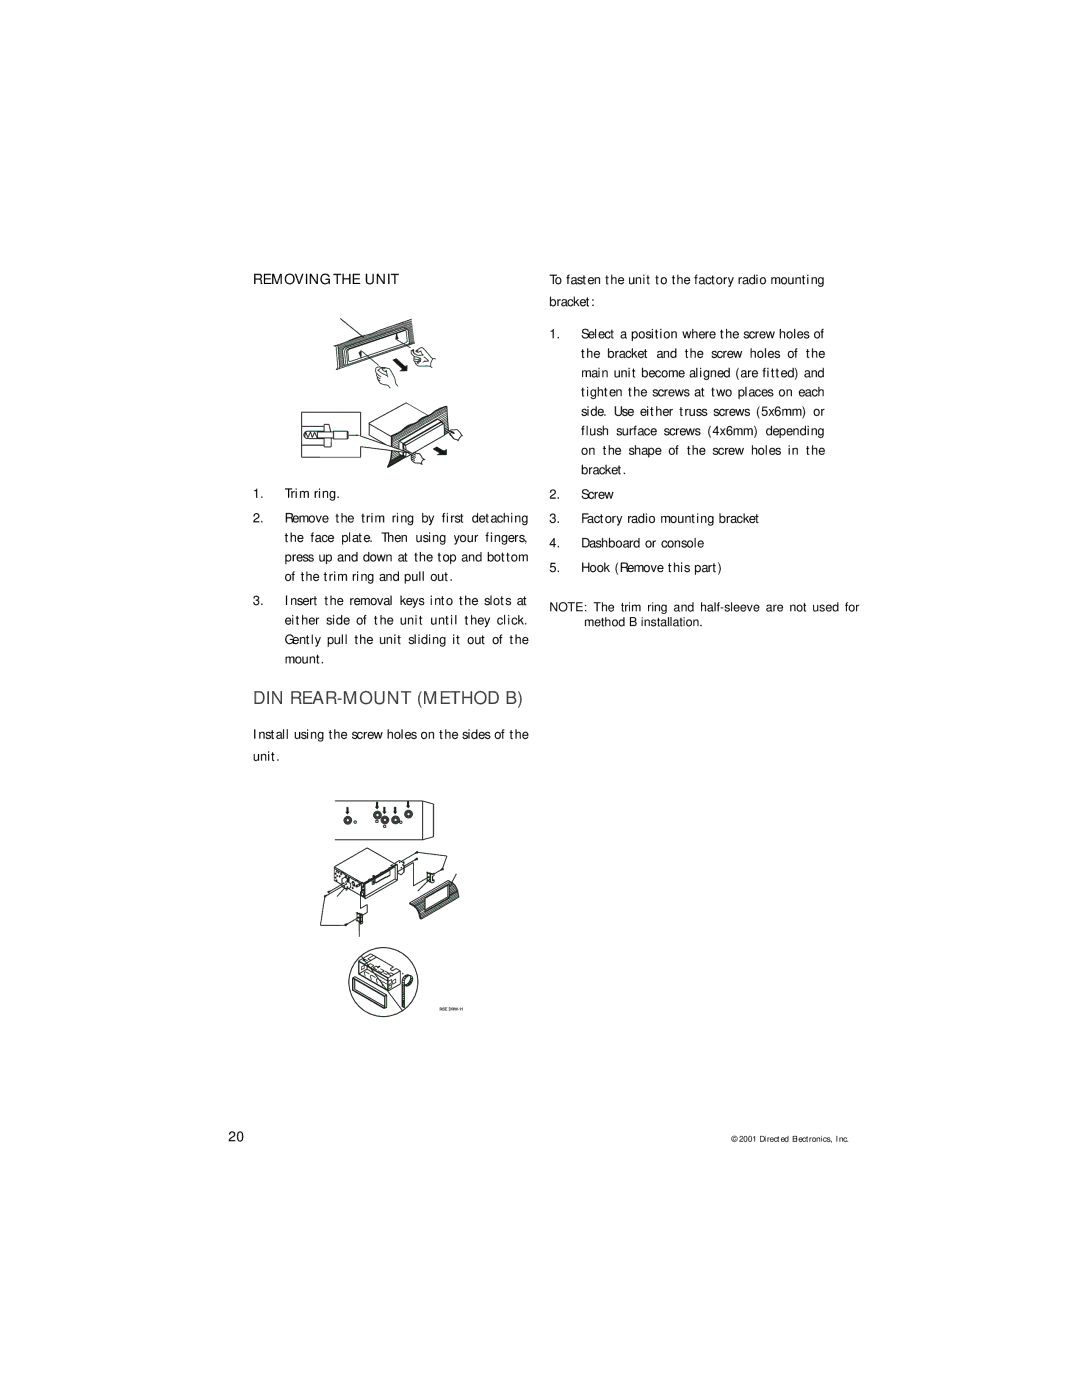
DIN REAR-MOUNT (METHOD B)
Install using the screw holes on the sides of the
unit.
1
2
4
35
2
5
To fasten the unit to the factory radio mounting bracket:
1.Select a position where the screw holes of the bracket and the screw holes of the main unit become aligned (are fitted) and tighten the screws at two places on each side. Use either truss screws (5x6mm) or flush surface screws (4x6mm) depending on the shape of the screw holes in the bracket.
2.Screw
3.Factory radio mounting bracket
4.Dashboard or console
5.Hook (Remove this part)
NOTE: The trim ring and
20 | © 2001 Directed Electronics, Inc. |