Chapter 2
Receiver Description and Installation
3.On Remote Control 1, press
4.Select Check Switch. When an attention screen displays, select Retest.
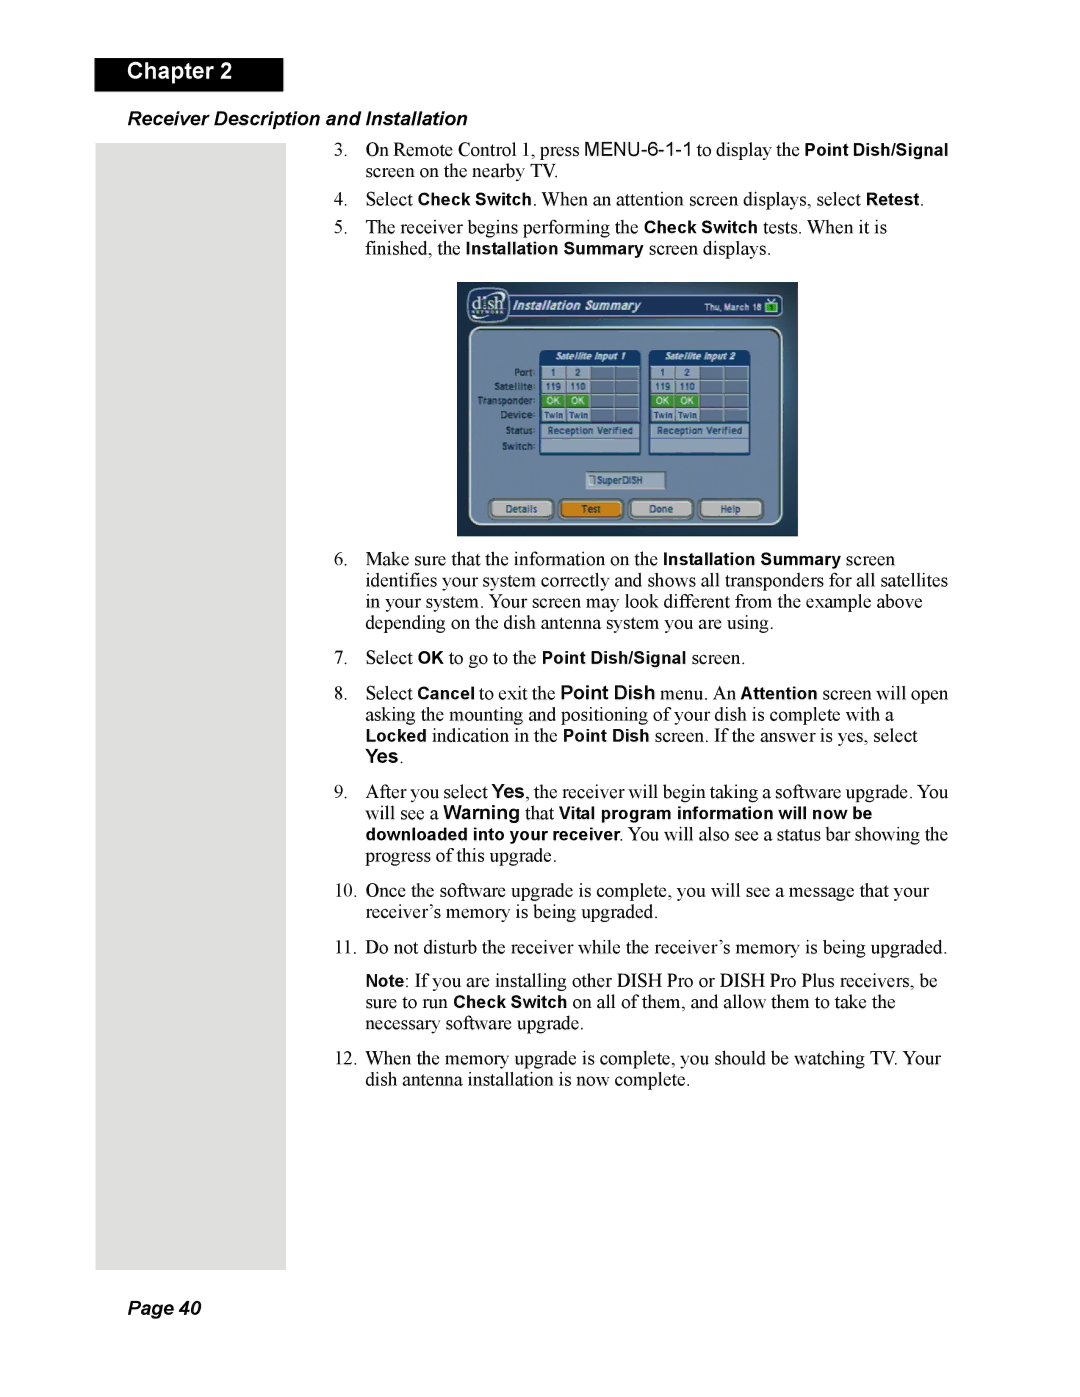
5.The receiver begins performing the Check Switch tests. When it is finished, the Installation Summary screen displays.
6.Make sure that the information on the Installation Summary screen identifies your system correctly and shows all transponders for all satellites in your system. Your screen may look different from the example above depending on the dish antenna system you are using.
7.Select OK to go to the Point Dish/Signal screen.
8.Select Cancel to exit the Point Dish menu. An Attention screen will open asking the mounting and positioning of your dish is complete with a Locked indication in the Point Dish screen. If the answer is yes, select
Yes.
9.After you select Yes, the receiver will begin taking a software upgrade. You will see a Warning that Vital program information will now be downloaded into your receiver. You will also see a status bar showing the progress of this upgrade.
10.Once the software upgrade is complete, you will see a message that your receiver’s memory is being upgraded.
11.Do not disturb the receiver while the receiver’s memory is being upgraded.
Note: If you are installing other DISH Pro or DISH Pro Plus receivers, be sure to run Check Switch on all of them, and allow them to take the necessary software upgrade.
12.When the memory upgrade is complete, you should be watching TV. Your dish antenna installation is now complete.
Page 40