1.Slide the STANDBY / ON switch on the right side of unit to the ON position.
2.Slide the AV IN / DVD switch on the left side of unit to select DVD mode.
3.Push the OPEN switch to open the disc door.
4.Hold the disc by its sides and carefully place it onto the central spindle in the disc compartment, with the label side facing up; press the disc down until you hear a “click”.
5.Push the door to close.
It takes a short while for your unit to load the disc. After loading, the unit will automatically start playing most DVDs.
6.If the unit does not automatically start playing the DVD, press the  PLAY button.
Pausing Playback (Still Mode)
1/3 ENG | D 6 | 2/3 ESP | OFF | | TT 1/21 CH 11/29 | T -01:00:28 |
Locating a Specific Title | DVD |
|
If a DVD contains title numbers, you can locate a specific title by directly selecting its title number.
1.In stop mode, press the GOTO button.
2.Press the  or
or  button to highlight a specific field and press the corresponding number button(s) for the title you want.
3.Press the ENTER button to confirm.The unit
will start playback about 3 seconds later. | TT 00/21 CH 029/029 | 00:00:00 |
1.Press the SETUP button in stop mode.
2.Use the  button to select LANGUAGE SETUP, then press the
 or
or  button repeatedly until VIDEO SETUP appears.
3.Use the  or
or  button to select the option (BRIGHTNESS or CONTRAST), then press the
  button. Use the
  or
or  button to make adjustments, then press the ENTER button. (The screen will change to your selected setting.)
4.Repeat steps 2 and 3 above to adjust other options.
5.To exit the SETUP MENU and return to the normal screen, press the RETURN or SETUP button.
VIDEO SETUP BRIGHTNESS CONTRAST
EXIT SETUP
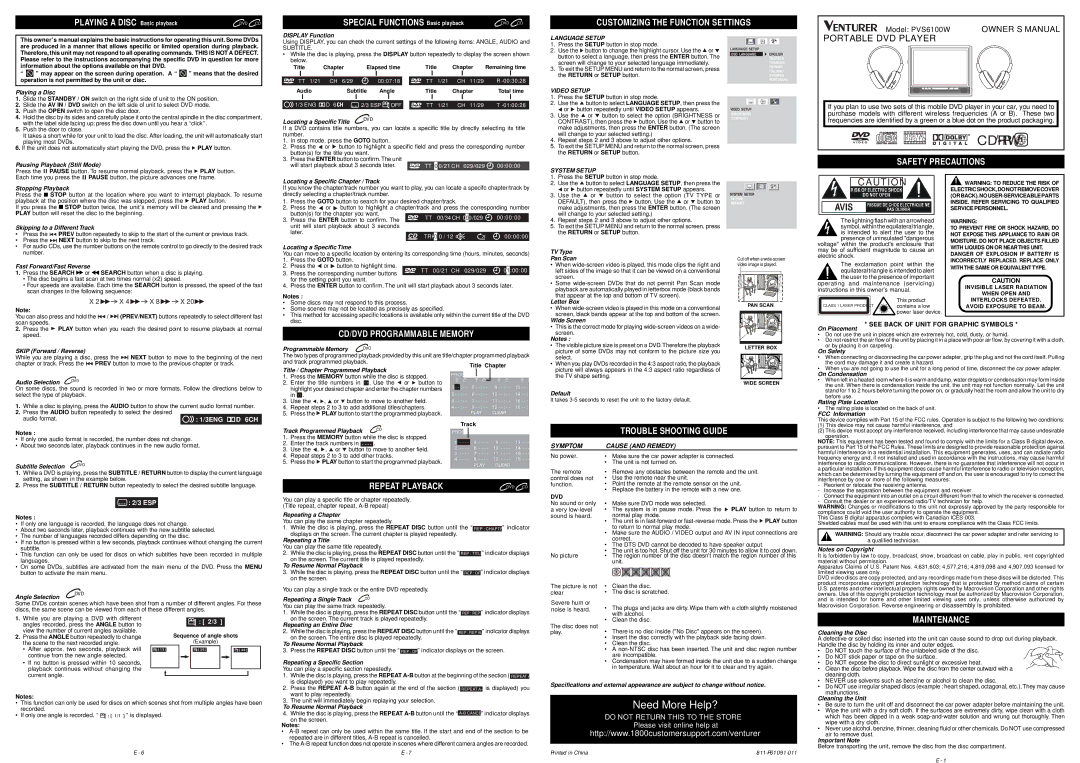
If you plan to use two sets of this mobile DVD player in your car, you need to purchase models with different wireless frequencies (A or B). These two frequencies are identified by a green or a blue dot on the product packaging.
D I G I TA L | | | R | CD-R/RW |
| | | |
P H O T O | | | | |
| | | | |
| | | | |
SAFETY PRECAUTIONS
Locating a Specific Chapter / Track
If you know the chapter/track number you want to play, you can locate a specifc chapter/track by directly selecting a chapter/track number.
1.Press the GOTO button to search for your desired chapter/track.
2.Press the  or
or  button to highlight a chapter/track and press the corresponding number button(s) for the chapter you want.
TT00/34 CH 000/029 00:00:003. Press the ENTER button to confirm. The
unit will start playback about 3 seconds later.
X 

 00:00:00
Locating a Specific Time
You can move to a specific location by entering its corresponding time (hours, minutes, seconds)
| 1. | Press the GOTO button. | | | | |
| 2. | Press the or button to highlight time. | | | | |
| TT 00/21 CH 029/029 | 0 | 1 | :00:00 |
| 3. | Press the corresponding number buttons |
| | for the setting point you want. | | | | |
| 4. | Press the ENTER button to confirm. The unit will start playback about 3 seconds later. |
Notes :
• | Some discs may not respond to this process. |
• | Some scenes may not be located as precisely as specified. |
SYSTEM SETUP
1.Press the SETUP button in stop mode.
2.Use the  button to select LANGUAGE SETUP, then press the
 or
or  button repeatedly until SYSTEM SETUP appears.
3.Use the  or
or  button to select the option (TV TYPE or DEFAULT), then press the
  button. Use the
  or
or  button to make adjustments, then press the ENTER button. (The screen will change to your selected setting.)
4.Repeat steps 2 and 3 above to adjust other options.
5.To exit the SETUP MENU and return to the normal screen, press the RETURN or SETUP button.
TV Type
Pan Scan
•When wide-screen video is played, this mode clips the right and left sides of the image so that it can be viewed on a conventional screen.
•Some wide-screen DVDs that do not permit Pan Scan mode playback are automatically played in letterbox mode (black bands that appear at the top and bottom of TV screen).
Letter Box
• When wide-screen video is played in this mode on a conventional |
screen, black bands appear at the top and bottom of the screen. |
Cut off when a wide-screen video image is played.
PAN SCAN
The lightning flash with an arrowhead symbol, within the equilateral triangle, is intended to alert the user to the presence of uninsulated "dangerous
voltage" within the product's enclosure that may be of sufficient magnitude to cause an electric shock.
The exclamation point within the equilateral triangle is intended to alert the user to the presence of important
operating and maintenance (servicing) instructions in this owner’s manual.
| This product |
|
CLASS 1 LASER PRODUCT | contains a low |
| power laser device. |
|
 WARNING: TO REDUCE THE RISK OF ELECTRICSHOCK,DONOTREMOVECOVER (ORBACK).NOUSER-SERVICEABLEPARTS INSIDE. REFER SERVICING TO QUALIFIED SERVICE PERSONNEL.
WARNING:
TO PREVENT FIRE OR SHOCK HAZARD, DO NOT EXPOSE THIS APPLIANCE TO RAIN OR MOISTURE. DO NOT PLACE OBJECTS FILLED WITH LIQUIDS ON OR NEAR THIS UNIT.
DANGER OF EXPLOSION IF BATTERY IS INCORRECTLY REPLACED. REPLACE ONLY WITHTHE SAME OR EQUIVALENT TYPE.
CAUTION
INVISIBLE LASER RADIATION
WHEN OPEN AND
INTERLOCKS DEFEATED.
AVOID EXPOSURE TO BEAM.
• This method for accessing specific locations is available only within the current title of the DVD |
disc. |
CD/DVD PROGRAMMABLE MEMORY
Programmable Memory  DVD
DVD
The two types of programmed playback provided by this unit are title/chapter programmed playback and track programmed playback.
Wide Screen
•This is the correct mode for playing wide-screen videos on a wide- screen.
Notes :
• | The visible picture size is preset on a DVD.Therefore the playback |
| picture of some DVDs may not conform to the picture size you |
| select. |
• | When you play DVDs recorded in the 4:3 aspect ratio, the playback |
* SEE BACK OF UNIT FOR GRAPHIC SYMBOLS *
On Placement
•Do not use the unit in places which are extremely hot, cold, dusty, or humid.
•Do not restrict the air flow of the unit by placing it in a place with poor air flow, by covering it with a cloth, or by placing it on carpeting.
On Safety
• When connecting or disconnecting the car power adapter, grip the plug and not the cord itself. Pulling |
the cord may damage it and create a hazard. |
On some discs, the sound is recorded in two or more formats. Follow the directions below to select the type of playback.
1.While a disc is playing, press the AUDIO button to show the current audio format number.
2.Press the AUDIO button repeatedly to select the desired
audio format. | : 1/3ENG D 6CH |
T C 13 - - : - - 14 - - : - - 15 - - : - - 16 - - : - -
picture will always appears in the 4:3 aspect ratio regardless of |
the TV shape setting. |
Default
It takes 3-5 seconds to reset the unit to the factory default.
• When you are not going to use the unit for a long period of time, disconnect the car power adapter. |
On Condensation |
• When left in a heated room where it is warm and damp, water droplets or condensation may form inside |
the unit. When there is condensation inside the unit, the unit may not function normally. Let the unit |
stand for 1 to 2 hours before turning the power on, or gradually heat the room and allow the unit to dry |
before use. |
Rating Plate Location
• The rating plate is located on the back of unit. |
FCC Information |
This device complies with Part 15 of the FCC rules. Operation is subject to the following two conditions: |
(1) This device may not cause harmful interference, and |
Notes :
•If only one audio format is recorded, the number does not change.
•About two seconds later, playback continues in the new audio format.
Subtitle Selection  DVD
DVD
Track Programmed Playback | CD |
|
1.Press the MEMORY button while the disc is stopped.
2.Enter the track numbers in  .
.
3.Use the  ,
,  ,
,  or
or  button to move to another field.
4.Repeat steps 2 to 3 to add other tracks.
5.Press the  PLAY button to start the programmed playback.
PROG | | | |
1 | | 5 - - - | 9 - - - - | 13 |
|
- - - - |
2 | - - - - | -6 - - - | 10 - - - - | - - - -14 |
3 | - - - - | 7 - - - - | 11 - - - - | 15 - - - - |
4 | - - - - | 8 - - - - | 12 - - - - | 16 - - - - |
| | PLAY | CLEAR | |
| | TROUBLE SHOOTING GUIDE |
SYMPTOM | CAUSE (AND REMEDY) |
No power. | • | Make sure the car power adapter is connected. |
| • | The unit is not turned on. |
(2) This device must accept any interference received, including interference that may cause undesirable |
operation. |
NOTE: This equipment has been tested and found to comply with the limits for a Class B digital device, |
pursuant to Part 15 of the FCC Rules. These limits are designed to provide reasonable protection against |
harmful interference in a residential installation. This equipment generates, uses, and can radiate radio |
frequency energy and, if not installed and used in accordance with the instructions, may cause harmful |
interference to radio communications. However, there is no guarantee that interference will not occur in |
a particular installation. If this equipment does cause harmful interference to radio or television reception, |
2. Press the SUBTITLE / RETURN button repeatedly to select the desired subtitle language. |
 : 2/3 ESP
Notes :
•If only one language is recorded, the language does not change.
•About two seconds later, playback continues with the new subtitle selected.
•The number of languages recorded differs depending on the disc.
•If no button is pressed within a few seconds, playback continues without changing the current subtitle.
•This function can only be used for discs on which subtitles have been recorded in multiple languages.
•On some DVDs, subtitles are activated from the main menu of the DVD. Press the MENU button to activate the main menu.
You can play a specific title or chapter repeatedly. (Title repeat, chapter repeat, A-B repeat)
Repeating a Chapter
You can play the same chapter repeatedly.
1.While the disc is playing, press the REPEAT DISC button until the “ REP : CHAPTER ” indicator displays on the screen. The current chapter is played repeatedly.
Repeating a Title
You can play the same title repeatedly.
2.While the disc is playing, press the REPEAT DISC button until the “ REP : TITLE ” indicator displays on the screen. The current title is played repeatedly.
To Resume Normal Playback
3.While the disc is playing, press the REPEAT DISC button until the “ REP : OFF ” indicator displays on the screen.
You can play a single track or the entire DVD repeatedly.
function.
DVD
No sound or only
avery low-level sound is heard.
No picture
The picture is not
• Point the remote at the remote sensor on the unit. |
• Replace the battery in the remote with a new one. |
• Make sure DVD mode was selected. |
• | The system is in pause mode. Press the PLAY button to return to |
| normal play mode. |
• | The unit is in fast-forward or fast-reverse mode. Press the PLAY button |
| to return to normal play mode. |
• Make sure the AUDIO / VIDEO output and AV IN input connections are |
| correct. |
• The DTS DVD cannot be decoded to have speaker output. |
• The unit is too hot. Shut off the unit for 30 minutes to allow it to cool down. |
• The region number of the disc doesn't match the region number of this |
| unit. |
• | Clean the disc. |
• The disc is scratched. |
- Reorient or relocate the receiving antenna. |
- Increase the separation between the equipment and receiver. |
- Connect the equipment into an outlet on a circuit different from that to which the receiver is connected. |
- Consult the dealer or an experienced radio/TV technician for help. |
WARNING: Changes or modifications to this unit not expressly approved by the party responsible for |
compliance could void the user authority to operate the equipment. |
This Class B digital apparatus complies with Canadian ICES-003. |
Shielded cables must be used with this unit to ensure compliance with the Class FCC limits. |
WARNING: Should any trouble occur, disconnect the car power adapter and refer servicing to a qualified technician.
Notes on Copyright
It is forbidden by law to copy, broadcast, show, broadcast on cable, play in public, rent copyrighted material without permission.
Apparatus Claims of U.S. Patent Nos. 4,631,603; 4,577,216; 4,819,098 and 4,907,093 licensed for limited viewing uses only.
DVD video discs are copy protected, and any recordings made from these discs will be distorted. This product incorporates copyright protection technology that is protected by method claims of certain U.S. patents and other intellectual property rights owned by Macrovision Corporation and other rights
Some DVDs contain scenes which have been shot from a number of different angles. For these discs, the same scene can be viewed from each of these different angles.
1. | While you are playing a DVD with different | | | | | | | | |
| | | | : [ 2/3 | ] | |
| angles recorded, press the ANGLE button to | | | | | |
| view the number of current angles available. | | | Sequence of angle shots |
2. | Press the ANGLE button repeatedly to change | | |
| the scene to the next recorded angle. | | | | | | (Example) | | |
| • After approx. two seconds, playback will | | | |
| | :[ 1/3 ] | :[ 2/3 ] | :[ 3/3 ] |
| continue from the new angle selected. | | | | | | | | |
• If no button is pressed within 10 seconds, playback continues without changing the current angle.
You can play the same track repeatedly.
1.While the disc is playing, press the REPEAT DISC button until the “ REP : REP 1 ” indicator displays on the screen. The current track is played repeatedly.
Repeating an Entire Disc
2.While the disc is playing, press the REPEAT DISC button until the “ REP : REP ALL ” indicator displays on the screen. The entire disc is played repeatedly.
To Resume Normal Playback
3. Press the REPEAT DISC button until the “ REP : OFF ” indicator displays on the screen.
Repeating a Specific Section
You can play a specific section repeatedly.
1. While the disc is playing, press the REPEAT A-Bbutton at the beginning of the section ( REPEAT A- |
is displayed) you want to play repeatedly. |
Severe hum or noise is heard.
The disc does not play.
• The plugs and jacks are dirty. Wipe them with a cloth slightly moistened |
| with alcohol. |
• | Clean the disc. |
• There is no disc inside ("No Disc" appears on the screen). |
• Insert the disc correctly with the playback side facing down. |
• | Clean the disc. |
• A non-NTSC disc has been inserted. The unit and disc region number |
| are incompatible. |
• Condensation may have formed inside the unit due to a sudden change |
| in temperature. Wait about an hour for it to clear and try again. |
Macrovision Corporation. Reverse engineering or disassembly is prohibited.
MAINTENANCE
Cleaning the Disc
A defective or soiled disc inserted into the unit can cause sound to drop out during playback. Handle the disc by holding its inner and outer edges.
• Do NOT touch the surface of the unlabeled side of the disc.
• Do NOT stick paper or tape on the surface.
• Do NOT expose the disc to direct sunlight or excessive heat.
• | Clean the disc before playback. Wipe the disc from the center outward with a |
| cleaning cloth. |
• | NEVER use solvents such as benzine or alcohol to clean the disc. |
Notes:
•This function can only be used for discs on which scenes shot from multiple angles have been recorded.
•If only one angle is recorded, “  : [ 1/1 ] ” is displayed.
E - 6
2. Press the REPEAT A-Bbutton again at the end of the section ( REPEAT A-B is displayed) you want to play repeatedly.
3.The unit will immediately begin replaying your selection.
To Resume Normal Playback
4.While the disc is playing, press the REPEAT A-Bbutton until the “ A-B CANCEL ” indicator displays
on the screen.
Notes:
•A-B repeat can only be used within the same title. If the start and end of the section to be repeated are in different titles, A-B repeat is cancelled.
•The A-B repeat function does not operate in scenes where different camera angles are recorded.
E - 7
Specifications and external appearance are subject to change without notice.
Need More Help?
DO NOT RETURN THIS TO THE STORE
Please visit online help at
http://www.1800customersupport.com/venturer
Printed in China | 811-P61091-011 |
• Do NOT use irregular shaped discs (example : heart shaped, octagonal, etc.).They may cause |
malfunctions.
Cleaning the Unit
•Be sure to turn the unit off and disconnect the car power adapter before maintaining the unit.
•Wipe the unit with a dry soft cloth. If the surfaces are extremely dirty, wipe clean with a cloth which has been dipped in a weak soap-and-water solution and wrung out thoroughly. Then wipe with a dry cloth.
•Never use alcohol, benzine, thinner, cleaning fluid or other chemicals. Do NOT use compressed
air to remove dust.
Important Note
Before transporting the unit, remove the disc from the disc compartment.