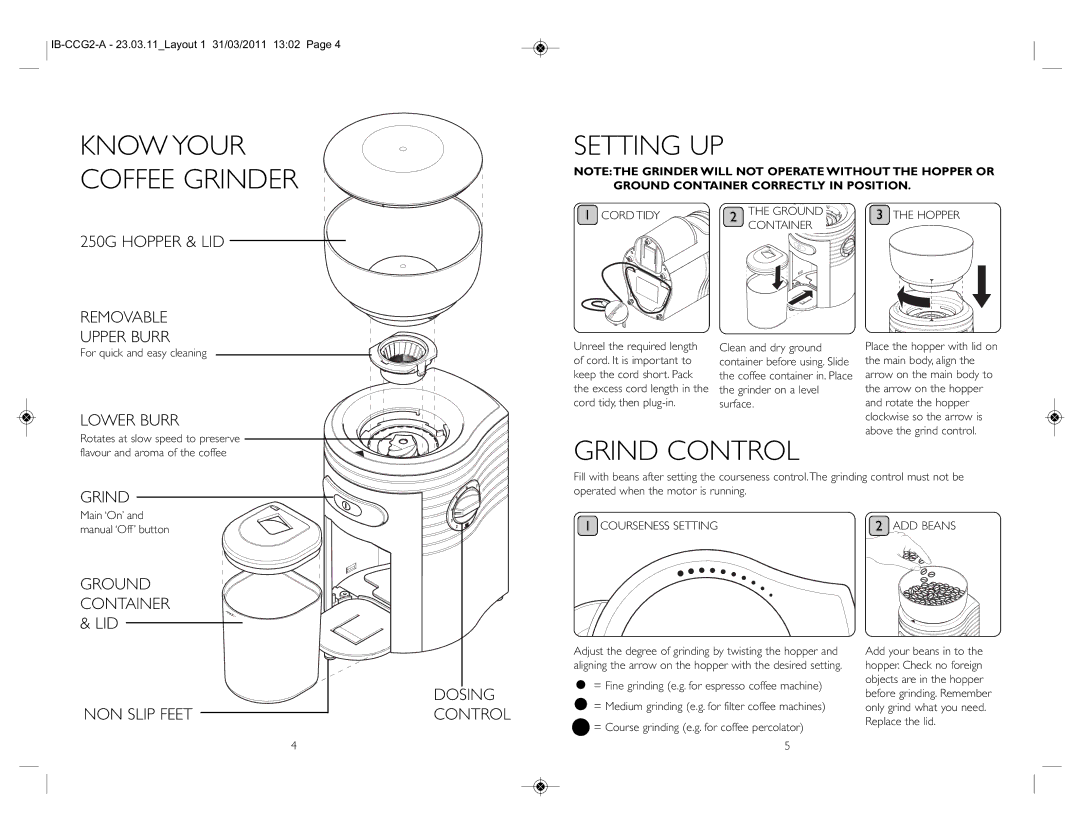
IB-CCG2-A specifications
The Dualit IB-CCG2-A is a remarkable addition to kitchen appliances, designed for those who appreciate the art of coffee-making. This innovative machine combines elegance with advanced technology, making it a sought-after tool for coffee enthusiasts and everyday users alike.One of the standout features of the Dualit IB-CCG2-A is its ability to brew single-serve coffee while offering the option for different cup sizes. This flexibility allows users to enjoy a quick espresso shot or a full mug of coffee, catering to various tastes and preferences. The machine is designed to accommodate both coffee pods and ground coffee, providing users with the freedom to choose their favorite coffee type.
The brewing system utilizes a powerful yet efficient boiler that heats water to the ideal temperature for optimal extraction. This ensures that every cup of coffee produced has rich flavor and perfect aroma. Additionally, the machine boasts an energy-saving mode, which automatically switches off the unit after a period of inactivity, promoting sustainability and reducing energy consumption.
Another key feature of the Dualit IB-CCG2-A is its sleek stainless-steel body, which not only enhances its aesthetic appeal but also ensures durability and resistance to wear and tear. The intuitive control panel is user-friendly, allowing users to easily navigate through settings and customize their coffee experience.
Dualit's commitment to quality is evident in the craftsmanship of the IB-CCG2-A. The machine is built to last, with high-quality components that ensure reliability and performance over time. The removable water tank makes refilling and cleaning a breeze, ensuring that maintenance is minimal.
Incorporating advanced technology, the Dualit IB-CCG2-A also features a quick brew time, meaning users don’t have to wait long for their caffeine fix. The innovative extraction system maximizes flavor and ensures consistency in each cup.
Overall, the Dualit IB-CCG2-A stands out in the world of coffee makers with its blend of style, functionality, and advanced features. Whether you're a casual coffee drinker or a serious connoisseur, this machine delivers an exceptional brewing experience every time. Its thoughtful design and efficient operation make it a must-have for any modern kitchen.

