10
English
Adjusting the Image Size
qPositioning the projection display
Projection | 5 ft. | 6.5 ft. | 9.5 ft. | 13 ft. | 20 ft. | |
Distance | (1.5 m) | (2 m) | (3 m) | (4 m) | (6 m) | |
|
|
|
|
|
| |
Image Size | 40" | 60" | 80" | 110" | 160" | |
(1.01m) | (1.52m) | (2.03m) | (2.79m) | (4.06m) | ||
(diagonal) | ||||||
(min.) |
|
|
| (max.) | ||
|
|
|
| |||
|
|
|
|
|
|
(projection distance and image size)
qSlide the lens latch and pop up the projection lens. Switch on the power and press the “Power on/Standby” button. See “Powering On/Off the Projection Display” on page 9 for more information.
Power on/
Standby Buttons
Lens Latch
Power Switch
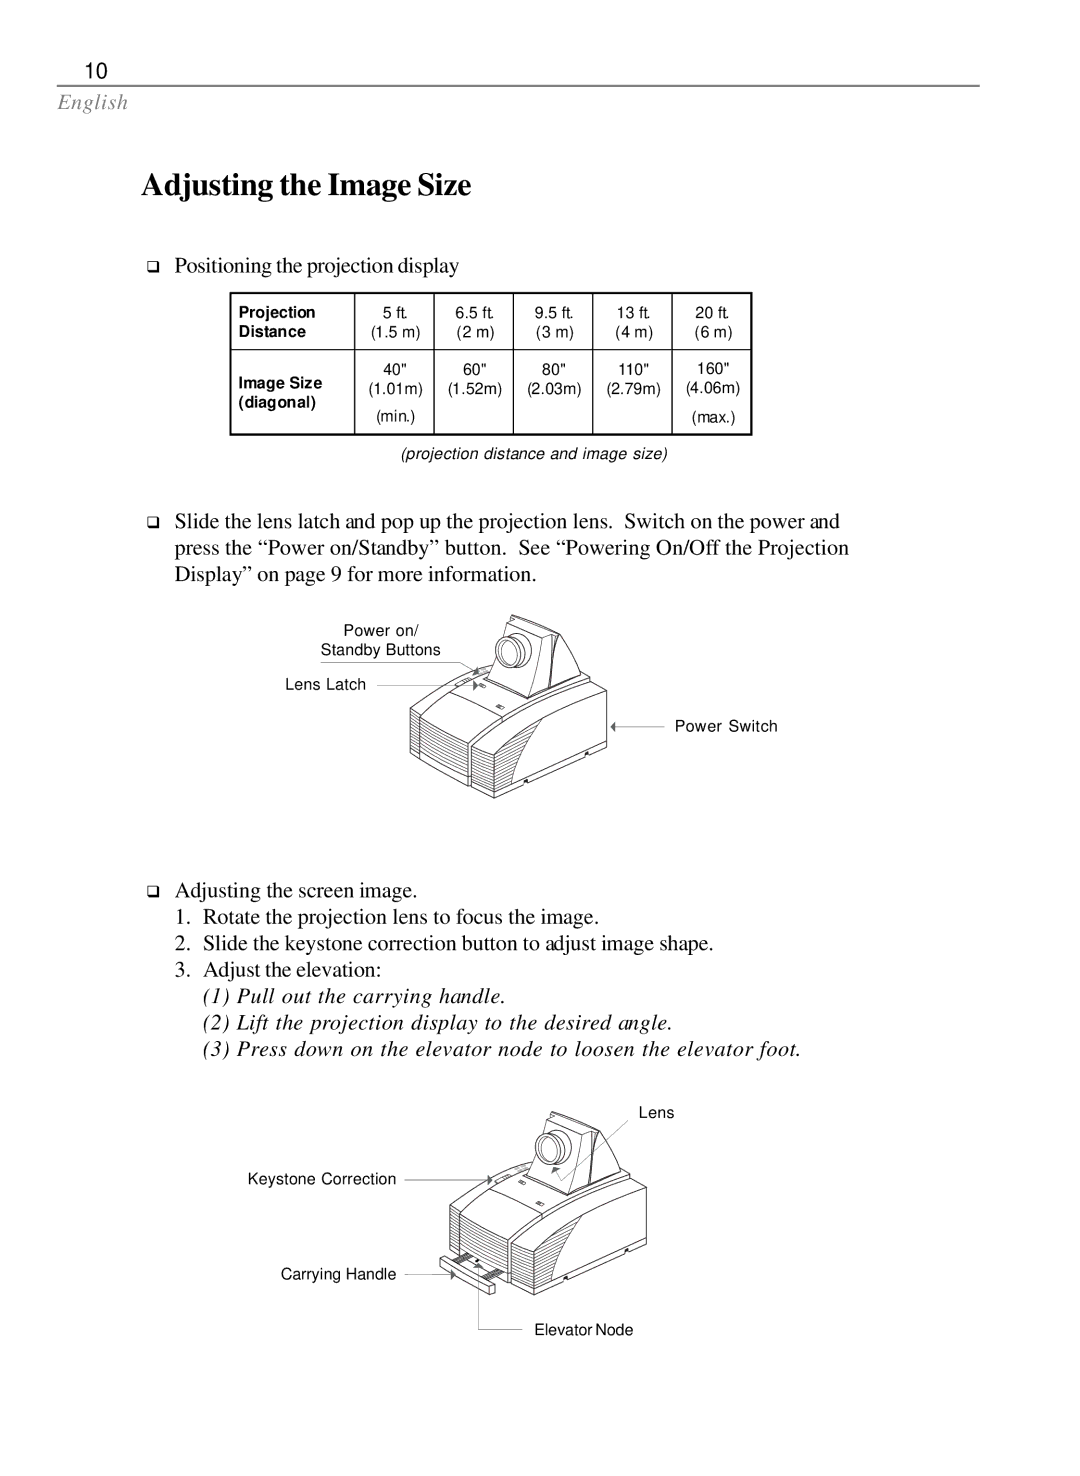
qAdjusting the screen image.
1.Rotate the projection lens to focus the image.
2.Slide the keystone correction button to adjust image shape.
3.Adjust the elevation:
(1)Pull out the carrying handle.
(2)Lift the projection display to the desired angle.
(3)Press down on the elevator node to loosen the elevator foot.
Lens
Keystone Correction
Carrying Handle
Elevator Node