PROGRAM NUMBER 4
ONCE DAILY WEEKLY
ONE TIME PROGRAM
PROGRAM NUMBER 4
DATE - - / - - START TIME - - : - - - -
END TIME - - : - - - -
CHANNEL - -
REC SPEED - -
ONE TIME PROGRAM
PROGRAM NUMBER 4
DATE 05 /12 MON START TIME - - : - - - -
END TIME - - : - - - -
CHANNEL - -
REC SPEED - -

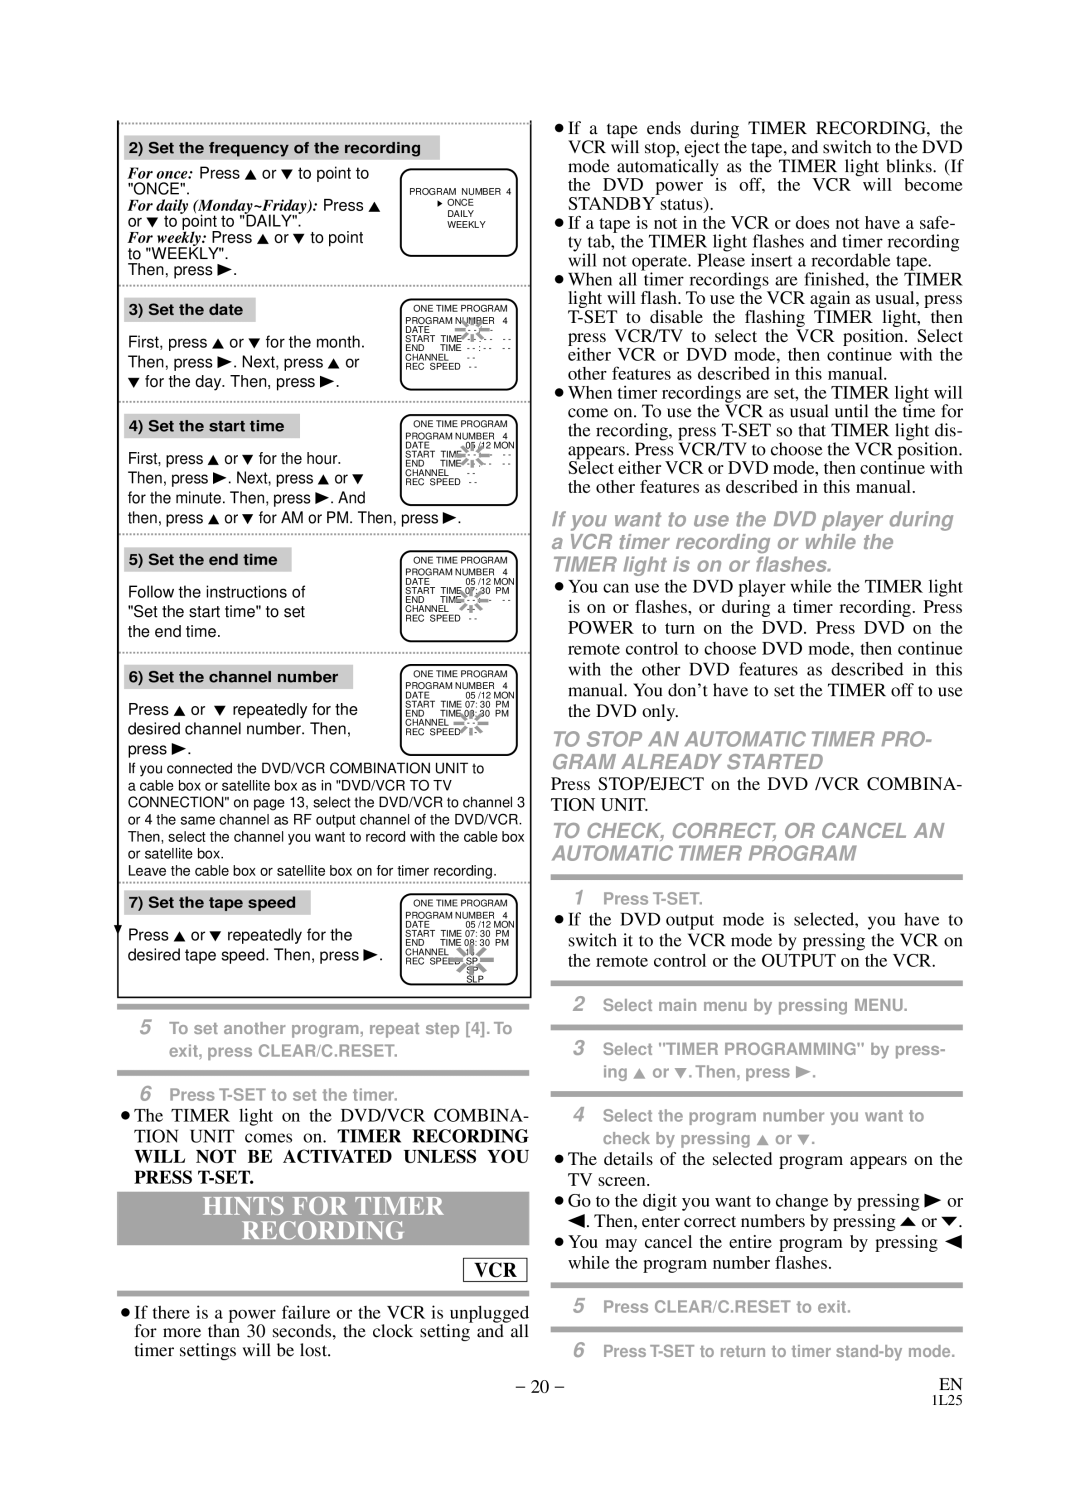
2) Set the frequency of the recording

For once: Press K or L to point to "ONCE".

For daily (Monday~Friday): Press K or L to point to "DAILY".

For weekly: Press K or L to point to "WEEKLY".

Then, press B.

3) Set the date

First, press K or L for the month.

Then, press B. Next, press K or

Lfor the day. Then, press B.

4) Set the start time

First, press K or L for the hour. Then, press B. Next, press K or L

for the minute. Then, press B. And

then, press K or L for AM or PM. Then, press B.

¡If a tape ends during TIMER RECORDING, the VCR will stop, eject the tape, and switch to the DVD mode automatically as the TIMER light blinks. (If the DVD power is off, the VCR will become STANDBY status).

¡If a tape is not in the VCR or does not have a safe- ty tab, the TIMER light flashes and timer recording will not operate. Please insert a recordable tape.

¡When all timer recordings are finished, the TIMER light will flash. To use the VCR again as usual, press T-SET to disable the flashing TIMER light, then press VCR/TV to select the VCR position. Select either VCR or DVD mode, then continue with the other features as described in this manual.

¡When timer recordings are set, the TIMER light will come on. To use the VCR as usual until the time for the recording, press T-SET so that TIMER light dis- appears. Press VCR/TV to choose the VCR position. Select either VCR or DVD mode, then continue with the other features as described in this manual.

If you want to use the DVD player during a VCR timer recording or while the

5) Set the end time

Follow the instructions of "Set the start time" to set the end time.

6) Set the channel number

Press K or L repeatedly for the desired channel number. Then, press B.

ONE TIME PROGRAM

PROGRAM NUMBER 4

DATE 05 /12 MON START TIME 07: 30 PM END TIME - - : - - - -

CHANNEL - -

REC SPEED - -

ONE TIME PROGRAM PROGRAM NUMBER 4

DATE

05 /12 MON

START TIME 07: 30 PM

END TIME 08: 30 PM

CHANNEL

- -

REC SPEED

- -

TIMER light is on or flashes.

¡You can use the DVD player while the TIMER light is on or flashes, or during a timer recording. Press POWER to turn on the DVD. Press DVD on the remote control to choose DVD mode, then continue with the other DVD features as described in this manual. You don’t have to set the TIMER off to use the DVD only.

TO STOP AN AUTOMATIC TIMER PRO- GRAM ALREADY STARTED

If you connected the DVD/VCR COMBINATION UNIT to a cable box or satellite box as in "DVD/VCR TO TV CONNECTION" on page 13, select the DVD/VCR to channel 3 or 4 the same channel as RF output channel of the DVD/VCR. Then, select the channel you want to record with the cable box or satellite box.

Leave the cable box or satellite box on for timer recording.

7) Set the tape speed


ONE TIME PROGRAM


PROGRAM NUMBER 4

Press K or L repeatedly for the

DATE

05 /12 MON

START TIME 07: 30 PM

desired tape speed. Then, press B.

END TIME 08: 30 PM

CHANNEL

16

REC SPEED SP

SP

SLP

Press STOP/EJECT on the DVD /VCR COMBINA-

TION UNIT.

TO CHECK, CORRECT, OR CANCEL AN AUTOMATIC TIMER PROGRAM

1Press T-SET.

¡If the DVD output mode is selected, you have to switch it to the VCR mode by pressing the VCR on the remote control or the OUTPUT on the VCR.

5To set another program, repeat step [4]. To exit, press CLEAR/C.RESET.

2Select main menu by pressing MENU.

3Select "TIMER PROGRAMMING" by press- ing K or L. Then, press B.

6 Press T-SET to set the timer.


4 Select the program number you want to

¡The TIMER light on the DVD/VCR COMBINA-


TION UNIT comes on. TIMER RECORDING


check by pressing K or L.

WILL NOT BE ACTIVATED UNLESS YOU

¡The details of the selected program appears on the

PRESS T-SET.


TV screen.

HINTS FOR TIMER


¡Go to the digit you want to change by pressing B or

RECORDING


s. Then, enter correct numbers by pressing oor p.


¡You may cancel the entire program by pressing s


while the program number flashes.


VCR


5 Press CLEAR/C.RESET to exit.

¡If there is a power failure or the VCR is unplugged


for more than 30 seconds, the clock setting and all


6 Press T-SET to return to timer stand-by mode.

timer settings will be lost.


– 20 –

EN

1L25

Page 20
Image 20
Durabrand DCD2203 owner manual Hints for Timer, Recording, Timer light is on or flashes

DCD2203 specifications

The Durabrand DCD2203 is a versatile and user-friendly portable CD player that stands out in the competitive world of portable audio devices. Designed for music lovers who appreciate mobility without sacrificing sound quality, the DCD2203 offers a range of features that make it an appealing choice.

One of the key features of the Durabrand DCD2203 is its compatibility with various CD formats, including standard CDs, CD-Rs, and CD-RWs. This means users can enjoy a wider selection of music, whether it's commercially produced albums or personal compilations. The device also integrates advanced anti-skip technology, ensuring uninterrupted playback even during movement. This feature is particularly valuable for individuals who wish to listen to music while exercising or on the go.

The DCD2203 is built with portability in mind. It is lightweight and compact, making it easy to carry in a bag or backpack. The device is powered by either standard batteries or an AC adapter, giving users the flexibility to choose their preferred power option based on their activities. The long battery life ensures that music playback can last for hours, making it suitable for extended trips or daily commutes.

In terms of user interface, the Durabrand DCD2203 is straightforward and intuitive. The large, easy-to-read display shows track information, and the simple control layout allows for quick access to play, pause, skip, and other functions. Additionally, the device features a headphone jack for personal listening, enabling users to connect their favorite headphones or earbuds for an enhanced audio experience.

The audio quality produced by the DCD2203 is commendable, with clear sound reproduction and a decent dynamic range. Although it is primarily designed for CD playback, it offers standard audio output, making it compatible with other sound systems via auxiliary connections.

In conclusion, the Durabrand DCD2203 is an excellent option for individuals seeking an affordable and reliable portable CD player. With its compatibility with various CD formats, anti-skip technology, lightweight design, and straightforward usability, it caters to a diverse audience of music enthusiasts. Whether for personal enjoyment at home or on the go, the DCD2203 promises to deliver quality music playback, making it a worthy addition to any audio collection.