3.Audio plug – The audio plug connects the headphone. Listen to music on the digital video
camera. At the same time, this can function as audio input/output plug. Note: if using the radio function, the headphones have to be plugged in to function as antenna to receive radio channels.
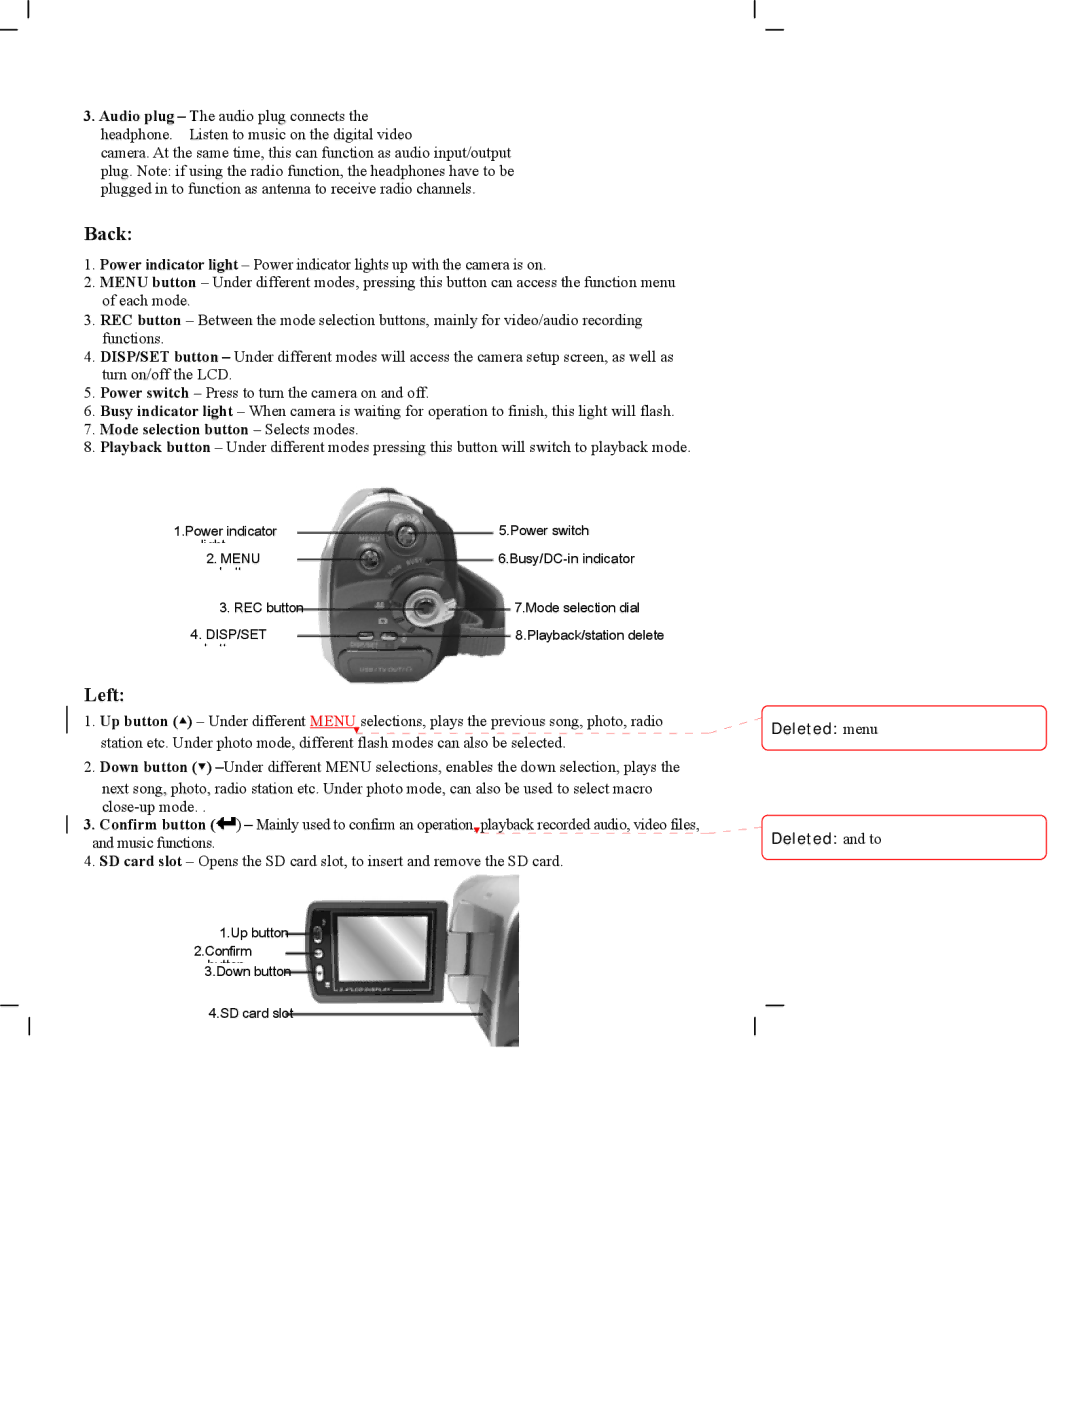
Back:
1.Power indicator light – Power indicator lights up with the camera is on.
2.MENU button – Under different modes, pressing this button can access the function menu of each mode.
3.REC button – Between the mode selection buttons, mainly for video/audio recording functions.
4.DISP/SET button – Under different modes will access the camera setup screen, as well as turn on/off the LCD.
5.Power switch – Press to turn the camera on and off.
6.Busy indicator light – When camera is waiting for operation to finish, this light will flash.
7.Mode selection button – Selects modes.
8.Playback button – Under different modes pressing this button will switch to playback mode.
1.Power indicator | 5.Power switch |
light |
|
2. MENU | |
button |
|
3. REC button | 7.Mode selection dial |
4. DISP/SET | 8.Playback/station delete |
b tton |
|
Left:
1.Up button (▲) – Under different MENU selections, plays the previous song, photo, radio station etc. Under photo mode, different flash modes can also be selected.
2.Down button (▼)
next song, photo, radio station etc. Under photo mode, can also be used to select macro
3.Confirm button (![]() ) – Mainly used to confirm an operation, playback recorded audio, video files, and music functions.
) – Mainly used to confirm an operation, playback recorded audio, video files, and music functions.
4.SD card slot – Opens the SD card slot, to insert and remove the SD card.
1.Up button 2.Confirm
button 3.Down button
9
4.SD card slot
Deleted: menu
Deleted: and to