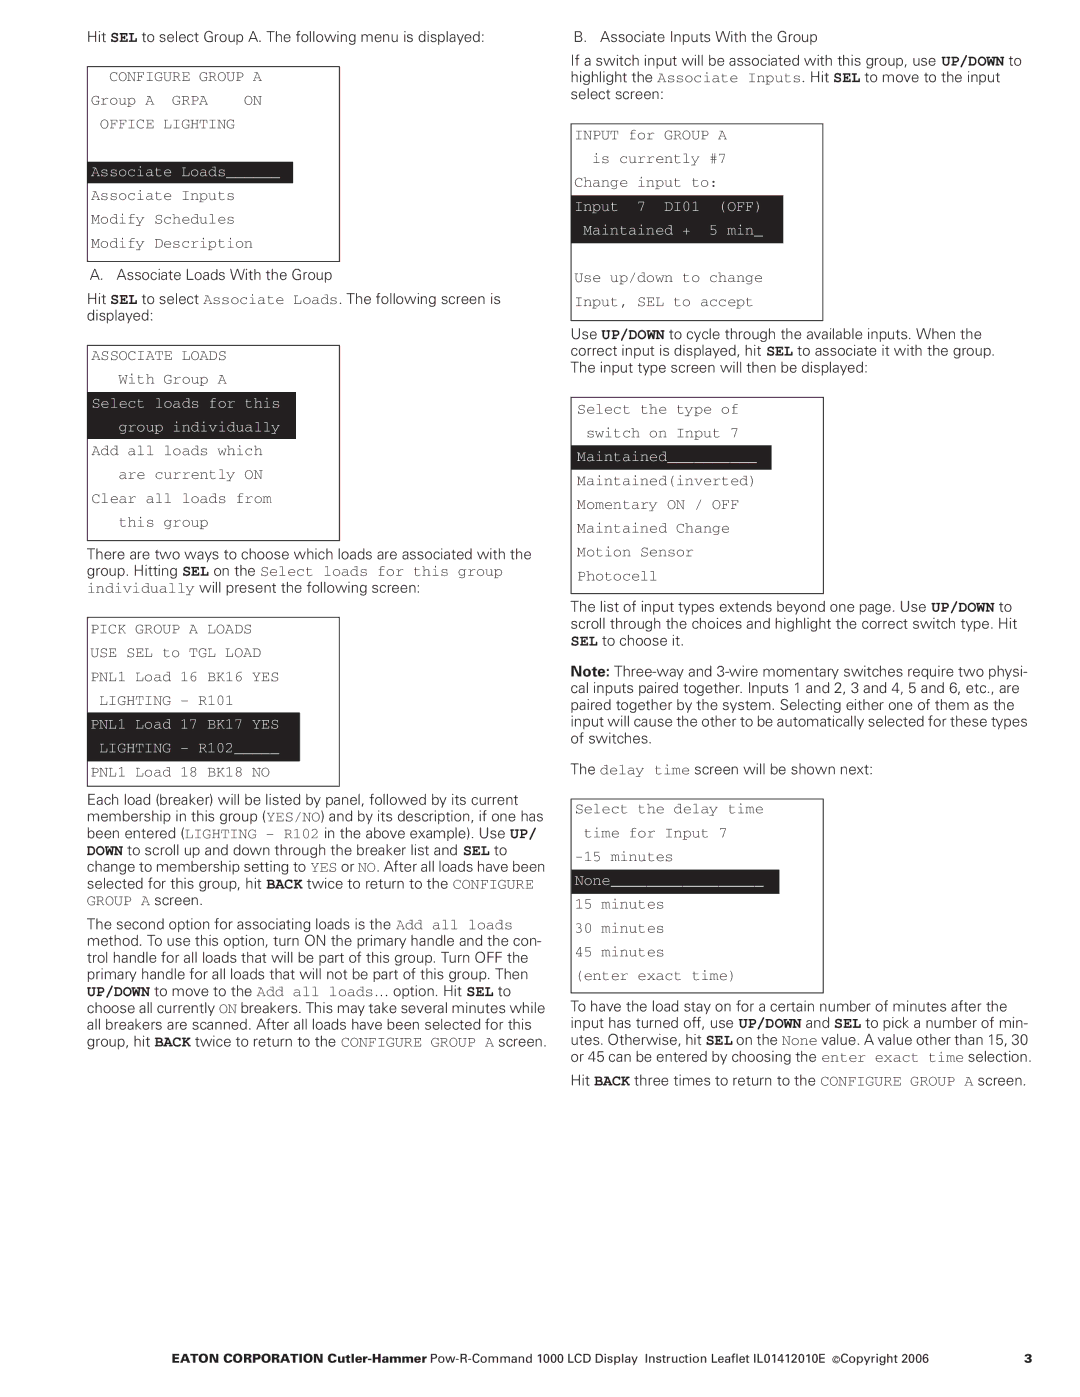
Hit SEL to select Group A. The following menu is displayed:
CONFIGURE GROUP A
Group A GRPA ON
OFFICE LIGHTING
Associate Loads______
Associate Inputs
Modify Schedules
Modify Description
A. Associate Loads With the Group
Hit SEL to select Associate Loads. The following screen is displayed:
ASSOCIATE LOADS
With Group A
Select loads for this group individually
Add all loads which are currently ON
Clear all loads from this group
There are two ways to choose which loads are associated with the group. Hitting SEL on the Select loads for this group individually will present the following screen:
PICK GROUP A LOADS
USE SEL to TGL LOAD
PNL1 Load 16 BK16 YES
LIGHTING – R101
PNL1 Load 17 BK17 YES
LIGHTING – R102_____
PNL1 Load 18 BK18 NO
Each load (breaker) will be listed by panel, followed by its current membership in this group (YES/NO) and by its description, if one has been entered (LIGHTING – R102 in the above example). Use UP/ DOWN to scroll up and down through the breaker list and SEL to change to membership setting to YES or NO. After all loads have been selected for this group, hit BACK twice to return to the CONFIGURE GROUP A screen.
The second option for associating loads is the Add all loads method. To use this option, turn ON the primary handle and the con- trol handle for all loads that will be part of this group. Turn OFF the primary handle for all loads that will not be part of this group. Then UP/DOWN to move to the Add all loads… option. Hit SEL to choose all currently ON breakers. This may take several minutes while all breakers are scanned. After all loads have been selected for this group, hit BACK twice to return to the CONFIGURE GROUP A screen.
B. Associate Inputs With the Group
If a switch input will be associated with this group, use UP/DOWN to highlight the Associate Inputs. Hit SEL to move to the input select screen:
INPUT for GROUP A is currently #7 Change input to:
Input 7 DI01 (OFF)
Maintained + 5 min_
Use up/down to change
Input, SEL to accept
Use UP/DOWN to cycle through the available inputs. When the correct input is displayed, hit SEL to associate it with the group. The input type screen will then be displayed:
Select the type of switch on Input 7
Maintained__________
Maintained(inverted)
Momentary ON / OFF
Maintained Change
Motion Sensor
Photocell
The list of input types extends beyond one page. Use UP/DOWN to scroll through the choices and highlight the correct switch type. Hit SEL to choose it.
Note:
The delay time screen will be shown next:
Select the delay time time for Input 7
None_________________
15minutes
30minutes
45minutes (enter exact time)
To have the load stay on for a certain number of minutes after the input has turned off, use UP/DOWN and SEL to pick a number of min- utes. Otherwise, hit SEL on the None value. A value other than 15, 30 or 45 can be entered by choosing the enter exact time selection.
Hit BACK three times to return to the CONFIGURE GROUP A screen.
EATON CORPORATION | 3 |