System Overview
1 | 2 | 3 |
4
14
13
125
11
10![]()
![]() 6
6
9![]() 7
7
8![]()
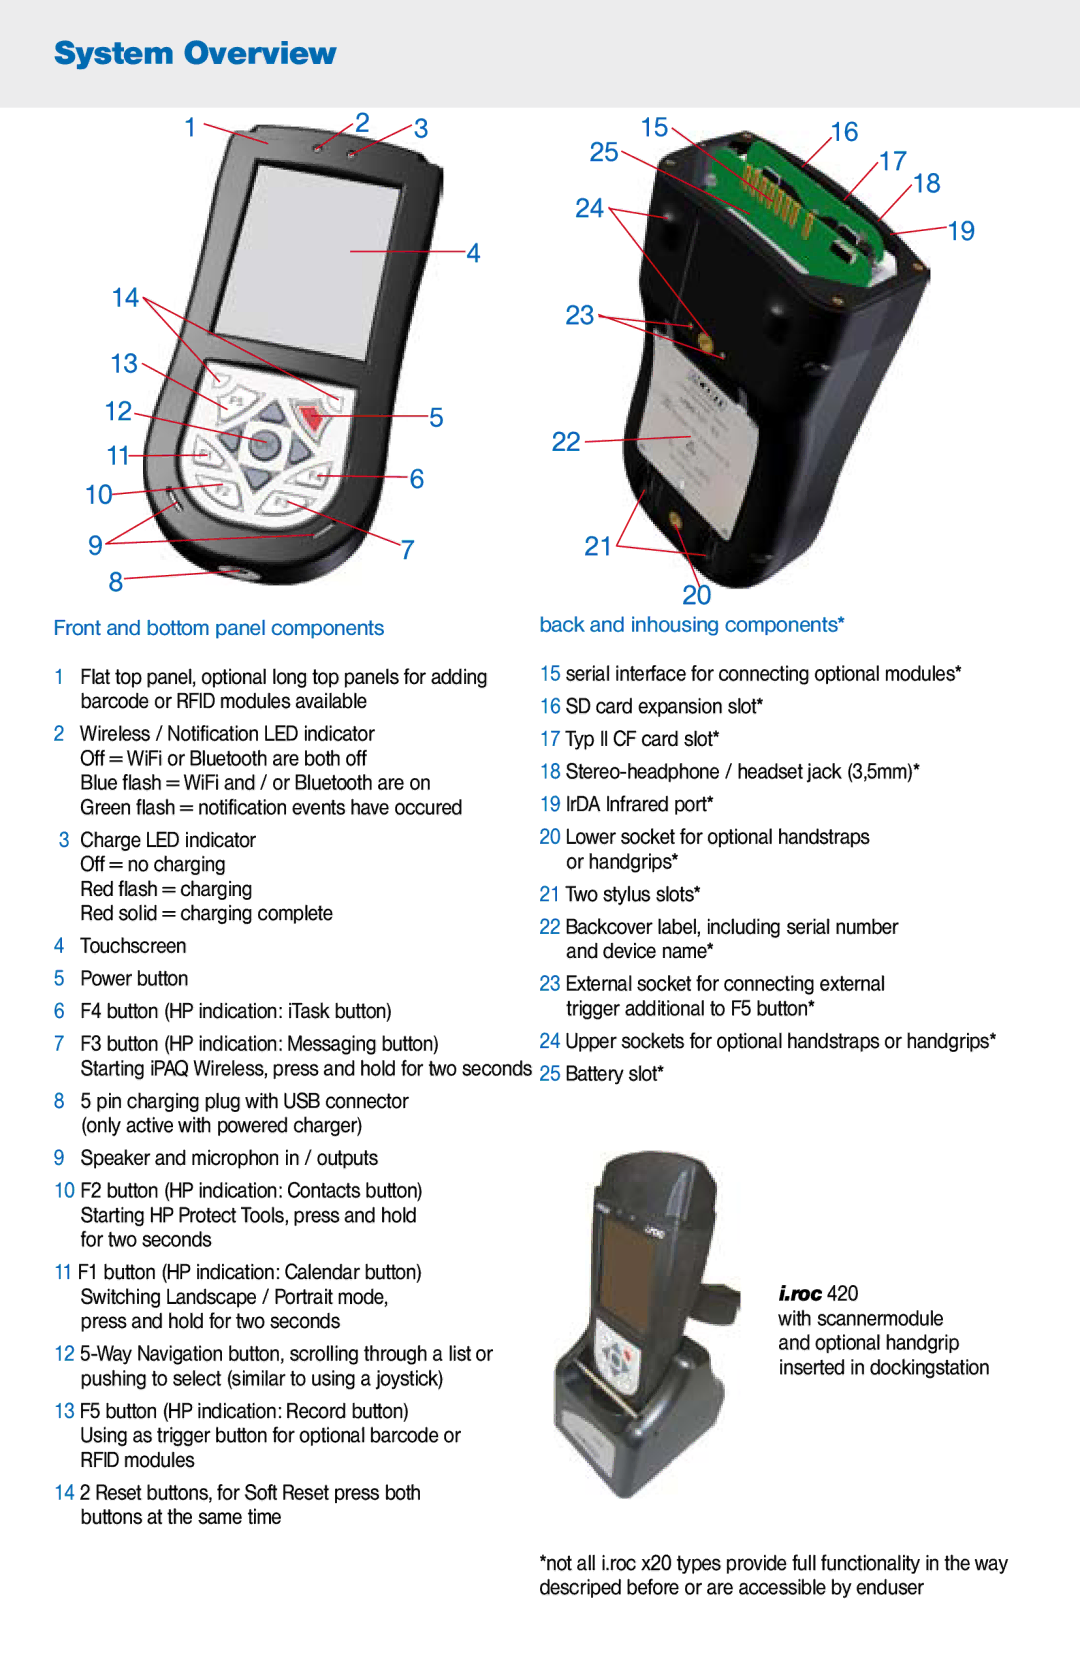
Front and bottom panel components
1Flat top panel, optional long top panels for adding barcode or RFID modules available
2Wireless / Notification LED indicator Off = WiFi or Bluetooth are both off
Blue flash = WiFi and / or Bluetooth are on Green flash = notification events have occured
3Charge LED indicator Off = no charging Red flash = charging
Red solid = charging complete
4Touchscreen
5Power button
6F4 button (HP indication: iTask button)
7F3 button (HP indication: Messaging button)
Starting iPAQ Wireless, press and hold for two seconds
85 pin charging plug with USB connector (only active with powered charger)
9Speaker and microphon in / outputs
10F2 button (HP indication: Contacts button) Starting HP Protect Tools, press and hold for two seconds
11F1 button (HP indication: Calendar button)
Switching Landscape / Portrait mode, press and hold for two seconds
12
13 F5 button (HP indication: Record button) Using as trigger button for optional barcode or RFID modules
14 2 Reset buttons, for Soft Reset press both buttons at the same time
15 | 16 |
25 | 17 18 |
|
24
![]() 19
19
23 ![]()
22 ![]()
21![]()
20
back and inhousing components*
15 serial interface for connecting optional modules*
16 SD card expansion slot*
17 Typ II CF card slot*
18
19 IrDA Infrared port*
20 Lower socket for optional handstraps or handgrips*
21 Two stylus slots*
22 Backcover label, including serial number and device name*
23 External socket for connecting external trigger additional to F5 button*
24 Upper sockets for optional handstraps or handgrips*
25 Battery slot*
i.roc 420
with scannermodule and optional handgrip inserted in dockingstation
*not all i.roc x20 types provide full functionality in the way descriped before or are accessible by enduser
