Cabling
While the M-16DX’s inputs can work with balanced or unbalanced cables, they’re designed to work with balanced cables. Balanced cables provide optimal noise-rejection, so if you can use them, do—they’ll help you avoid problems at a gig.
Balanced cables split their signal into two copies that travel up the cable out of phase with each other. If any noise gets into the cable, it’s added to both copies. When the copies reach the M-16DX’s input jack, they’re flipped back into phase and added to each other. And, as the audio copies are flipped into phase, any noise they carry gets flipped out of phase, with each noise copy cancelling the other one out, thus automatically removing the noise from the signal.
Setting Up
Keep the I/O Module with the Performers
For the best sound, we recommend keeping your I/O module on or near the stage—you may want to purchase an optional 23-foot-long EDIROL DXC-7 DX BUS cable. Keeping the module onstage accomplishes a few things:
•You can have short cable runs from your mics and instruments to the I/O module—reducing the chances of RF and other noises making their way into your signals. The module’s signal then takes the longer trip to the mixer carried over the M-16DX’s absolutely noise-free digital DX BUS connection.
•You’ll save money—by not having to buy long cables that stretch from the stage to the mixer.
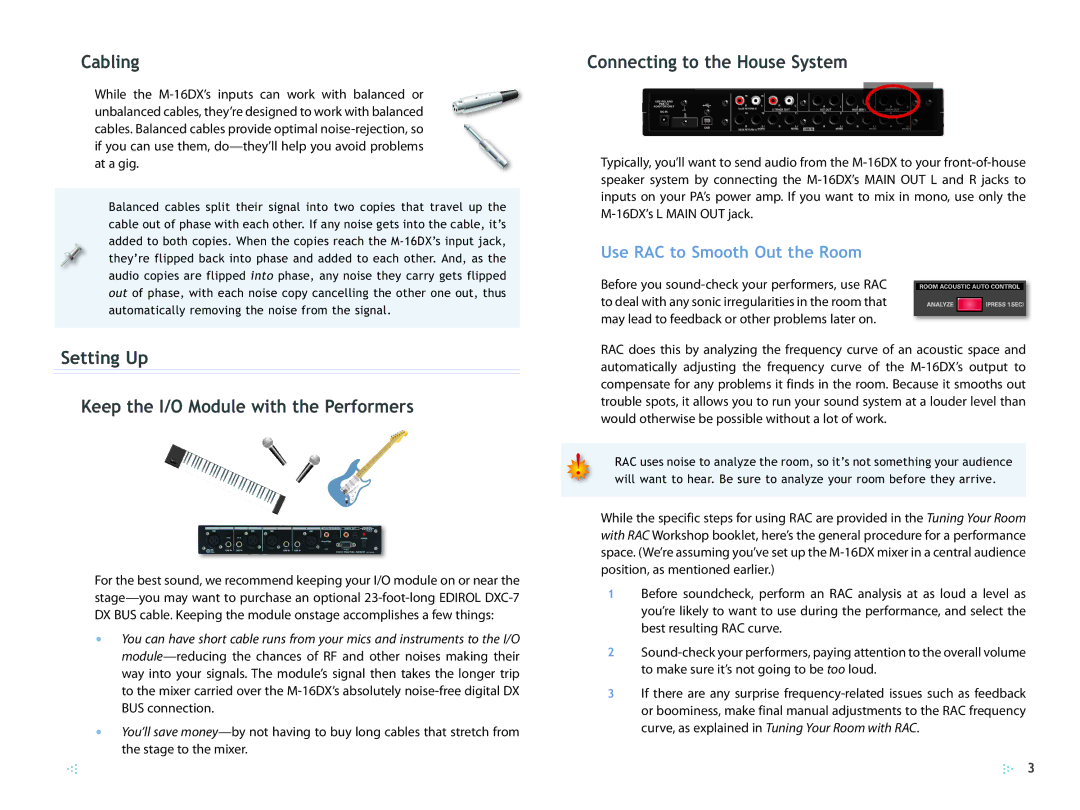
Connecting to the House System
Typically, you’ll want to send audio from the M-16DX to your front-of-house speaker system by connecting the M-16DX’s MAIN OUT L and R jacks to inputs on your PA’s power amp. If you want to mix in mono, use only the M-16DX’s L MAIN OUT jack.
Use RAC to Smooth Out the Room
Before you sound-check your performers, use RAC to deal with any sonic irregularities in the room that may lead to feedback or other problems later on.
RAC does this by analyzing the frequency curve of an acoustic space and automatically adjusting the frequency curve of the M-16DX’s output to compensate for any problems it finds in the room. Because it smooths out trouble spots, it allows you to run your sound system at a louder level than would otherwise be possible without a lot of work.
RAC uses noise to analyze the room, so it’s not something your audience will want to hear. Be sure to analyze your room before they arrive.
While the specific steps for using RAC are provided in the Tuning Your Room with RAC Workshop booklet, here’s the general procedure for a performance space. (We’re assuming you’ve set up the M-16DX mixer in a central audience position, as mentioned earlier.)
1Before soundcheck, perform an RAC analysis at as loud a level as you’re likely to want to use during the performance, and select the best resulting RAC curve.
2Sound-check your performers, paying attention to the overall volume to make sure it’s not going to be too loud.
3If there are any surprise frequency-related issues such as feedback or boominess, make final manual adjustments to the RAC frequency curve, as explained in Tuning Your Room with RAC.