INSTALLATION INSTRUCTIONS FOR FREESTANDING GAS RANGE

After removing all packing materials and literature from the oven:

a)Set oven to BAKE at 300ºF. See Use & Care Manual for operating instructions.

b)Within 60 seconds the oven burner should ignite. Check for proper flame and allow the burner to cycle once. Reset controls to OFF.

c)If your model is equipped with a waist-high broiler, set oven to BROIL. See Use & Care Manual for operating instructions.

d)Within 60 seconds the broil burner should ignite. Check for proper flame. Reset controls to OFF.

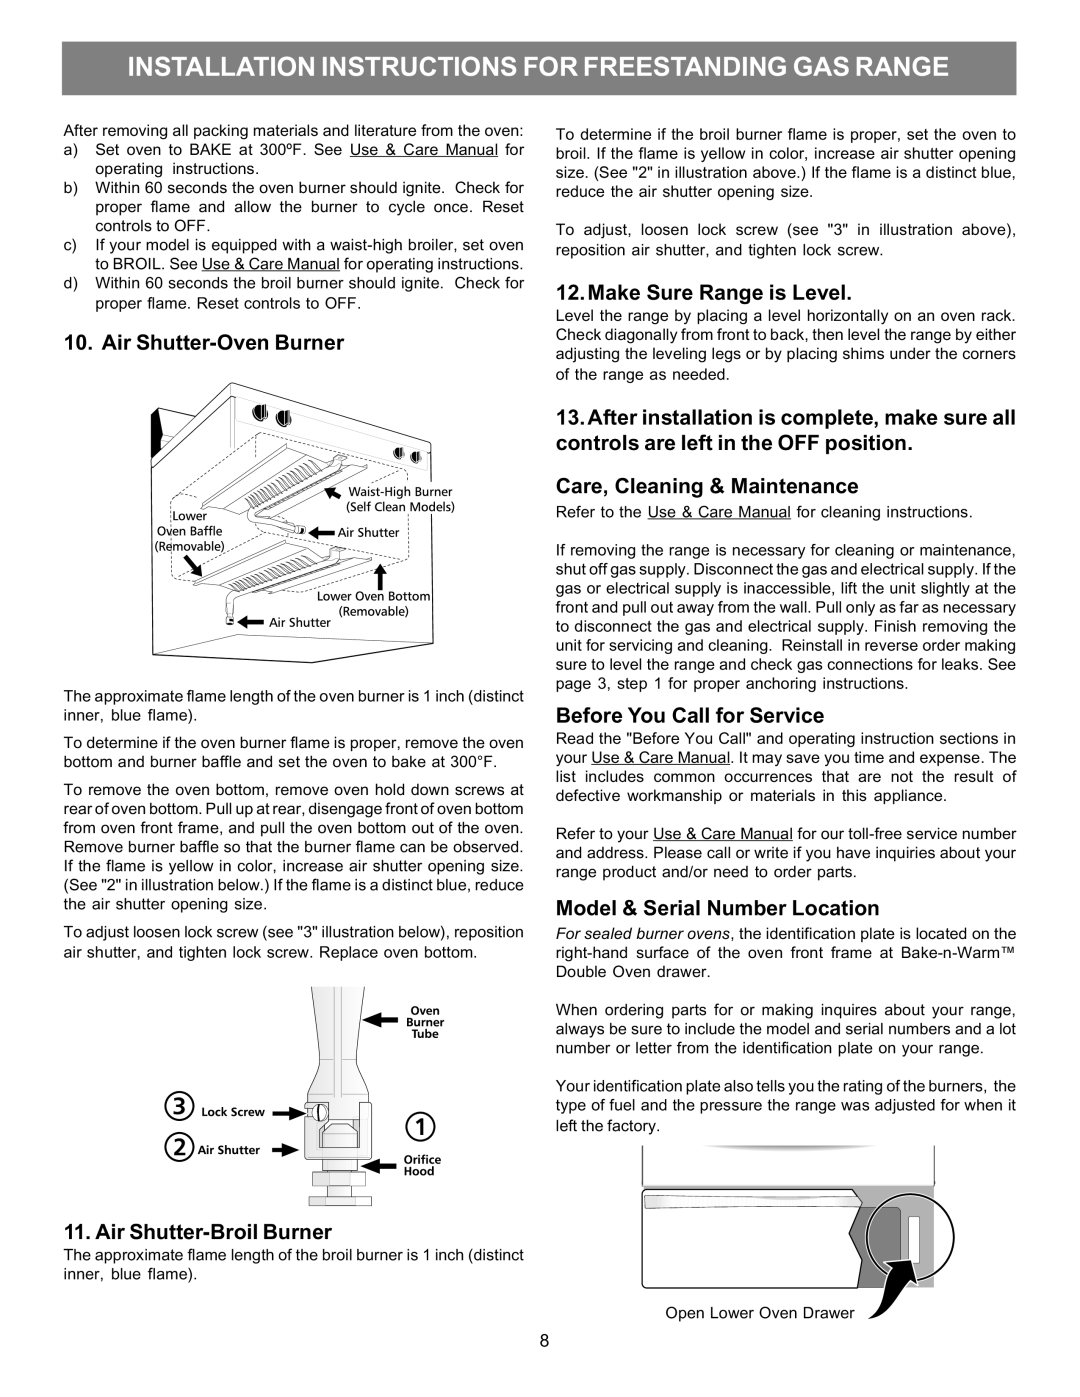
10. Air Shutter-Oven Burner

To determine if the broil burner flame is proper, set the oven to broil. If the flame is yellow in color, increase air shutter opening size. (See "2" in illustration above.) If the flame is a distinct blue, reduce the air shutter opening size.

To adjust, loosen lock screw (see "3" in illustration above), reposition air shutter, and tighten lock screw.

12. Make Sure Range is Level.

Level the range by placing a level horizontally on an oven rack. Check diagonally from front to back, then level the range by either adjusting the leveling legs or by placing shims under the corners of the range as needed.

The approximate flame length of the oven burner is 1 inch (distinct inner, blue flame).

To determine if the oven burner flame is proper, remove the oven bottom and burner baffle and set the oven to bake at 300°F.

To remove the oven bottom, remove oven hold down screws at rear of oven bottom. Pull up at rear, disengage front of oven bottom from oven front frame, and pull the oven bottom out of the oven. Remove burner baffle so that the burner flame can be observed. If the flame is yellow in color, increase air shutter opening size. (See "2" in illustration below.) If the flame is a distinct blue, reduce the air shutter opening size.

To adjust loosen lock screw (see "3" illustration below), reposition air shutter, and tighten lock screw. Replace oven bottom.

13.After installation is complete, make sure all controls are left in the OFF position.

Care, Cleaning & Maintenance

Refer to the Use & Care Manual for cleaning instructions.

If removing the range is necessary for cleaning or maintenance, shut off gas supply. Disconnect the gas and electrical supply. If the gas or electrical supply is inaccessible, lift the unit slightly at the front and pull out away from the wall. Pull only as far as necessary to disconnect the gas and electrical supply. Finish removing the unit for servicing and cleaning. Reinstall in reverse order making sure to level the range and check gas connections for leaks. See page 3, step 1 for proper anchoring instructions.

Before You Call for Service

Read the "Before You Call" and operating instruction sections in your Use & Care Manual. It may save you time and expense. The list includes common occurrences that are not the result of defective workmanship or materials in this appliance.

Refer to your Use & Care Manual for our toll-free service number and address. Please call or write if you have inquiries about your range product and/or need to order parts.

Model & Serial Number Location

For sealed burner ovens, the identification plate is located on the right-hand surface of the oven front frame at Bake-n-Warm™ Double Oven drawer.

When ordering parts for or making inquires about your range, always be sure to include the model and serial numbers and a lot number or letter from the identification plate on your range.

Your identification plate also tells you the rating of the burners, the type of fuel and the pressure the range was adjusted for when it left the factory.

11. Air Shutter-Broil Burner

The approximate flame length of the broil burner is 1 inch (distinct inner, blue flame).

Open LowerOven Drawer

8

Page 10
Image 10
Electrolux 316469105 Air Shutter-Oven Burner, Make Sure Range is Level, Before You Call for Service

316469105 specifications

The Electrolux 316469105 is a top-tier range replacement part known for its reliability and performance in cooking appliances. Designed to enhance the functionality of various Electrolux ranges, this component represents a critical part of many kitchen setups.

One of the main features of the Electrolux 316469105 is its high-quality construction. Made with durable materials, the part ensures longevity and resistance to wear and tear, common issues in household appliances. The attention to quality means that users can expect consistent performance over time, making cooking more enjoyable and efficient.

The Electrolux 316469105 is engineered for compatibility with a range of models, thereby offering versatility for homeowners who own different Electrolux appliances. This compatibility ensures that users can easily replace old or malfunctioning parts without the need for major modifications or adjustments to their existing setups.

In terms of technology, this range part boasts innovative designs that facilitate better heat distribution for even cooking results. The use of advanced materials allows for quicker heat-up times and optimal energy efficiency. This is particularly beneficial in today's eco-conscious society, where consumers are increasingly concerned about their energy consumption and carbon footprint.

The Electrolux 316469105 is also designed with practicality in mind. Its installation process is straightforward, with clear instructions that guide users through the replacement steps. This user-friendly design means that even those with limited DIY skills can successfully replace the part, saving both time and money by avoiding costly service calls.

Another notable characteristic is its emphasis on safety. The part is constructed to meet rigorous safety standards, reducing the risk of malfunctions during operation. This feature provides peace of mind to users, allowing them to focus on creating delicious meals without worrying about the integrity of their appliance.

Overall, the Electrolux 316469105 is a testament to quality engineering and customer-centered design. With its robust features, technological innovations, and user-friendly attributes, it stands out as an essential component for anyone looking to maintain or enhance the performance of their Electrolux range. Whether you’re a seasoned chef or just starting your culinary journey, this part can significantly improve your cooking experience.