LOCATION OF APPLIANCE

This appliance must not be installed in a bed-sitting room of volume less than 20m³ or in a bathroom, shower room or garage. It is essential that the appliance is positioned as stated below. The appliance must be a minimum of 20mm from the rear wall (note that this dimension is provided by the inlet elbow). Shelves, wall cabinets and cooker hoods must not be fitted closer that 500mm to the top of the grill canopy or within 100mm of the sides of the grill. Curtains must not be fitted immediately behind the appliance or within 200mm of the sides of the grill. If fitted next to or between two base units a minimum space of 1mm must be left between the units and the sides of the appliance. The hotplate must be set to a minimum of 7mm above the adjacent units (note that the levelling feet fitted to the appliance will achieve a nominal height to hotplate level of 907mm -5+13mm). Base units not meeting the above conditions must be a minimum of 100mm away from the hotplate.

L.P.G. cookers MUST NOT be installed below ground level, i.e in a basement, or aboard any boat, yacht or other vessel.

INSTALLATION

1.PARTS REQUIRED

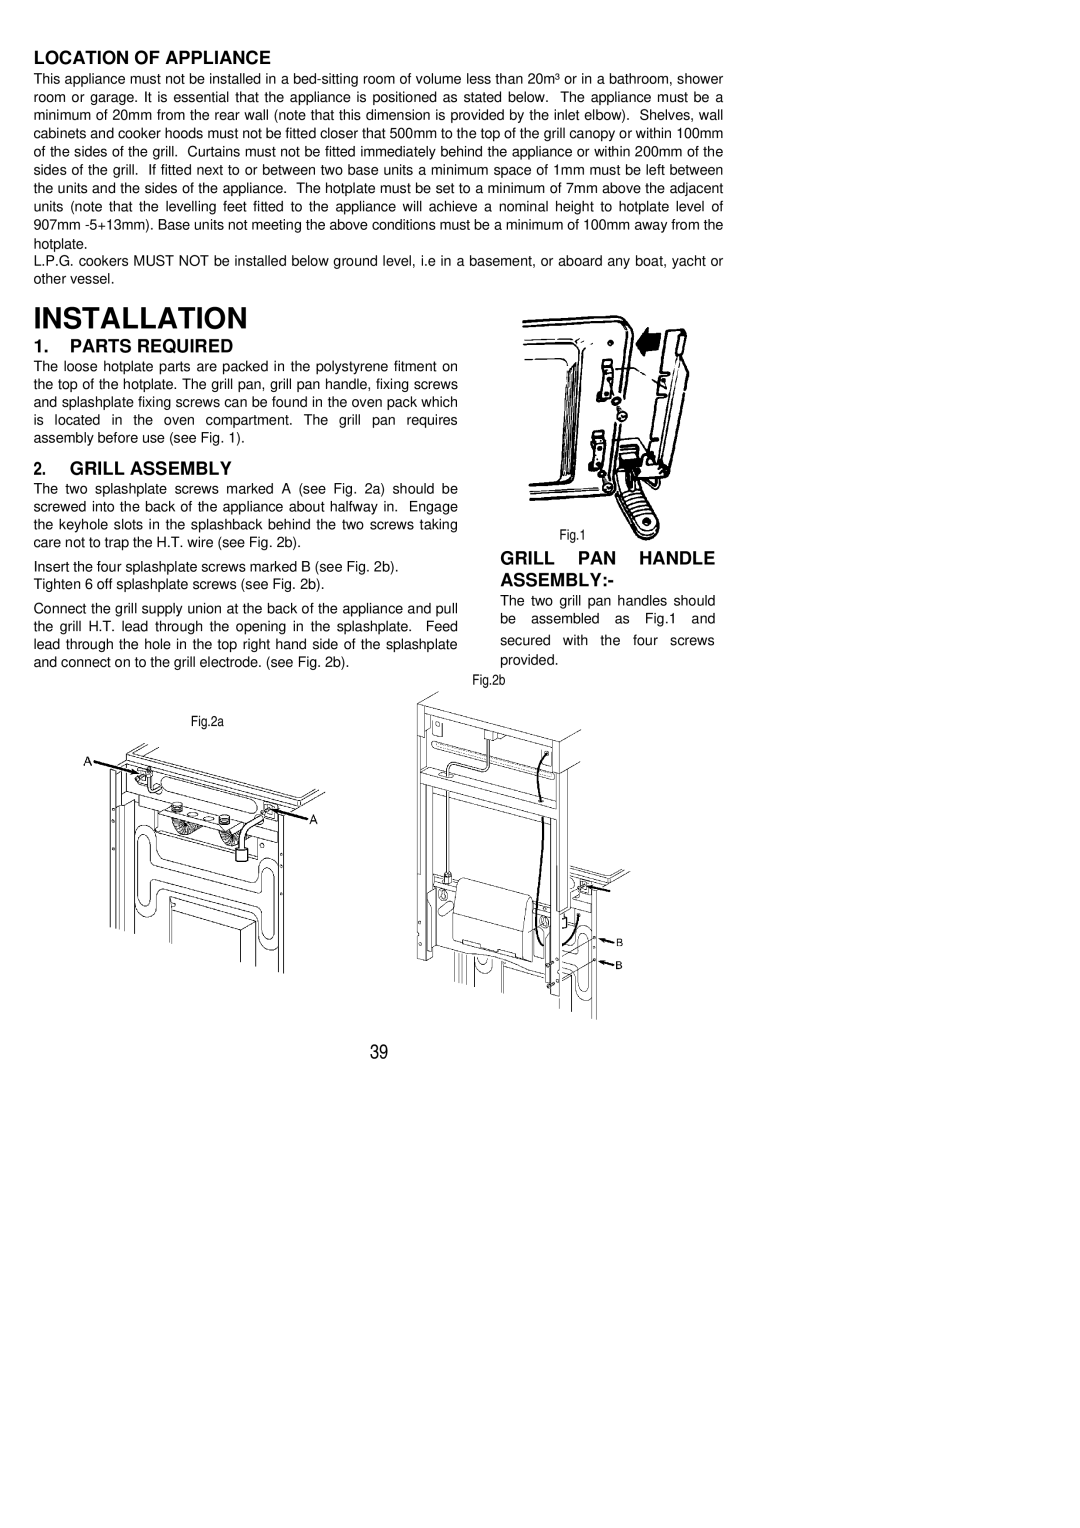
The loose hotplate parts are packed in the polystyrene fitment on the top of the hotplate. The grill pan, grill pan handle, fixing screws and splashplate fixing screws can be found in the oven pack which is located in the oven compartment. The grill pan requires assembly before use (see Fig. 1).

2. GRILL ASSEMBLY

The two splashplate screws marked A (see Fig. 2a) should be


screwed into the back of the appliance about halfway in. Engage


the keyhole slots in the splashback behind the two screws taking

Fig.1

care not to trap the H.T. wire (see Fig. 2b).


Insert the four splashplate screws marked B (see Fig. 2b). Tighten 6 off splashplate screws (see Fig. 2b).

Connect the grill supply union at the back of the appliance and pull the grill H.T. lead through the opening in the splashplate. Feed lead through the hole in the top right hand side of the splashplate and connect on to the grill electrode. (see Fig. 2b).

GRILL PAN HANDLE ASSEMBLY:-

The two grill pan handles should be assembled as Fig.1 and

secured with the four screws provided.

Fig.2b

Fig.2a

39

Page 39
Image 39
Electrolux 55GX3 installation instructions Location of Appliance, Parts Required, Grill Assembly, Grill PAN Handle Assembly

55GX3 specifications

The Electrolux 55GX3 is a cutting-edge appliance that combines innovative technology with user-friendly design to enhance cooking experiences in modern kitchens. This versatile oven stands out with its sleek exterior and advanced functionalities that cater to both novice cooks and culinary enthusiasts alike.

One of the main features of the 55GX3 is its True Steam cooking technology, which uses the power of steam to cook food evenly while preserving moisture and nutrients. This feature is particularly beneficial for baking as it helps create crisp crusts and tender interiors. Additionally, it allows for healthier cooking, reducing the need for excess fats and oils.

The oven comes equipped with a spacious cavity, enabling users to prepare large meals efficiently. With multiple cooking modes, including convection, broil, and steam, the 55GX3 offers flexibility, making it suitable for various culinary styles and dishes. The convection mode circulates hot air, ensuring that food is cooked thoroughly and evenly, which is a great advantage for roasting meats and baking.

Another standout characteristic of the Electrolux 55GX3 is its smart technology integration. The appliance features Wi-Fi connectivity, allowing users to control and monitor cooking settings remotely via a smartphone app. This convenience is especially appealing for busy individuals who may want to preheat their oven or adjust cooking times while away from the kitchen.

The user interface of the 55GX3 is intuitive, with a responsive touchscreen display that simplifies navigation through different cooking settings and times. The oven also includes pre-programmed recipes and cooking guides that provide assistance in achieving perfect results every time, making it easy for users to experiment with new dishes.

In terms of safety, the Electrolux 55GX3 is designed with a child lock feature to prevent accidental operation, ensuring peace of mind for families. Its self-cleaning function streamlines maintenance, allowing users to focus more on cooking rather than cleaning.

Overall, the Electrolux 55GX3 embodies a blend of advanced technology, practical features, and safety, making it an excellent addition to any kitchen. With its emphasis on performance and convenience, this oven not only meets but exceeds the expectations of today’s home cooks.