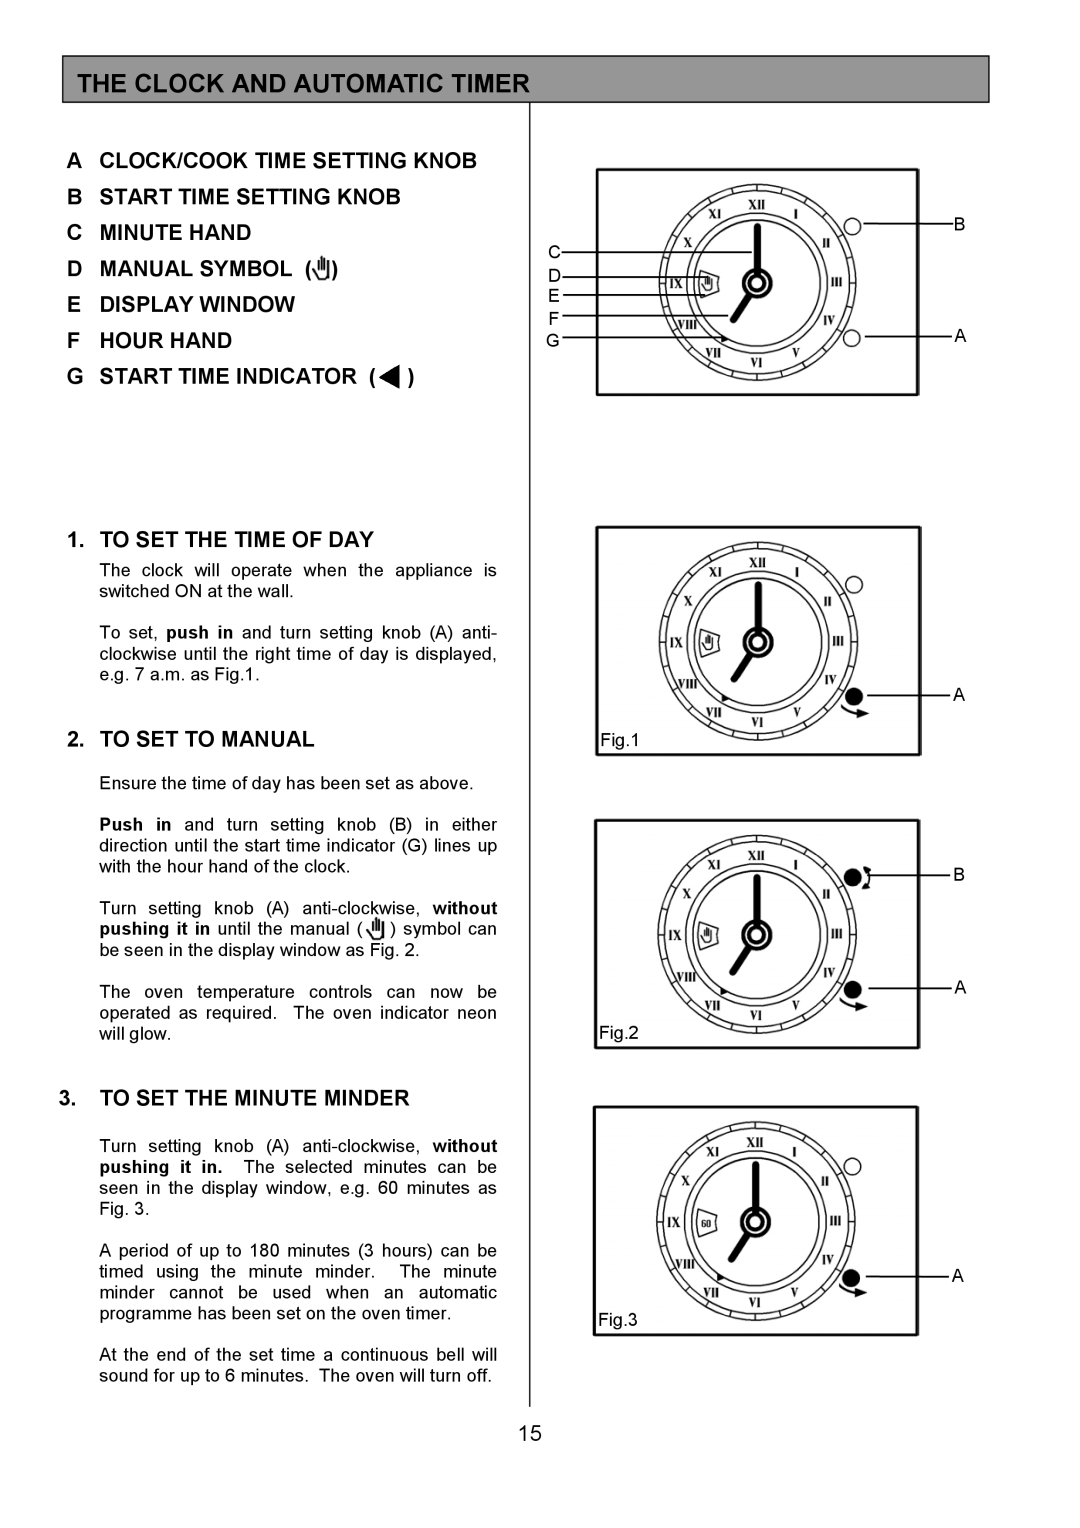
THE CLOCK AND AUTOMATIC TIMER
ACLOCK/COOK TIME SETTING KNOB
BSTART TIME SETTING KNOB
CMINUTE HAND
DMANUAL SYMBOL (![]() )
)
EDISPLAY WINDOW
FHOUR HAND
GSTART TIME INDICATOR (![]() )
)
1. TO SET THE TIME OF DAY
The clock will operate when the appliance is switched ON at the wall.
To set, push in and turn setting knob (A) anti- clockwise until the right time of day is displayed, e.g. 7 a.m. as Fig.1.
2. TO SET TO MANUAL
Ensure the time of day has been set as above.
Push in and turn setting knob (B) in either direction until the start time indicator (G) lines up with the hour hand of the clock.
Turn setting knob (A) ![]() ) symbol can be seen in the display window as Fig. 2.
) symbol can be seen in the display window as Fig. 2.
The oven temperature controls can now be operated as required. The oven indicator neon will glow.
3.TO SET THE MINUTE MINDER
Turn setting knob (A)
A period of up to 180 minutes (3 hours) can be timed using the minute minder. The minute minder cannot be used when an automatic programme has been set on the oven timer.
At the end of the set time a continuous bell will sound for up to 6 minutes. The oven will turn off.
C
D
E
F
G
Fig.1
Fig.2
Fig.3
B
A
A
B
A
A
15