Manuals
/
Electrolux
/
Kitchen Appliance
/
Coffeemaker
Electrolux
PE 9038-m fww
installation instructions
English Contents
Models:
PE 9038-m fww
1
1
2
3
4
5
6
7
8
9
10
11
12
13
14
15
16
17
18
19
20
21
22
23
24
25
26
27
28
29
30
31
32
33
34
35
36
36
Download
36 pages
7.75 Kb
1
2
3
4
5
6
7
8
9
Specifications
Install
Signal And Alarms
Fault Indicator
Warranty
Resetting Standard Values
Cleaning
Safety
Service & Spare Parts
Page 2
Image 2
Page 1
Page 3
Page 2
Image 2
Page 1
Page 3
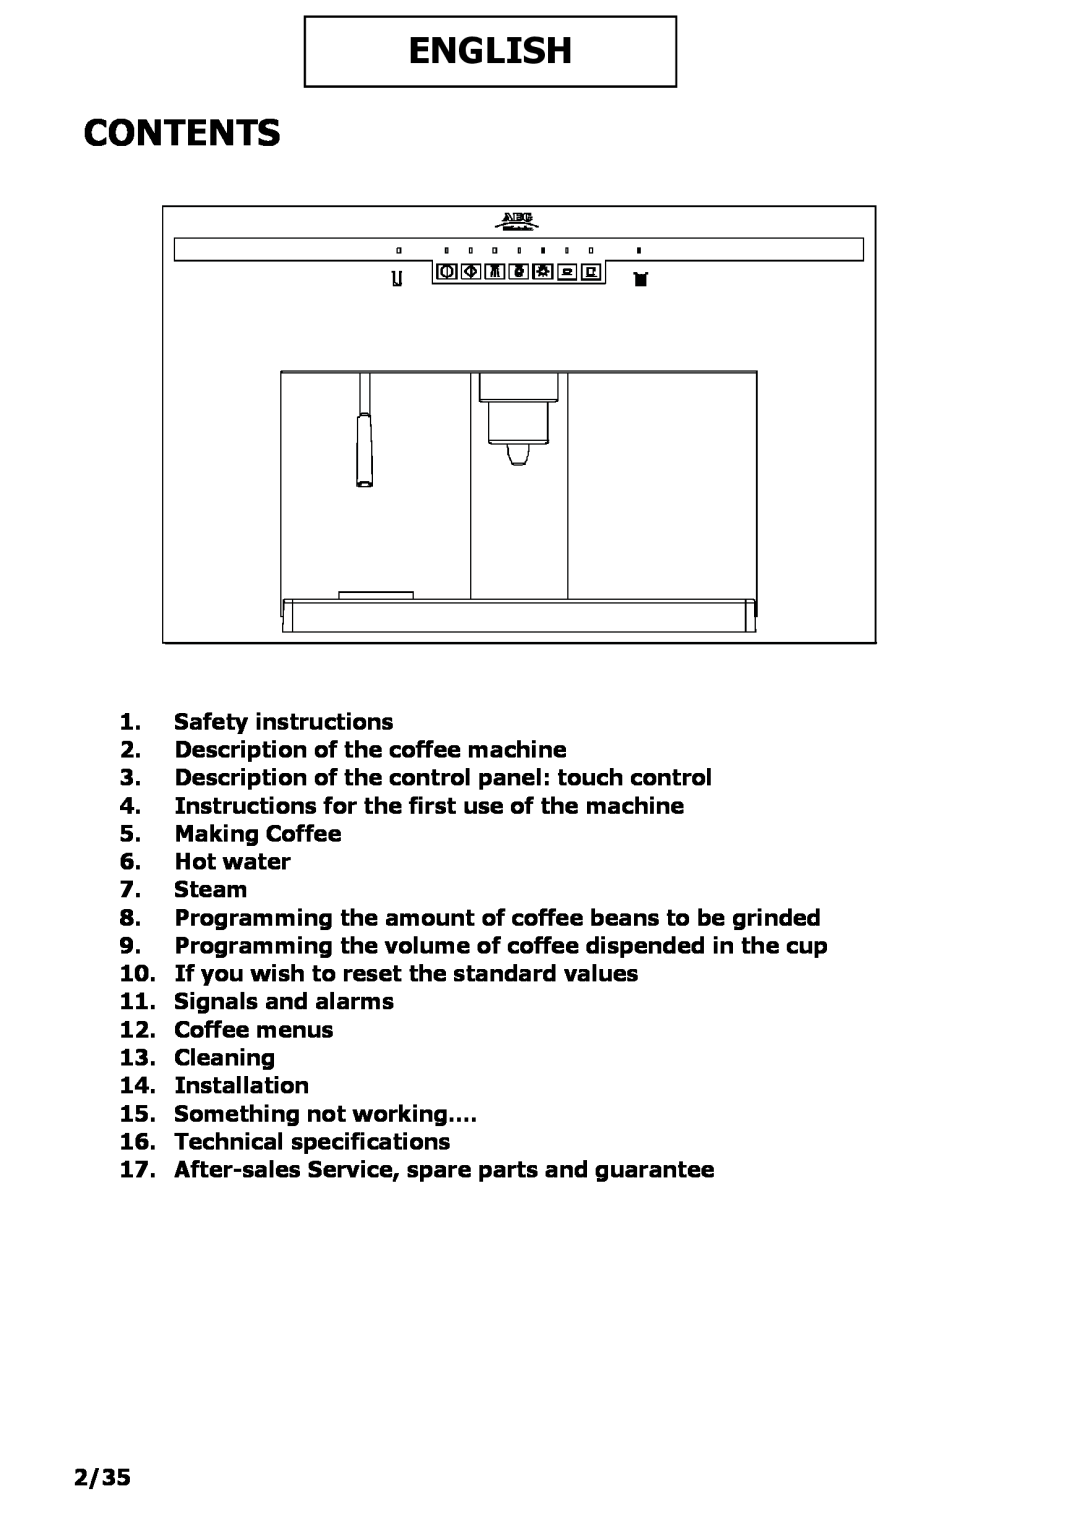
Contents
Fully automatic espresso coffee machine
Operating and Installation Instructions
PE 9038-m
ENGLISH CONTENTS
Intended use
1. SAFETY INSTRUCTION
Safety of children
Prior to initial start-up
PACKAGE
FOR INSTALLATION AND SERVICING
SOME HINTS OF ENVIRONMENTAL PROTECTION
5/35
ELECTRICAL CONNECTION
WARNING THIS APPLIANCE MUST BE EARTHED
PERMANENT CONNECTION
6/35
4. Steam/water nozzle 5. Drip tray 6. Coffee beans container
2. DESCRIPTION OF THE COFFEE MACHINE
1. Water reservoir 2. Brita filter 3. Coffee Outlet
7. Grinding regulation knob 8. Control panel 9. “Used” coffee drawer
3. DESCRIPTION OF THE CONTROL PANEL TOUCH CONTROLS
TOUCH CONTROLS Instructions for use
9/35
4 INSTRUCTIONS FOR THE FIRST USE OF THE MACHINE
FILLING UP THE WATER RESERVOIR
Hardness of water
10/35
FILLING UP THE CONTAINER WITH COFFEE BEANS
11/35
INITIAL START-UP
12/35
ADJUSTING THE TEXTURE GROUND COFFEE
13/35
14/35
STAND-BY MODE
15/35
16/35
HOW TO OBTAIN AN EXCELLENT ESPRESSO
5 MAKING COFFEE
6 HOT WATER
17/35
7 STEAM
HEATING LIQUIDS
8 PROGRAMMING THE AMOUNT OF COFFEE BEANS TO BE GRINDED
19/35
20/35
9 PROGRAMMING THE VOLUME OF COFFEE DISPENSED IN THE CUP
21/35
22/35
10 IF YOU WISH TO RESET THE STANDARD VALUES
RESETTING STANDARD VALUES
VOLUMETER COUNTER FAULT
11 SIGNAL AND ALARMS
WATER REFILL INDICATOR
“USED COFFEE DRAWER FULL”/ COFFEE BEENS REFILL INDICATOR
ITALIAN CAPPUCCINO
FAULT INDICATOR
12 COFFEE MENUS
VIENNESE CAPPUCCINO
STEAM NOZZLE
13 CLEANING
OUTER PARTS
25/35
26/35
DRIP TRAY
TO EMPTY THE “USED” COFFEE DRAWER
27/35
Pull open the door and remove the drawer and empty it
Replace the drawer and close the door Replace the drip tray
28/35
CLEANING CYCLE OF THE BOILER
WATER RESERVOIR
BUILDING-IN
14 INSTALLATION
COMPONENTS FOR INSTALLING THE MACHINE
29/35
30/35
Fix the power cable onto the machine as shown in the figure
Unscrew the cable clamp available on the machine
INSTALLING THE MACHINE
31/35
32/35
33/35
16 TECHNICAL SPECIFICATIONS
15 SOMETHING NOT WORKING
08705 929
17 AFTER-SALES SERVICE, SPARE PARTS AND GUARANTEE
SERVICE & SPARE PARTS
CUSTOMER CARE
35/35
GUARANTEE CONDITIONS
EUROPEAN GUARANTEE
04501150
AEG Hausgeräte GmbH Postfach D-90327 Nürnberg
Copyright by AEG
Top
Page
Image
Contents