4. CONNECTING TO GAS

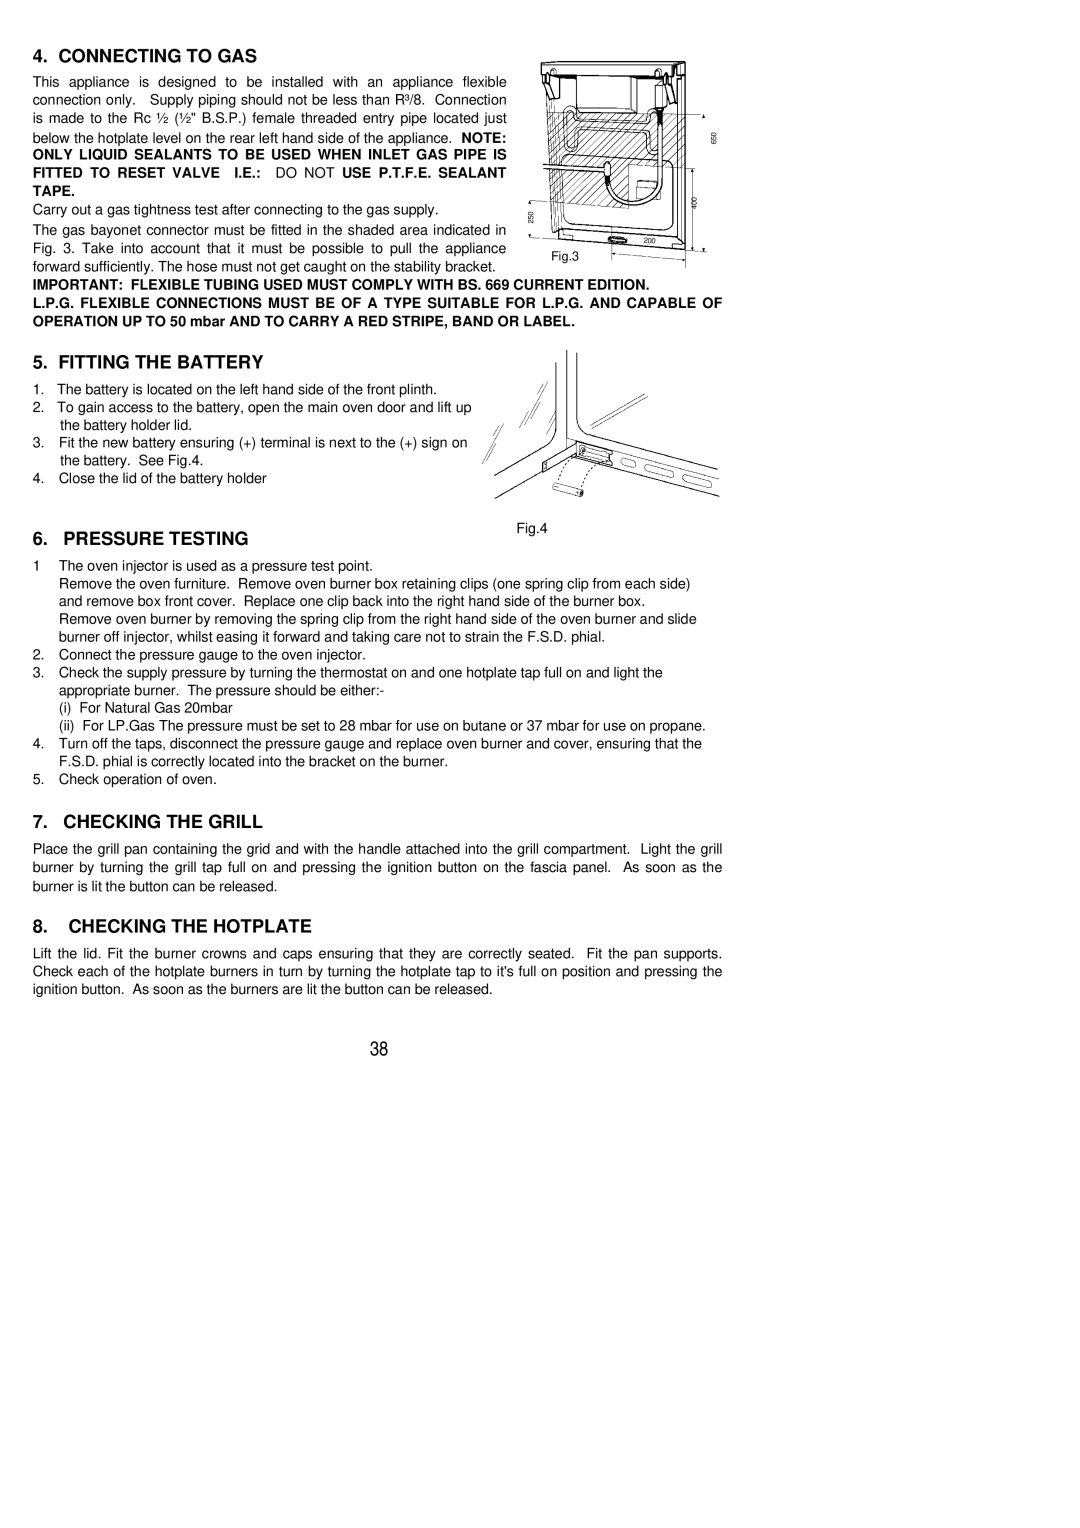
This appliance is designed to be installed with an appliance flexible connection only. Supply piping should not be less than R³/8. Connection is made to the Rc ½ (½" B.S.P.) female threaded entry pipe located just below the hotplate level on the rear left hand side of the appliance. NOTE:

ONLY LIQUID SEALANTS TO BE USED WHEN INLET GAS PIPE IS FITTED TO RESET VALVE I.E.: DO NOT USE P.T.F.E. SEALANT

TAPE.

Carry out a gas tightness test after connecting to the gas supply.

The gas bayonet connector must be fitted in the shaded area indicated in Fig. 3. Take into account that it must be possible to pull the appliance forward sufficiently. The hose must not get caught on the stability bracket.

250

Fig.3

650

400

IMPORTANT: FLEXIBLE TUBING USED MUST COMPLY WITH BS. 669 CURRENT EDITION.

L.P.G. FLEXIBLE CONNECTIONS MUST BE OF A TYPE SUITABLE FOR L.P.G. AND CAPABLE OF OPERATION UP TO 50 mbar AND TO CARRY A RED STRIPE, BAND OR LABEL.

5. FITTING THE BATTERY

1.The battery is located on the left hand side of the front plinth.

2.To gain access to the battery, open the main oven door and lift up the battery holder lid.

3.Fit the new battery ensuring (+) terminal is next to the (+) sign on the battery. See Fig.4.

4.Close the lid of the battery holder

6. PRESSURE TESTING

Fig.4

1The oven injector is used as a pressure test point.

Remove the oven furniture. Remove oven burner box retaining clips (one spring clip from each side) and remove box front cover. Replace one clip back into the right hand side of the burner box. Remove oven burner by removing the spring clip from the right hand side of the oven burner and slide

burner off injector, whilst easing it forward and taking care not to strain the F.S.D. phial.

2.Connect the pressure gauge to the oven injector.

3.Check the supply pressure by turning the thermostat on and one hotplate tap full on and light the appropriate burner. The pressure should be either:-

(i)For Natural Gas 20mbar

(ii)For LP.Gas The pressure must be set to 28 mbar for use on butane or 37 mbar for use on propane.

4.Turn off the taps, disconnect the pressure gauge and replace oven burner and cover, ensuring that the F.S.D. phial is correctly located into the bracket on the burner.

5.Check operation of oven.

7. CHECKING THE GRILL

Place the grill pan containing the grid and with the handle attached into the grill compartment. Light the grill burner by turning the grill tap full on and pressing the ignition button on the fascia panel. As soon as the burner is lit the button can be released.

8.CHECKING THE HOTPLATE

Lift the lid. Fit the burner crowns and caps ensuring that they are correctly seated. Fit the pan supports. Check each of the hotplate burners in turn by turning the hotplate tap to it's full on position and pressing the ignition button. As soon as the burners are lit the button can be released.

38

Page 38
Image 38
Electrolux SG 320 Connecting to GAS, Fitting the Battery, Pressure Testing, Checking the Grill, Checking the Hotplate

SG 320 specifications

The Electrolux SG 320 is a highly advanced vacuum cleaner designed to meet the needs of modern households. This powerful cleaning appliance combines innovative technologies with user-friendly features, making it an essential tool for effective home maintenance.

One of the standout features of the Electrolux SG 320 is its innovative Cyclonic Technology. This technology allows for powerful suction and ensures that dirt and debris are efficiently separated from the airflow. As a result, the vacuum cleaner maintains consistent suction power, even as the dust container fills up. This is particularly beneficial in households with pets or heavy foot traffic, where dirt accumulation is inevitable.

The SG 320 comes equipped with a multi-surface brush roll, allowing for seamless transitions between various floor types, including carpets, hardwood, and tiles. This versatility ensures that users can tackle any cleaning task without needing to switch machines or attachments. Additionally, the vacuum features a height-adjustable nozzle, which allows for further customization according to the surface being cleaned, enhancing dirt pickup efficiency.

User convenience is also a priority for Electrolux, and the SG 320 incorporates a lightweight design that makes it easy to carry and maneuver around the home. The vacuum's ergonomic handle ensures a comfortable grip, reducing strain on the user's wrist during extended cleaning sessions. Moreover, the 360-degree swivel steering allows for effortless navigation around furniture and tight spaces.

Another key characteristic of the Electrolux SG 320 is its advanced filtration system. It utilizes a HEPA filter that captures 99.97% of allergens and particles as small as 0.3 microns. This is an ideal feature for allergy sufferers and those concerned about indoor air quality. The filter is also washable, simplifying maintenance and ensuring that it can be reused for extended periods.

In terms of design, the Electrolux SG 320 exudes modern elegance with a sleek profile that is aesthetically pleasing. Its compact design allows for easy storage, even in smaller spaces. The vacuum is also equipped with a generous cord length, facilitating cleaning in larger areas without the need to constantly change outlets.

Overall, the Electrolux SG 320 is an impressive vacuum cleaner that combines powerful performance, advanced technologies, and user-friendly features. It is an excellent choice for anyone looking to maintain a clean and healthy living environment without compromising on convenience or efficiency.