S I G 5 3 0

10. CHECKING THE MAIN OVEN CONTROLS

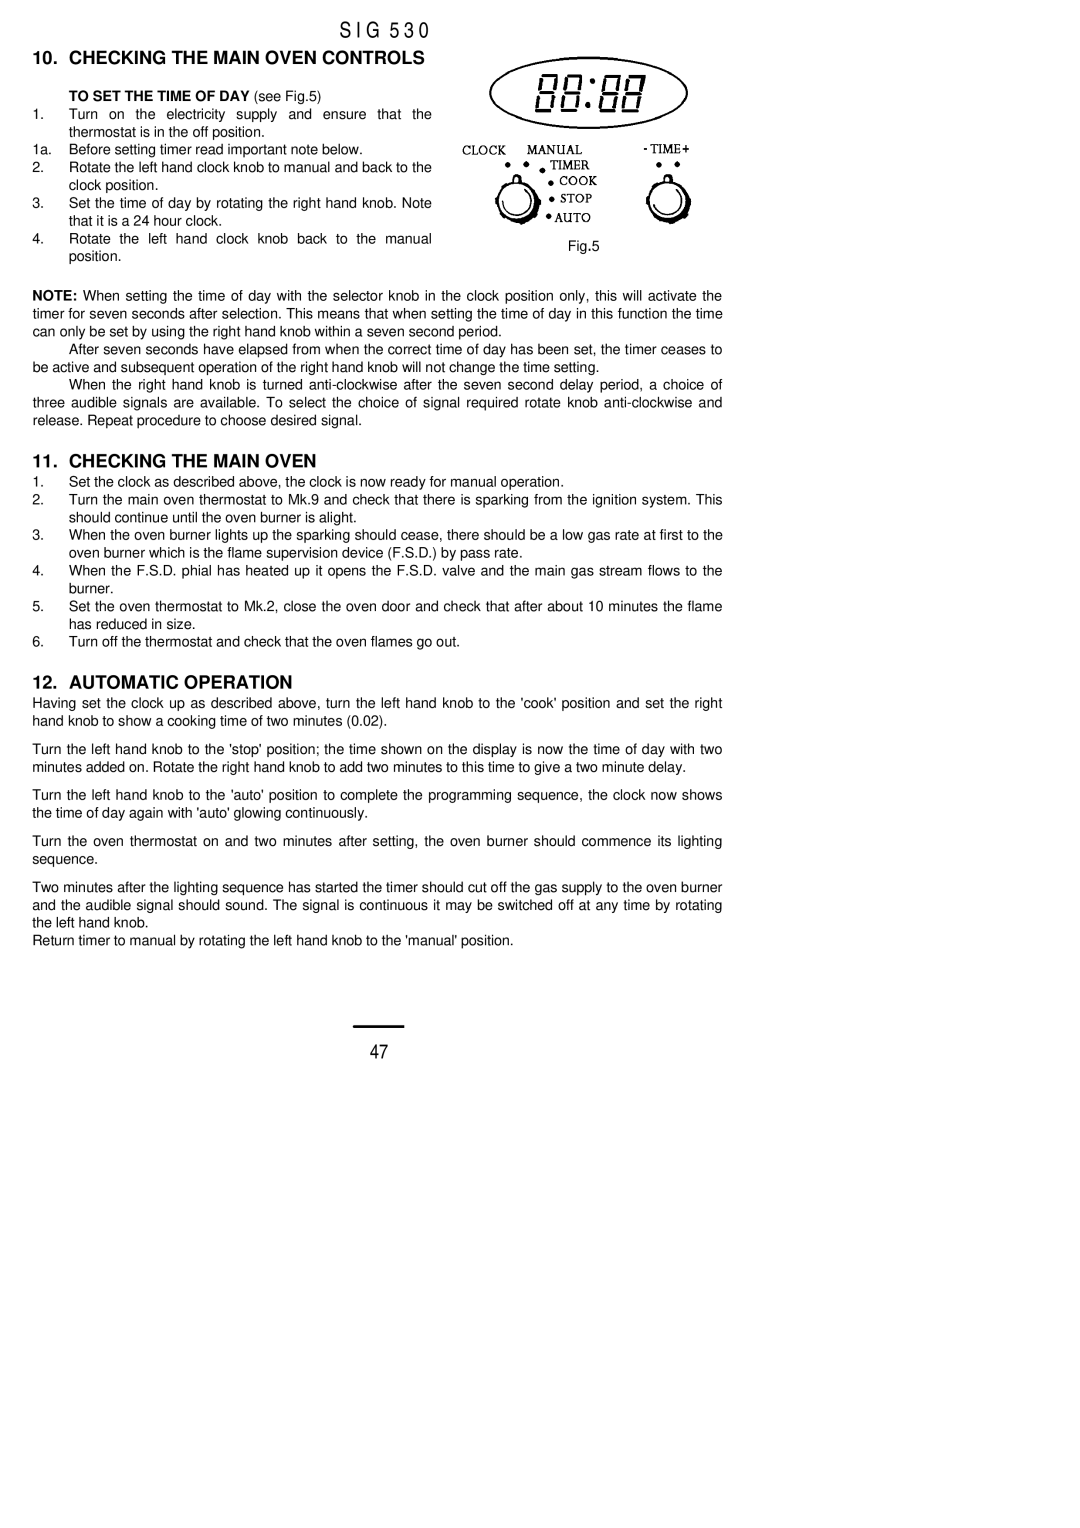
TO SET THE TIME OF DAY (see Fig.5)

1.Turn on the electricity supply and ensure that the

thermostat is in the off position.

1a. Before setting timer read important note below.

2.Rotate the left hand clock knob to manual and back to the clock position.

3.Set the time of day by rotating the right hand knob. Note


that it is a 24 hour clock.


4.

Rotate the left hand clock knob back to the manual

Fig.5


position.


NOTE: When setting the time of day with the selector knob in the clock position only, this will activate the timer for seven seconds after selection. This means that when setting the time of day in this function the time can only be set by using the right hand knob within a seven second period.

After seven seconds have elapsed from when the correct time of day has been set, the timer ceases to be active and subsequent operation of the right hand knob will not change the time setting.

When the right hand knob is turned anti-clockwise after the seven second delay period, a choice of three audible signals are available. To select the choice of signal required rotate knob anti-clockwise and release. Repeat procedure to choose desired signal.

11. CHECKING THE MAIN OVEN

1.Set the clock as described above, the clock is now ready for manual operation.

2.Turn the main oven thermostat to Mk.9 and check that there is sparking from the ignition system. This should continue until the oven burner is alight.

3.When the oven burner lights up the sparking should cease, there should be a low gas rate at first to the oven burner which is the flame supervision device (F.S.D.) by pass rate.

4.When the F.S.D. phial has heated up it opens the F.S.D. valve and the main gas stream flows to the burner.

5.Set the oven thermostat to Mk.2, close the oven door and check that after about 10 minutes the flame has reduced in size.

6.Turn off the thermostat and check that the oven flames go out.

12. AUTOMATIC OPERATION

Having set the clock up as described above, turn the left hand knob to the 'cook' position and set the right hand knob to show a cooking time of two minutes (0.02).

Turn the left hand knob to the 'stop' position; the time shown on the display is now the time of day with two minutes added on. Rotate the right hand knob to add two minutes to this time to give a two minute delay.

Turn the left hand knob to the 'auto' position to complete the programming sequence, the clock now shows the time of day again with 'auto' glowing continuously.

Turn the oven thermostat on and two minutes after setting, the oven burner should commence its lighting sequence.

Two minutes after the lighting sequence has started the timer should cut off the gas supply to the oven burner and the audible signal should sound. The signal is continuous it may be switched off at any time by rotating the left hand knob.

Return timer to manual by rotating the left hand knob to the 'manual' position.

47

Page 47
Image 47
Electrolux SIG 530 installation instructions Checking the Main Oven Controls, Automatic Operation

SIG 530 specifications

The Electrolux SIG 530 is a cutting-edge kitchen appliance designed to elevate culinary experiences for home chefs and cooking enthusiasts alike. This product line showcases Electrolux's commitment to merging functional design with innovative technology, making it a standout in the crowded home appliance market.

One of the key features of the Electrolux SIG 530 is its advanced cooking technology. The appliance is equipped with Intelligent Cooking, which utilizes a sensor-based system to monitor cooking progress and adjust settings automatically. This technology ensures that meals are consistently cooked to perfection, taking the guesswork out of the cooking process. Whether you are roasting, baking, or grilling, the SIG 530 maintains optimal temperatures for desired results.

Another hallmark of the SIG 530 is its spacious and versatile cooking area. Designed to accommodate large dishes, it features a generous capacity that makes it perfect for family meals or entertaining guests. The flexible cooking zone allows for multiple dishes to be prepared simultaneously, increasing efficiency and saving valuable time.

The Electrolux SIG 530 also integrates user-friendly controls, featuring an intuitive digital interface that simplifies navigation. With easy-to-read displays and simple touch controls, users can quickly select cooking modes, set timers, and adjust temperatures with minimal effort. This focus on usability ensures that the appliance can be enjoyed by individuals of all cooking skill levels.

Additionally, the SIG 530 is designed with energy efficiency in mind. It adheres to modern standards of sustainability while providing powerful performance. The appliance reduces energy consumption without compromising quality, enabling users to save on utility bills while minimizing their environmental footprint.

Cleaning and maintenance are made hassle-free thanks to the appliance’s self-cleaning function and removable parts. This thoughtful design feature enhances convenience and helps maintain the appliance in pristine condition after every use.

With its sleek design, high-tech features, and focus on energy efficiency, the Electrolux SIG 530 is a worthy addition to any modern kitchen. Its blend of performance and practicality makes it an essential tool for achieving culinary excellence, catering to the needs of both novice cooks and seasoned chefs. This appliance is a testament to Electrolux's dedication to quality and innovation in the kitchen appliance industry.