Short-throw mount assembly
#3
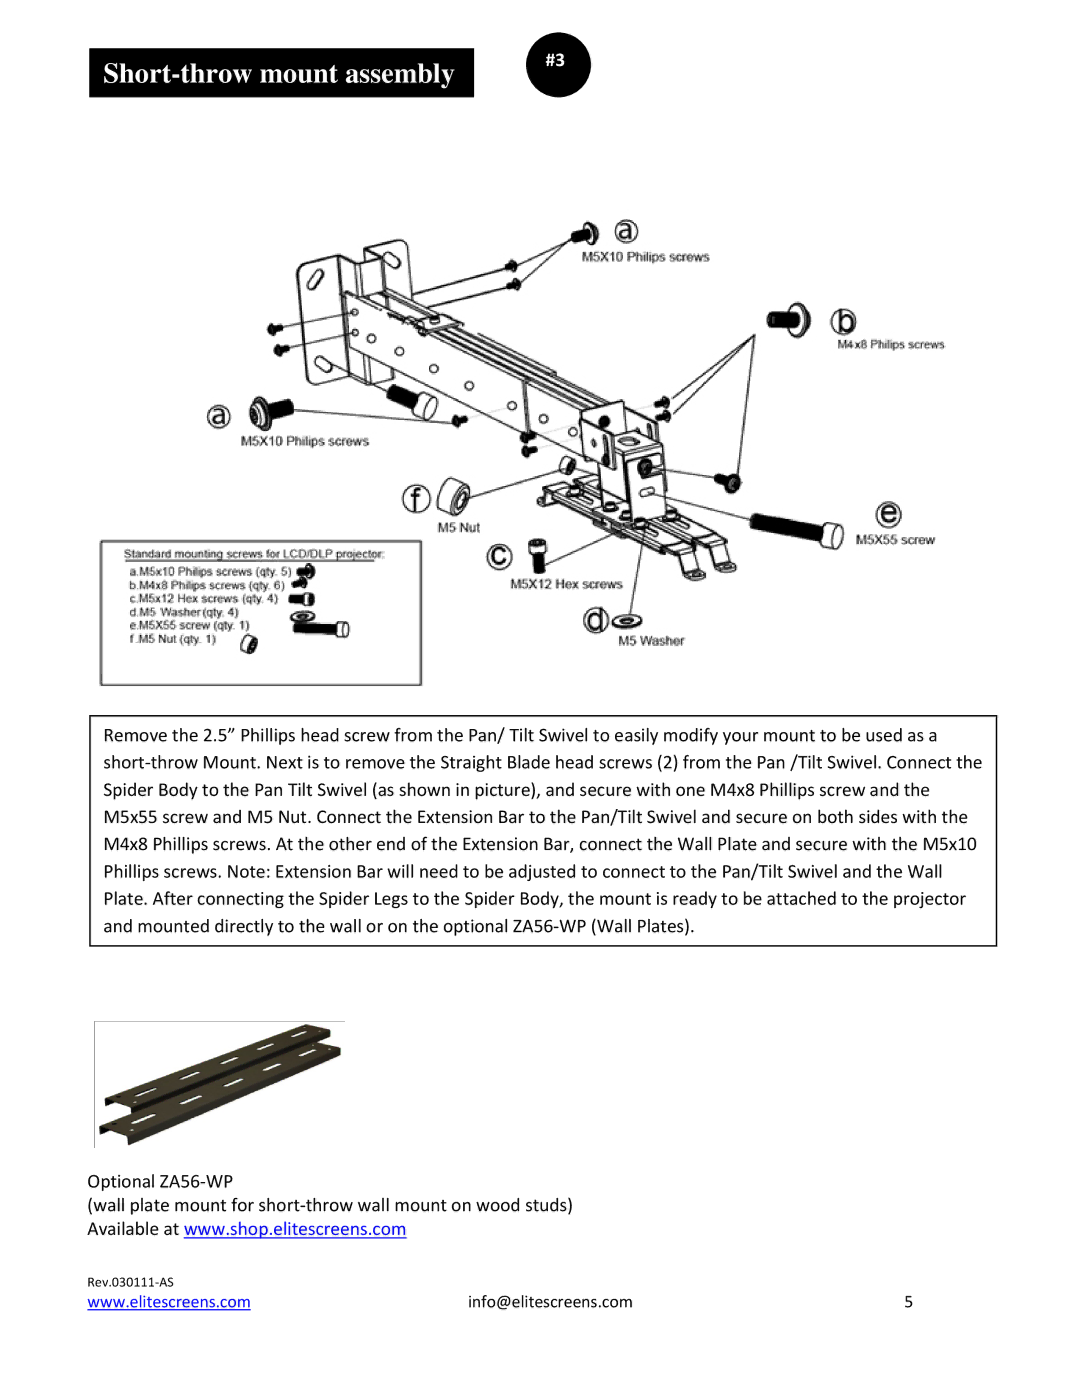
Remove the 2.5” Phillips head screw from the Pan/ Tilt Swivel to easily modify your mount to be used as a short‐throw Mount. Next is to remove the Straight Blade head screws (2) from the Pan /Tilt Swivel. Connect the Spider Body to the Pan Tilt Swivel (as shown in picture), and secure with one M4x8 Phillips screw and the M5x55 screw and M5 Nut. Connect the Extension Bar to the Pan/Tilt Swivel and secure on both sides with the M4x8 Phillips screws. At the other end of the Extension Bar, connect the Wall Plate and secure with the M5x10 Phillips screws. Note: Extension Bar will need to be adjusted to connect to the Pan/Tilt Swivel and the Wall Plate. After connecting the Spider Legs to the Spider Body, the mount is ready to be attached to the projector and mounted directly to the wall or on the optional ZA56‐WP (Wall Plates).
Optional ZA56‐WP
(wall plate mount for short‐throw wall mount on wood studs) Available at www.shop.elitescreens.com
Rev.030111‐AS |
|
|
www.elitescreens.com | info@elitescreens.com | 5 |