Enameling on Metal
Preparing the Copper
Enamels come in transparent or opaque. They can be purchased directly from Thompson Enamel, P.O. Box 310, Newport, Kentucky 41072. Their Lead Free Enamels come ready to use. No enamel washing is required for these enam- els.
Start with one of the many
1Heat the copper on an enameling rack to about 1400°F/760°C to burn off oil or grease. Heat the copper to just until smoke from oil or grease stops coming off the metal and its color has changed to a
2After the copper cools, brush any loose scale from the copper. Use a brush or paper towel, being sure that you do not put any grease or oil onto the copper,
such as fingerprints. Clean the copper with a 3M
It is best to clean the copper just before you decorate it. If you wait too long to decorate after cleaning, the copper could get dirty again.
Decorating the Copper
Counter Enameling
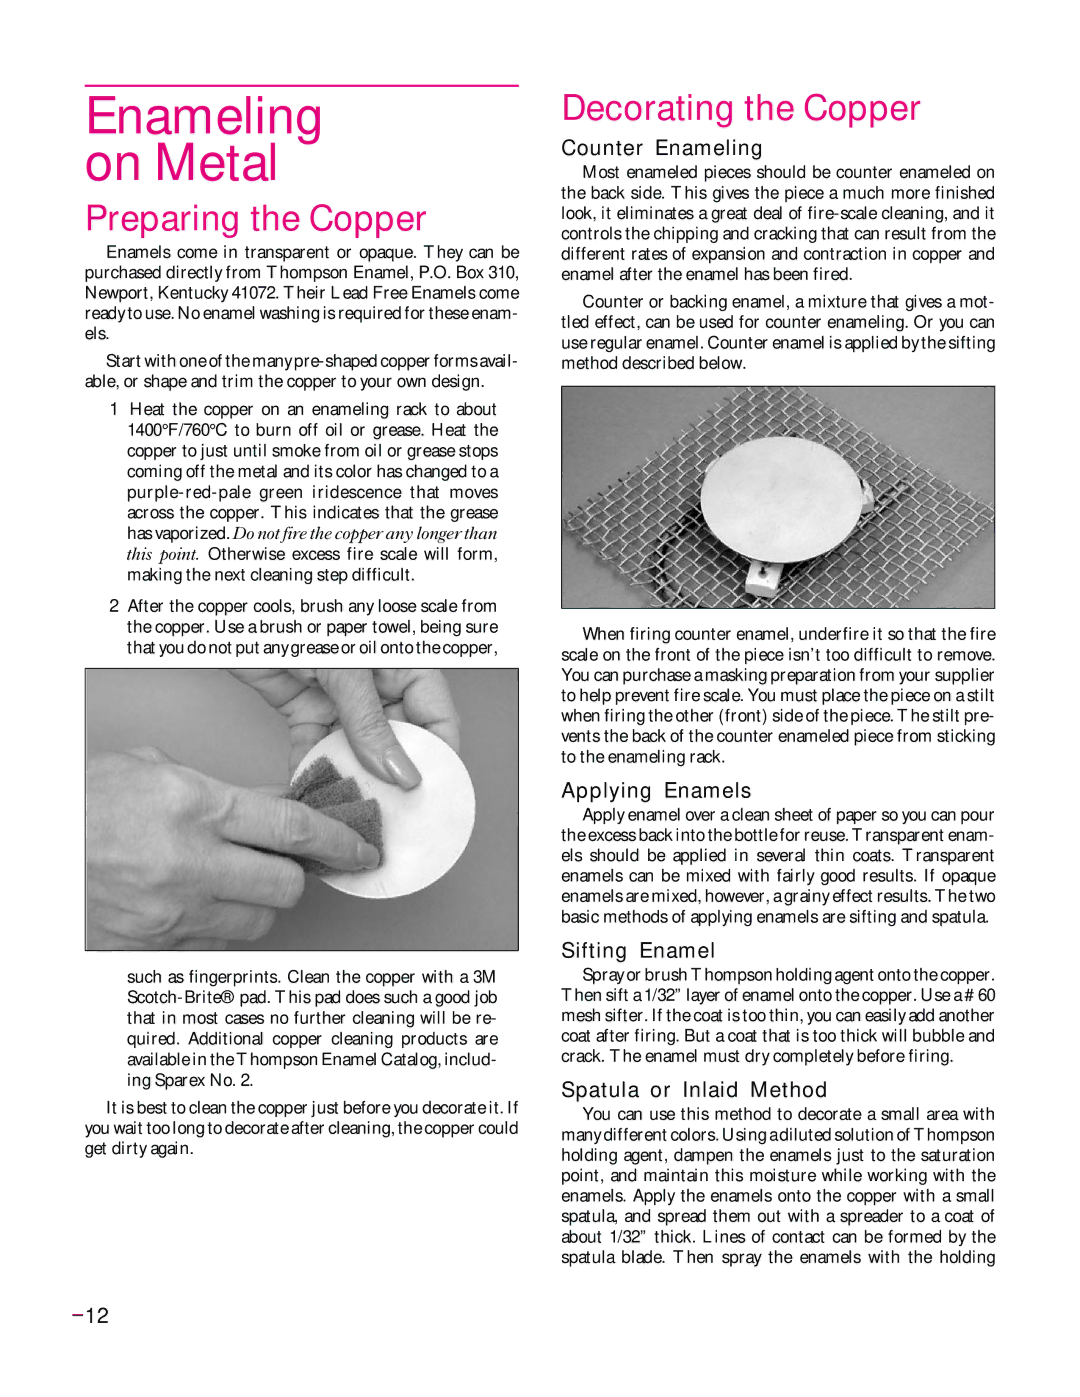
Most enameled pieces should be counter enameled on the back side. This gives the piece a much more finished look, it eliminates a great deal of
Counter or backing enamel, a mixture that gives a mot- tled effect, can be used for counter enameling. Or you can use regular enamel. Counter enamel is applied by the sifting method described below.
When firing counter enamel, underfire it so that the fire scale on the front of the piece isn’t too difficult to remove. You can purchase a masking preparation from your supplier to help prevent fire scale. You must place the piece on a stilt when firing the other (front) side of the piece. The stilt pre- vents the back of the counter enameled piece from sticking to the enameling rack.
Applying Enamels
Apply enamel over a clean sheet of paper so you can pour the excess back into the bottle for reuse. Transparent enam- els should be applied in several thin coats. Transparent enamels can be mixed with fairly good results. If opaque enamels are mixed, however, a grainy effect results. The two basic methods of applying enamels are sifting and spatula.
Sifting Enamel
Spray or brush Thompson holding agent onto the copper. Then sift a 1/32” layer of enamel onto the copper. Use a #60 mesh sifter. If the coat is too thin, you can easily add another coat after firing. But a coat that is too thick will bubble and crack. The enamel must dry completely before firing.
Spatula or Inlaid Method
You can use this method to decorate a small area with many different colors. Using a diluted solution of Thompson holding agent, dampen the enamels just to the saturation point, and maintain this moisture while working with the enamels. Apply the enamels onto the copper with a small spatula, and spread them out with a spreader to a coat of about 1/32” thick. Lines of contact can be formed by the spatula blade. Then spray the enamels with the holding
12