HV-3000XG specifications
The Elmo HV-3000XG is a sophisticated high-definition document camera designed for educational and professional environments. Renowned for its reliability and versatility, this device enhances presentations, lectures, and discussions with seamless integration of visual content.One of the key features of the HV-3000XG is its impressive 1080p HD resolution, which allows users to capture and display documents, 3D objects, and digital images in stunning clarity. This high resolution ensures that even the finest details are visible, making it an ideal tool for art presentations, science demonstrations, and technical training.
The HV-3000XG is equipped with a powerful zoom functionality, achieving up to 12x optical zoom and 8x digital zoom. This enables users to focus in on specific areas of a document or object, making it perfect for annotating or highlighting important information during a presentation. This feature is particularly beneficial in classroom settings where detailed analysis is crucial.
Another impressive characteristic is its built-in LED lighting, which provides optimal illumination for both transparent and opaque materials. This ensures that images captured in various lighting conditions remain clear and easy to see. The lighting is adjustable, allowing users to tailor the brightness according to their needs.
Furthermore, the HV-3000XG is equipped with intuitive controls and a user-friendly interface, making it accessible for users of all skill levels. The camera includes a variety of connection options, including HDMI and USB interfaces. This allows for easy connectivity to projectors, monitors, and computers, facilitating a quick setup.
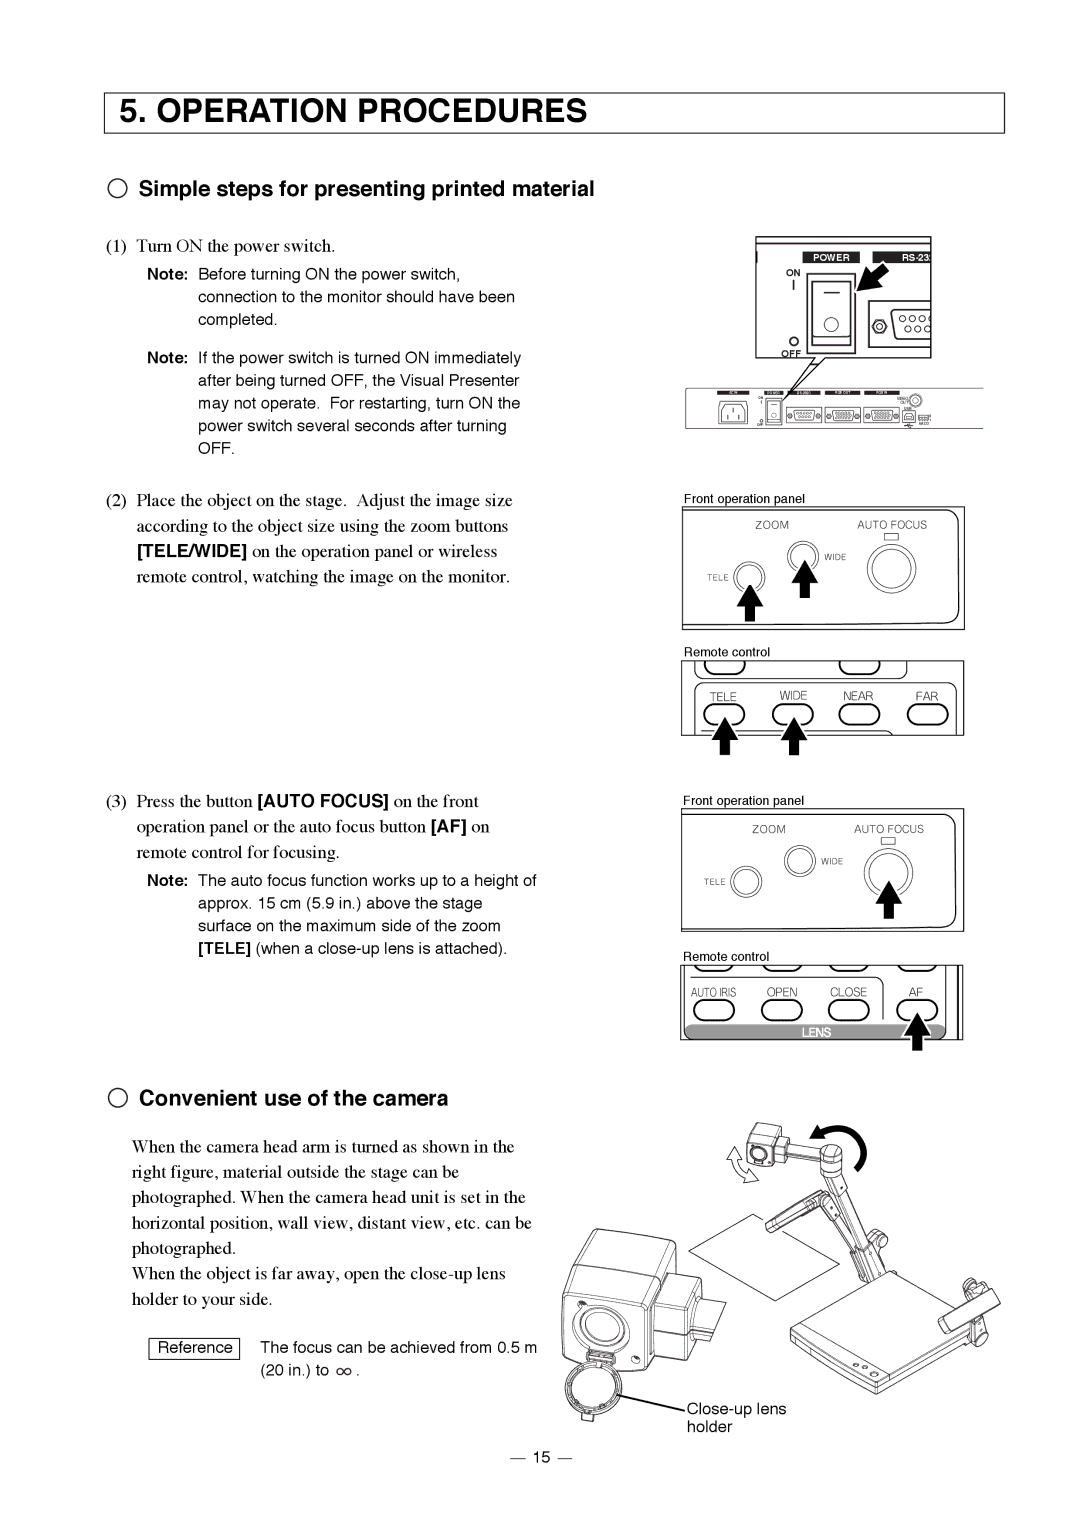
Additionally, the Elmo HV-3000XG features a flexible arm that allows for 360-degree positioning, enabling users to easily switch between different viewpoints and angles. Its compact design makes it portable and straightforward to store when not in use.
In terms of technology, the HV-3000XG employs advanced sensor technology that enhances image quality and reduces noise, ensuring that visuals are sharp and distraction-free.
Overall, the Elmo HV-3000XG stands out in the education technology market with its combination of advanced features, ease of use, and exceptional imaging capabilities, making it an indispensable tool for educators, trainers, and presenters alike.