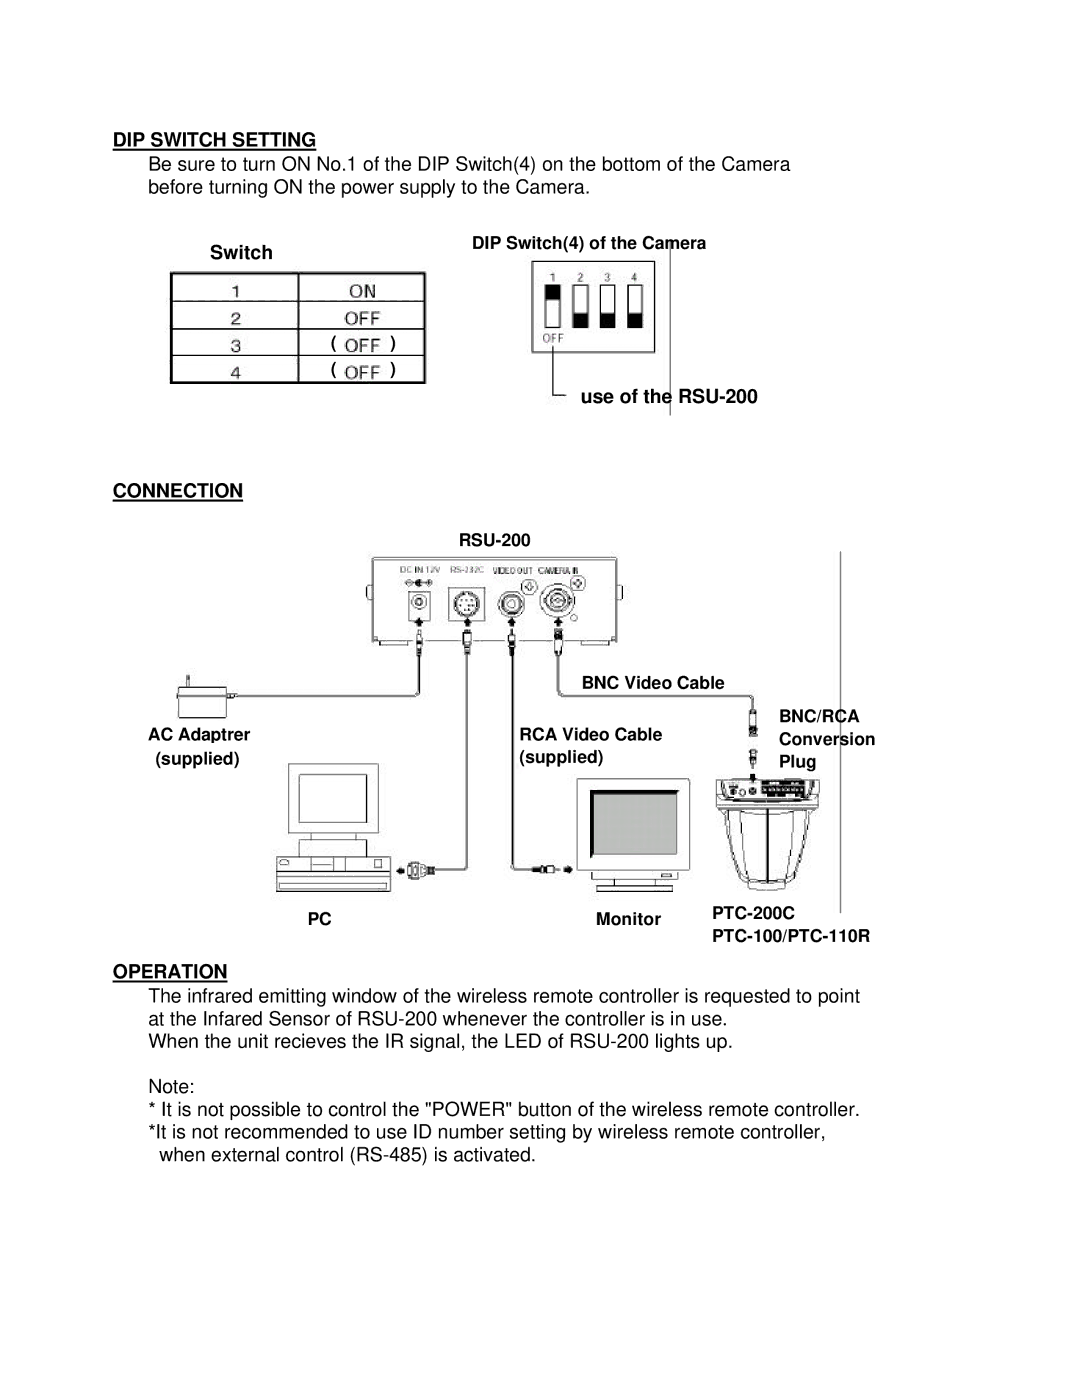
RSU-200 specifications
The Elmo RSU-200 is an advanced remote surveillance unit designed to meet the growing needs of safety and security in various environments. Boasting a compact form factor, this rugged unit is suitable for both indoor and outdoor use, ensuring durability in any setting. The RSU-200 is equipped with high-definition video capabilities, allowing users to monitor situations in real-time with exceptional clarity.One of the standout features of the Elmo RSU-200 is its integrated 4G LTE connectivity. This allows for seamless data transmission, providing users with the ability to access live video feeds and recorded footage from remote locations. The unit supports multiple connectivity options, including Wi-Fi and Ethernet, ensuring flexibility depending on the deployment environment.
The RSU-200 is equipped with a powerful pan-tilt-zoom (PTZ) camera, offering expansive coverage with the ability to rotate and tilt for comprehensive surveillance. With a 30x optical zoom capability, users can capture detailed images from great distances, making it an excellent choice for monitoring large areas such as parking lots, public venues, and construction sites. Additionally, the low-light performance of the camera ensures that monitoring can continue even in challenging lighting conditions.
The unit incorporates advanced motion detection technology, which can trigger alerts and record video upon detecting movement, making it an invaluable asset for security personnel. Coupled with the ability to set customizable motion zones, users can focus surveillance efforts on specific areas of interest.
Another significant characteristic of the RSU-200 is its user-friendly interface. The unit can be easily managed through Elmo's intuitive software, which allows for straightforward configuration and operation, making it accessible for users of varying technical skill levels.
The RSU-200 is designed with data security in mind, featuring encryption protocols to protect sensitive information. Furthermore, it is compatible with various video management systems, allowing for integration into existing security infrastructures.
With its combination of portability, versatility, and state-of-the-art technology, the Elmo RSU-200 is an ideal solution for businesses seeking to enhance their surveillance capabilities while ensuring safety and security across their operations. Whether used in urban environments, construction sites, or events, the RSU-200 stands out as a formidable tool in the realm of remote surveillance.

