
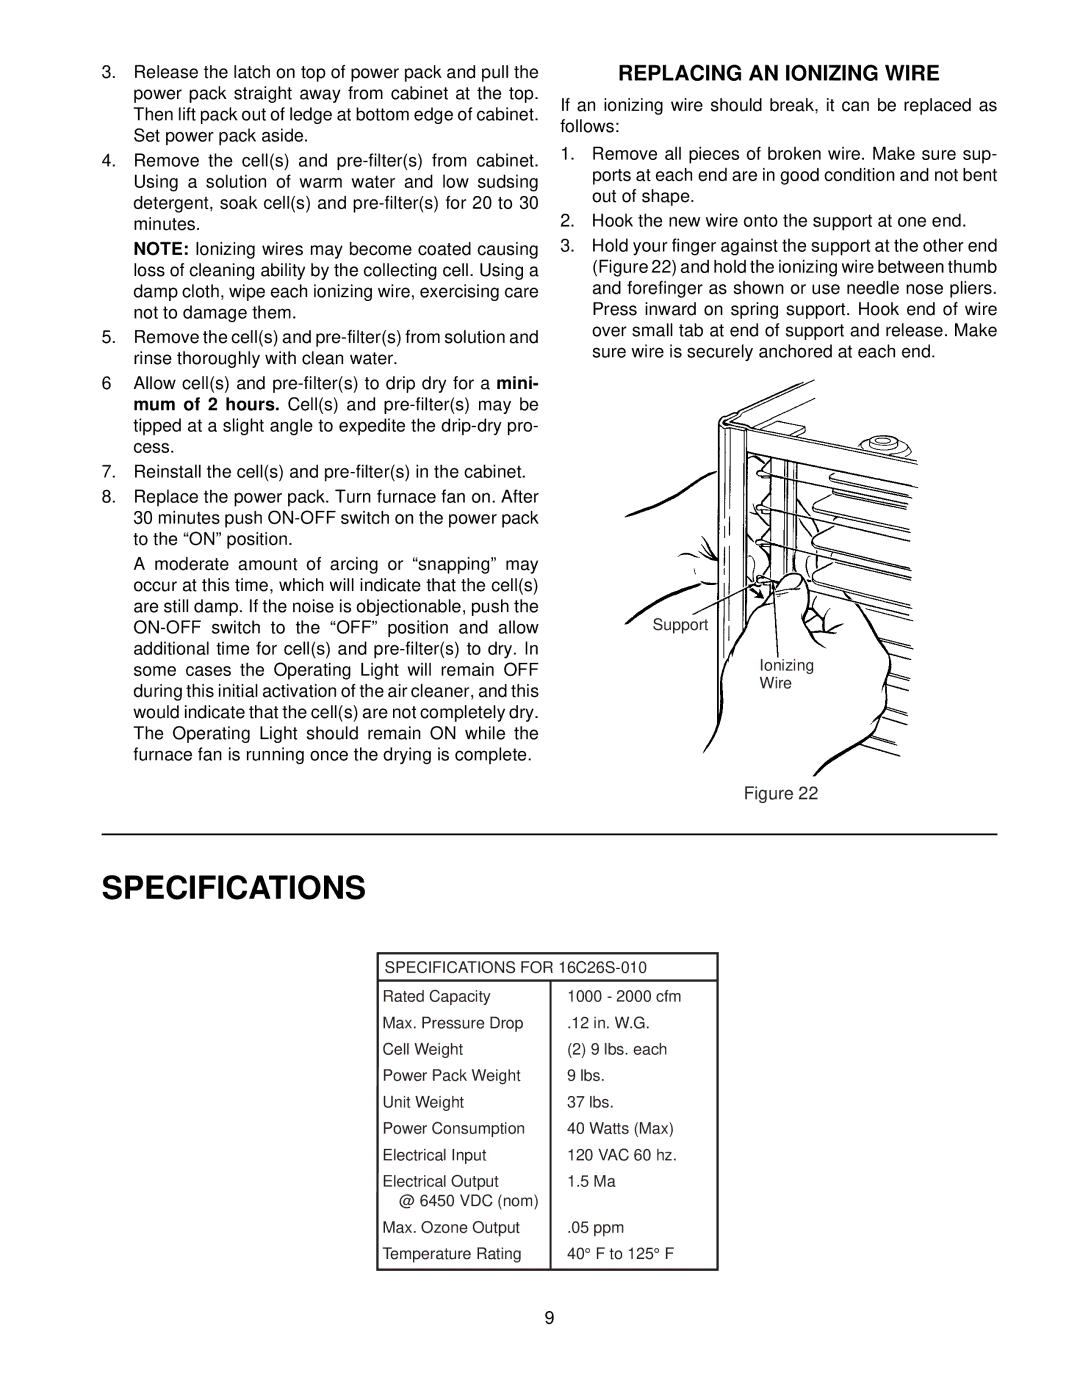
16C26S-010 specifications
The Emerson 16C26S-010 is a versatile and innovative control solution that has been designed to meet the rigorous demands of various industrial applications. As part of Emerson's extensive offerings, this device serves as a powerful tool for automation and process control, providing enhance functionality and seamless integration with existing systems.One of the main features of the Emerson 16C26S-010 is its advanced control algorithms. These algorithms enable the device to achieve precise and stable control of processes, ensuring optimal performance. The built-in PID control capability further enhances its effectiveness, allowing users to customize control parameters to suit their specific requirements. This adaptability makes the 16C26S-010 an ideal choice for a variety of applications, including temperature regulation, flow control, and pressure management.
Another notable characteristic of the Emerson 16C26S-010 is its user-friendly design. The device comes equipped with an intuitive interface and easy-to-navigate menus that simplify the setup process. This interface allows users to quickly program and adjust settings, facilitating faster response times and reduced downtime. Additionally, the robust construction of the unit ensures durability and reliability in demanding environments, making it suitable for both indoor and outdoor use.
Connectivity is a key feature of the Emerson 16C26S-010. The device supports various communication protocols, including Modbus and Ethernet, enabling seamless integration with other devices and systems. This connectivity allows for real-time monitoring and control, fostering improved decision-making and operational efficiency.
Moreover, the Emerson 16C26S-010 is designed with energy efficiency in mind. Its intelligent control strategies help minimize energy consumption, leading to cost savings and a reduced environmental footprint. This focus on sustainability aligns with modern industry trends that prioritize environmentally responsible practices.
In summary, the Emerson 16C26S-010 stands out as an exceptional control solution characterized by its advanced algorithms, user-friendly interface, robust construction, extensive connectivity options, and energy efficiency. These features make it a valuable asset for any industrial automation application, ensuring reliability and performance while meeting the evolving needs of the market.