PROGRAM NUMBER 4
ONCE DAILY WEEKLY
INDEX SEARCH
03
TIME SEARCH
2 : 50

INDEX SEARCH

The index signal is recorded on the tape automatically when the recording is started. If you want to view a recording at a specific start point, it can easily be done.

1 Press [SEARCH MODE] so that the Index Search menu appears.

2 Enter your desired number by pressing [PLAY] or [STOP] within 30 seconds.

3 Press [F.FWD] or [REW] to start index search. If you want to go in the forward direction, press [F.FWD]. If you want to go in the reverse direction, press [REW].

After index search, the VCR will play the tape automatically.

TIME SEARCH

This feature allows you to fast forward or rewind the tape for a desired length of time.

1 Press [SEARCH MODE] so that the Time Search menu appears.

2 Enter your desired time to skip by pressing [PLAY] or [STOP] within 30 seconds.

3 Press [F.FWD] or [REW] to start time search. If you want to go in the forward direction, press [F.FWD]. If you want to go in the reverse direction, press [REW].

After time search, the VCR will play the tape automatically.

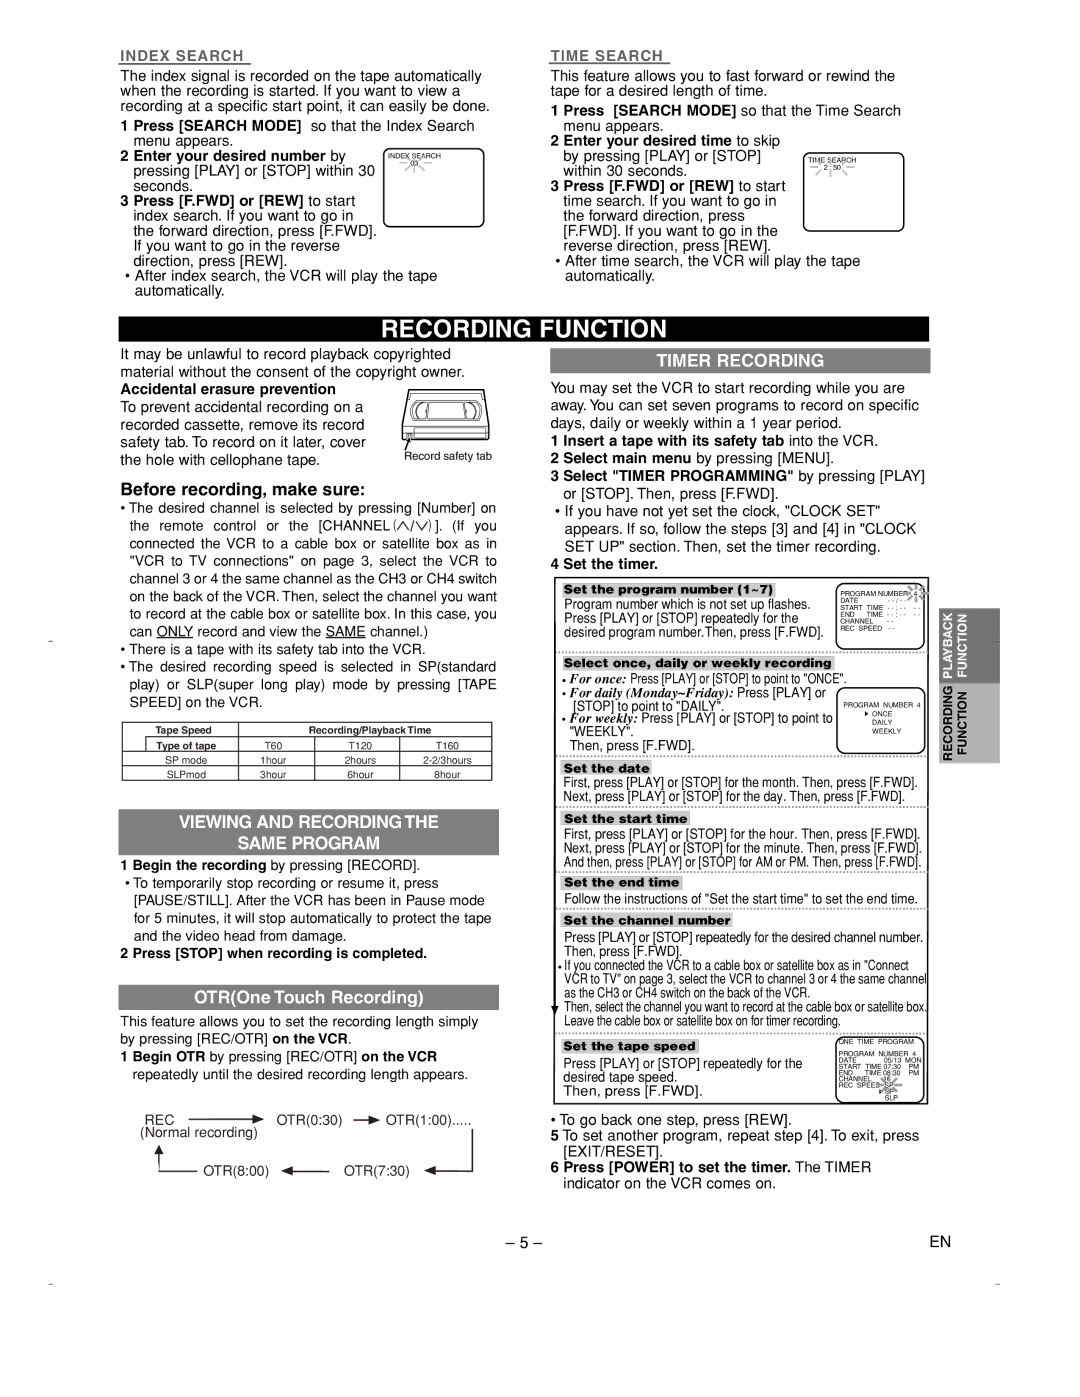
RECORDING FUNCTION

It may be unlawful to record playback copyrighted material without the consent of the copyright owner.

Accidental erasure prevention


To prevent accidental recording on a


recorded cassette, remove its record


safety tab. To record on it later, cover

Record safety tab

the hole with cellophane tape.

Before recording, make sure:

The desired channel is selected by pressing [Number] on

the remote control or the [CHANNEL () ]. (If you connected the VCR to a cable box or satellite box as in "VCR to TV connections" on page 3, select the VCR to channel 3 or 4 the same channel as the CH3 or CH4 switch on the back of the VCR. Then, select the channel you want to record at the cable box or satellite box. In this case, you can ONLY record and view the SAME channel.)

There is a tape with its safety tab into the VCR.

The desired recording speed is selected in SP(standard play) or SLP(super long play) mode by pressing [TAPE SPEED] on the VCR.


Tape Speed


Recording/Playback Time


Type of tape

T60


T120

T160


SP mode

1hour


2hours

2-2/3hours


SLPmod

3hour


6hour

8hour

VIEWING AND RECORDING THE

SAME PROGRAM

1 Begin the recording by pressing [RECORD].

To temporarily stop recording or resume it, press [PAUSE/STILL]. After the VCR has been in Pause mode for 5 minutes, it will stop automatically to protect the tape and the video head from damage.

2 Press [STOP] when recording is completed.

OTR(One Touch Recording)

This feature allows you to set the recording length simply by pressing [REC/OTR] on the VCR.

1 Begin OTR by pressing [REC/OTR] on the VCR repeatedly until the desired recording length appears.

REC

OTR(0:30)

OTR(1:00)

(Normal recording)


OTR(8:00)


OTR(7:30)

TIMER RECORDING

You may set the VCR to start recording while you are away. You can set seven programs to record on specific days, daily or weekly within a 1 year period.

1 Insert a tape with its safety tab into the VCR.

2 Select main menu by pressing [MENU].

3 Select "TIMER PROGRAMMING" by pressing [PLAY]

or [STOP]. Then, press [F.FWD].

If you have not yet set the clock, "CLOCK SET" appears. If so, follow the steps [3] and [4] in "CLOCK SET UP" section. Then, set the timer recording.

4 Set the timer.

Set the program number (1~7)


PROGRAM NUMBER

4

Program number which is not set up flashes.

DATE

- - / - -


START TIME - - : - -

- -

Press [PLAY] or [STOP] repeatedly for the

END TIME - - : - -

- -

CHANNEL

- -


desired program number.Then, press [F.FWD].

REC SPEED

- -


Select once, daily or weekly recording

For once: Press [PLAY] or [STOP] to point to "ONCE".

For daily (Monday~Friday): Press [PLAY] or

[STOP] to point to "DAILY".

For weekly: Press [PLAY] or [STOP] to point to "WEEKLY".

Then, press [F.FWD].

Set the date

First, press [PLAY] or [STOP] for the month. Then, press [F.FWD]. Next, press [PLAY] or [STOP] for the day. Then, press [F.FWD].

Set the start time

First, press [PLAY] or [STOP] for the hour. Then, press [F.FWD]. Next, press [PLAY] or [STOP] for the minute. Then, press [F.FWD]. And then, press [PLAY] or [STOP] for AM or PM. Then, press [F.FWD].

Set the end time

Follow the instructions of "Set the start time" to set the end time.

Set the channel number

Press [PLAY] or [STOP] repeatedly for the desired channel number. Then, press [F.FWD].

If you connected the VCR to a cable box or satellite box as in "Connect VCR to TV" on page 3, select the VCR to channel 3 or 4 the same channel as the CH3 or CH4 switch on the back of the VCR.

Then, select the channel you want to record at the cable box or satellite box. Leave the cable box or satellite box on for timer recording.

Set the tape speed


ONE TIME PROGRAM


PROGRAM NUMBER 4

Press [PLAY] or [STOP] repeatedly for the

DATE

05/13 MON

START TIME 07:30

PM

desired tape speed.

END TIME 08:30

PM

CHANNEL

16


Then, press [F.FWD].

REC SPEED SP


SP


SLP


To go back one step, press [REW].

5 To set another program, repeat step [4]. To exit, press [EXIT/RESET].

6 Press [POWER] to set the timer. The TIMER

indicator on the VCR comes on.

PLAYBACK

FUNCTION

RECORDING

FUNCTION

– 5 –

EN

Page 5
Image 5
Emerson EWV401A Recording Function, Before recording, make sure, Viewing and Recording Same Program, Timer Recording

EWV401A specifications

The Emerson EWV401A is a versatile and advanced electronic water valve designed to facilitate precise water flow management in various applications. This model is particularly favored in industries such as residential water management, irrigation systems, and commercial plumbing due to its reliability, efficiency, and user-friendly features.

One of the standout features of the EWV401A is its intelligent control mechanism, which allows for remote operation. This is achieved through the utilization of IoT technology, enabling users to monitor and manage water flow directly from their smartphones or computers. This capability not only enhances convenience but also aids in efficient water conservation by allowing users to adjust settings in real-time.

The EWV401A is engineered with durable materials that ensure a long lifespan, resisting wear and tear in demanding environments. Its robust construction provides resistance against harsh weather conditions, making it ideal for outdoor applications. Moreover, the valve is rated for high pressure and can handle significant water flow, which makes it suitable for both residential and commercial use.

Another key characteristic of the Emerson EWV401A is its ease of installation. The unit comes with comprehensive instructions and all necessary hardware, allowing for quick setup without requiring specialized tools or expertise. This user-centric design not only saves time but also reduces installation costs.

Advanced sensor technology is integrated within the EWV401A, which provides real-time feedback on flow rates, pressure, and valve status. Users can easily access this data, helping them make informed decisions regarding water usage and maintenance needs. The valveā€™s seamless integration with existing home automation systems further amplifies its appeal.

The device also features a fail-safe mechanism, ensuring that in the event of power loss or a communication breakdown, the valve will default to a closed position to prevent any unwanted water leakage. This characteristic underscores its reliability in crucial applications.

In summary, the Emerson EWV401A is a state-of-the-art electronic water valve that combines advanced technology, robust construction, and user-friendly features. Its intelligent control, durability, ease of installation, and safety mechanisms make it a top choice for anyone seeking to optimize their water management solutions. Whether for residential or commercial applications, the EWV401A promises efficiency and reliability in water flow control.