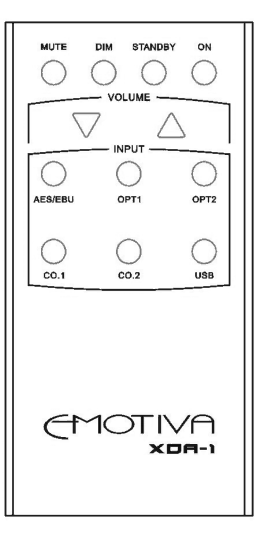
XDA-1 Remote
The
Power Buttons
ON Button
Discrete button to turn the
STANDBY Button
Discrete button to put the
Volume Controls
Applies continuous increase (UP) or decrease (DOWN) in volume levels while buttons are held down.
Input Selection Buttons
These discrete buttons select the various source inputs of the
•AES/EBU - selects AES/EBU input as source
•OPT1 - selects OPT1 input as source
•OPT2 - selects OPT2 input as source
•CO.1 - selects CO.1 input as source
•CO.2 - selects CO.2 input as source
•USB - selects USB input as source
Dim Button
Varies the display intensity in 5 steps.
Mute Button
Mutes the sound when pressed. Press again to
Changing the Battery
The
Note: In order to minimize the potential for damage to the screws holding the back cover, use only a number 2 Phillips screwdriver!
12
