ADDITIONAL SAFETY RULES FOR WET/DRY GRINDERS
1.IF YOU ARE NOT thoroughly familiar with the opera- tion of the Wet/Dry Grinder, obtain advice from your supervisor, instructor or other qualified person.
2.MAKE SURE the wheel guards and eye shields are in place and are properly adjusted and tightened.
3.BE SURE blotter and wheel flanges are used to mount the grinding wheels onto the shaft of the grinder.
4.ADJUST distance between wheels and tool rests to maintain 1/8" or less separation as the diameter of the wheels decrease with use. Securely tighten tool rests so they cannot shift position while in use.
5.INSPECT THE WHEELS before turning on the power. REPLACE cracked or chipped wheels immediately.
6.STAND to one side of the wheel when turning on the power.
7.DRESS the wheel on the face only. Dressing on the side of the wheel would cause it to become too thin for safe use.
8.WHEN GRINDING use the face of the wheel only.
9.DO NOT use a wheel that vibrates. Dress wheel, replace the wheel, or replace the bearings of the shaft if
these are worn. Grinding creates heat; don’t touch ground portion of workpiece until you are sure workpiece has cooled.
10.HOLD work firmly against tool rests.
11.KEEP hands away from grinding wheels.
12.USE grinding wheel suitable for speed of grinder.
13.DISCONNECT machine from power source when making repairs or adjustments.
14.WARNING: The use of accessories or attachments not recommended by Delta may result in risk of injury.
15.ADDITIONAL information regarding the safe and proper operation of this product is available from the National Safety Council, 1121 Spring Lake Drive, Itasca, IL
16.SAVE THESE INSTRUCTIONS. Refer to them often and use them to instruct others.
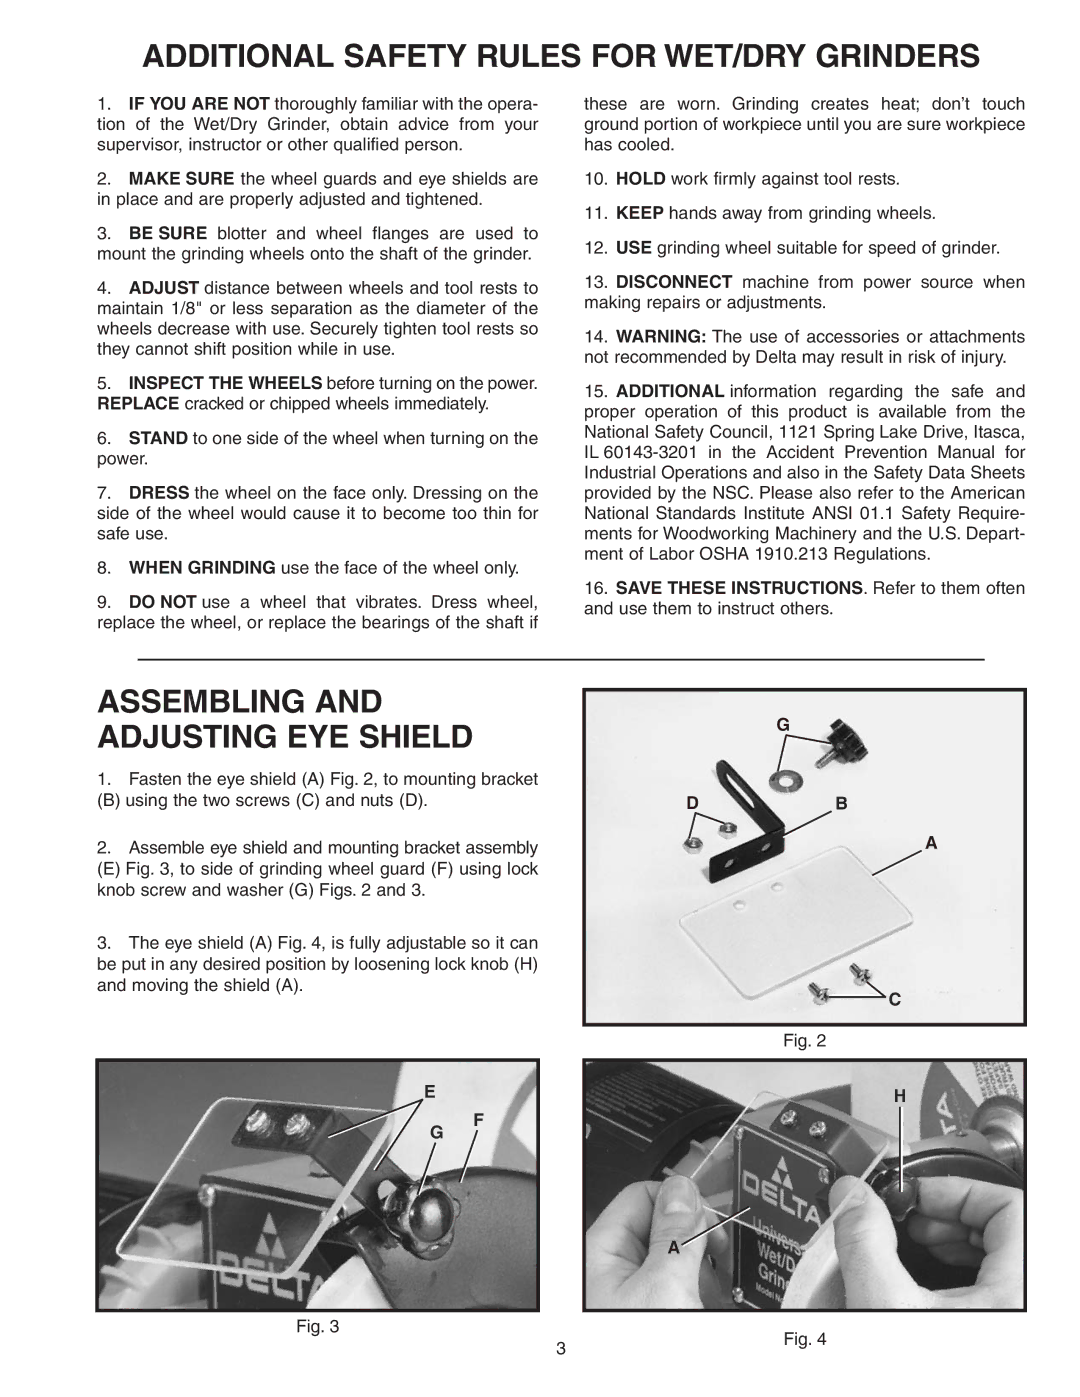
ASSEMBLING AND ADJUSTING EYE SHIELD
1.Fasten the eye shield (A) Fig. 2, to mounting bracket
(B) using the two screws (C) and nuts (D).
2.Assemble eye shield and mounting bracket assembly
(E) Fig. 3, to side of grinding wheel guard (F) using lock knob screw and washer (G) Figs. 2 and 3.
3.The eye shield (A) Fig. 4, is fully adjustable so it can be put in any desired position by loosening lock knob (H) and moving the shield (A).
G
DB
A
C
Fig. 2
E
G
Fig. 3
F
3
H
A
Fig. 4
