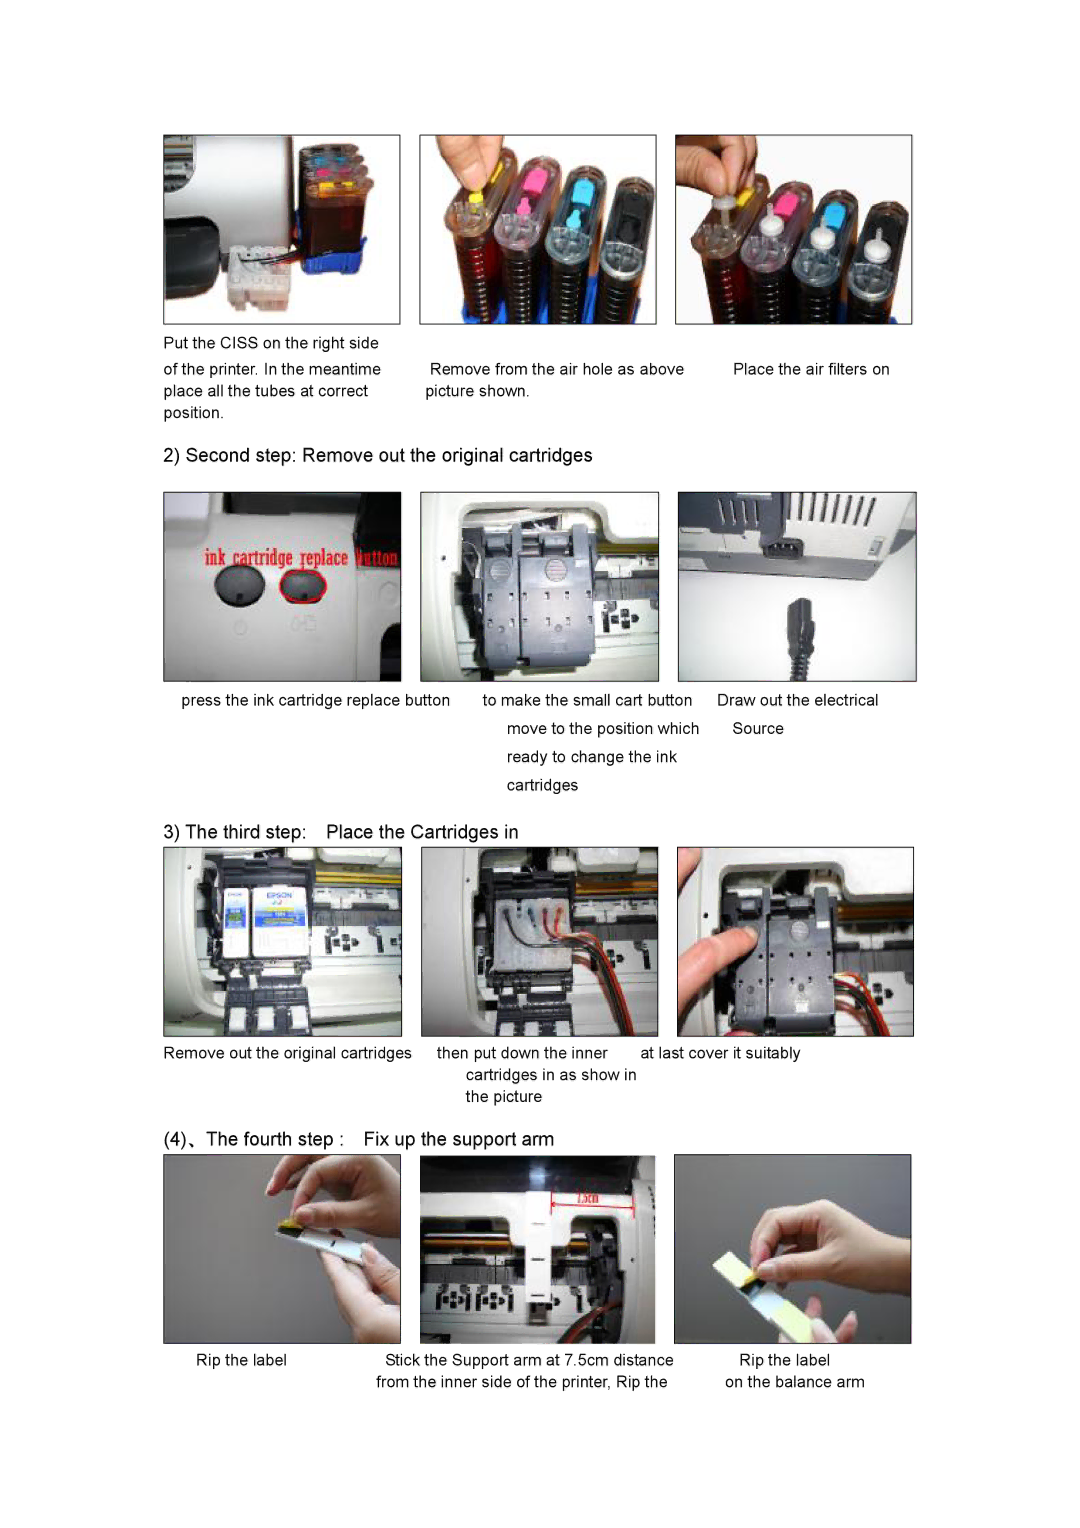
Put the CISS on the right side |
|
|
of the printer. In the meantime | Remove from the air hole as above | Place the air filters on |
place all the tubes at correct | picture shown. |
|
position. |
|
|
2) Second step: Remove out the original cartridges
press the ink cartridge replace button | to make the small cart button | Draw out the electrical |
| move to the position which | Source |
| ready to change the ink |
|
| cartridges |
|
3) The third step: Place the Cartridges in
Remove out the original cartridges then put down the inner | at last cover it suitably | ||
| cartridges in as show in |
|
|
| the picture |
|
|
(4)、The fourth step : Fix up the support arm |
|
| |
|
|
|
|
Rip the label | Stick the Support arm at 7.5cm distance | Rip the label |
| from the inner side of the printer, Rip the | on the balance arm |