Put the CISS on the left side of the printer. In the meantime place all the tubes at correct position.
Pull out the small rubber plug from the air hole as above picture shown.
Place 6pcs of air filters into air holes, the thicker side is down into tank.
2、Second step: Remove the Cartridge
ABC
1)Press the “ink cartridge replace button” (Picture A) on the printer to move the cartridge to the cartridge remove position (Picture B).
2)Unplug the power connector at the back of the printer (Pic.C)
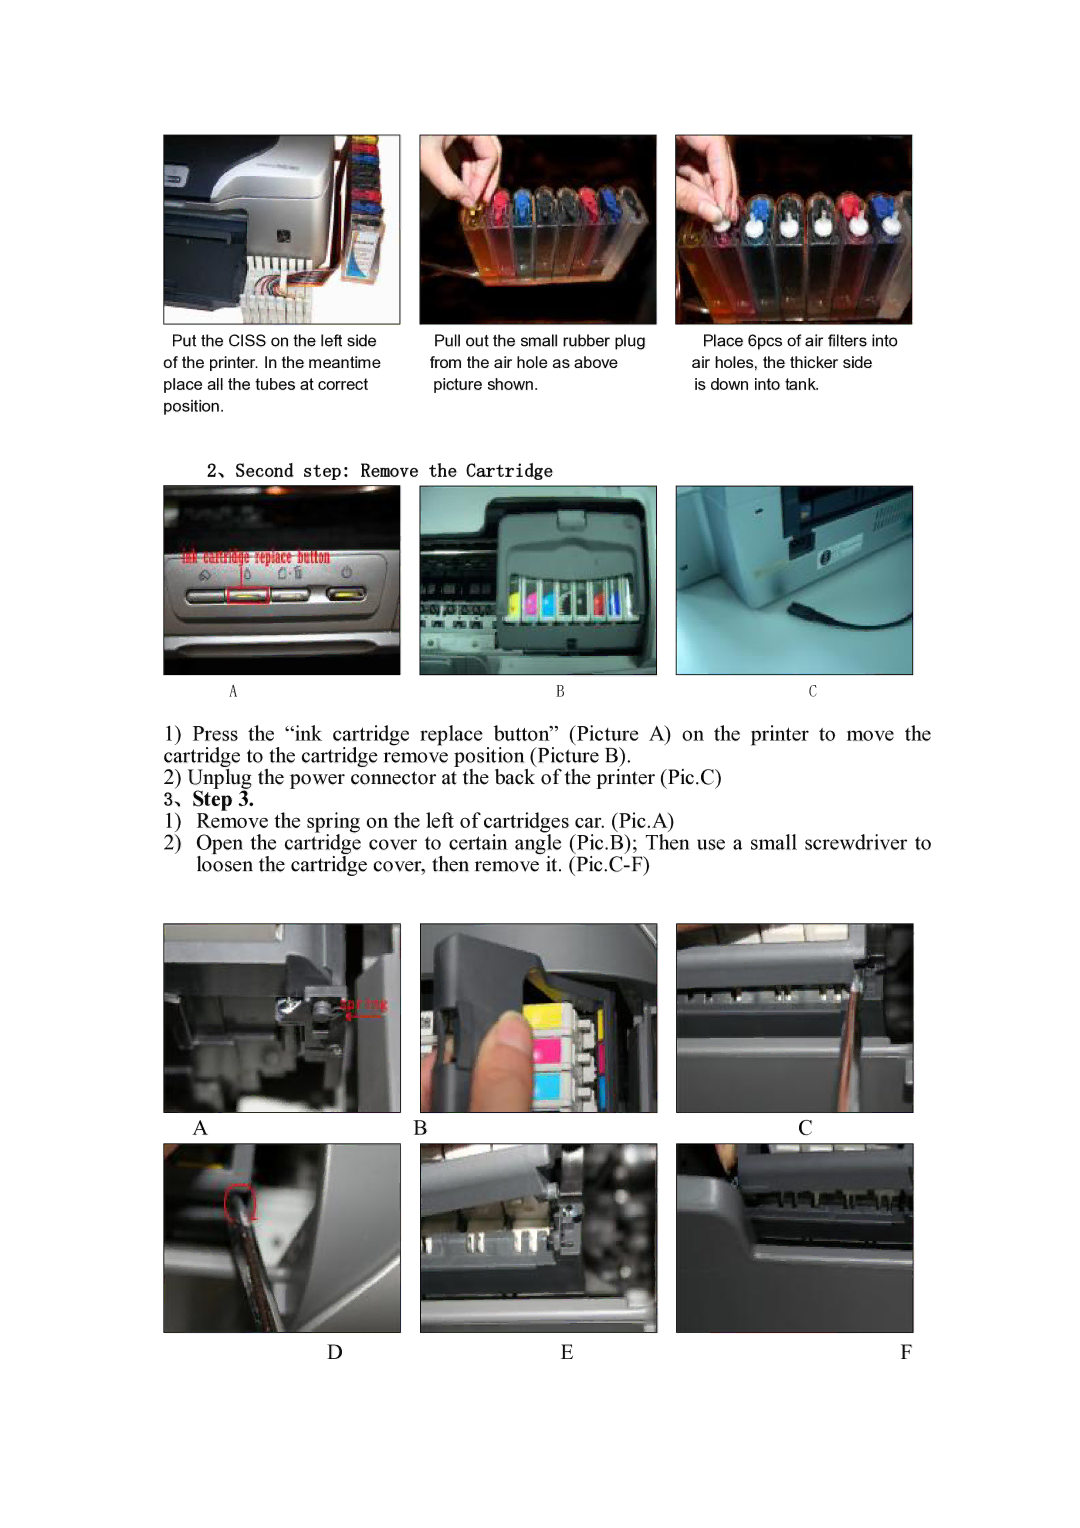
3、Step 3.
1)Remove the spring on the left of cartridges car. (Pic.A)
2)Open the cartridge cover to certain angle (Pic.B); Then use a small screwdriver to loosen the cartridge cover, then remove it.
ABC
DEF