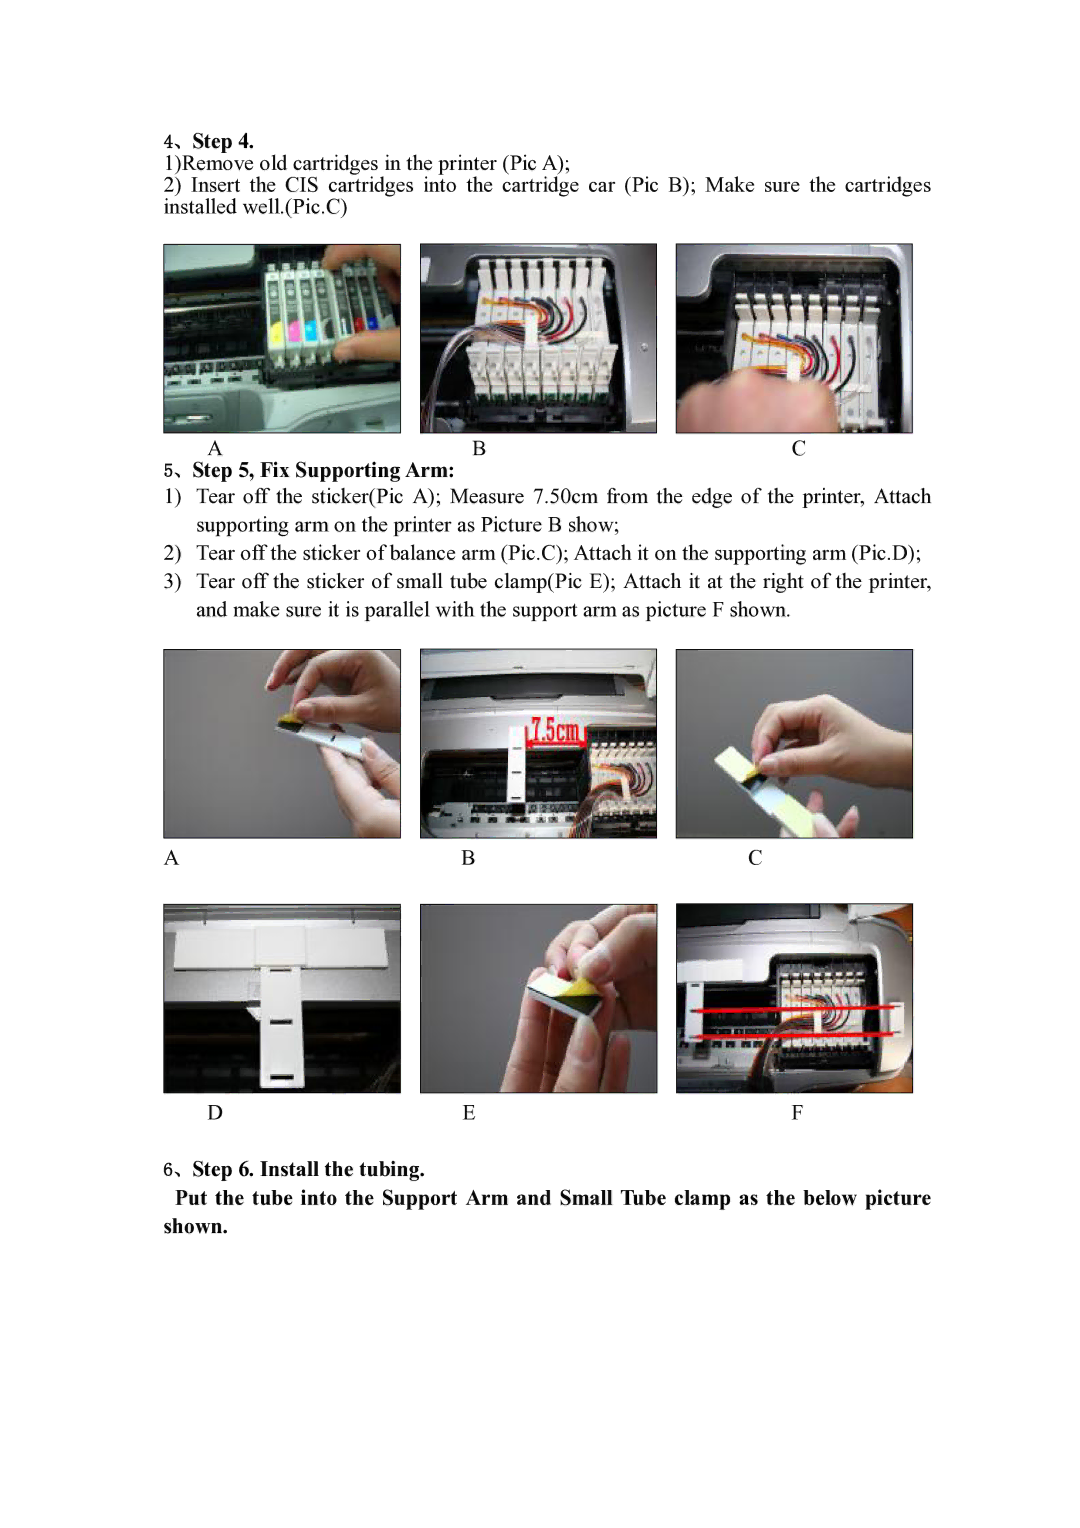
4、Step 4.
1)Remove old cartridges in the printer (Pic A);
2)Insert the CIS cartridges into the cartridge car (Pic B); Make sure the cartridges installed well.(Pic.C)
ABC
5、Step 5, Fix Supporting Arm:
1)Tear off the sticker(Pic A); Measure 7.50cm from the edge of the printer, Attach supporting arm on the printer as Picture B show;
2)Tear off the sticker of balance arm (Pic.C); Attach it on the supporting arm (Pic.D);
3)Tear off the sticker of small tube clamp(Pic E); Attach it at the right of the printer, and make sure it is parallel with the support arm as picture F shown.
ABC
DEF
6、Step 6. Install the tubing.
Put the tube into the Support Arm and Small Tube clamp as the below picture shown.