
A-02 specifications
Esoteric A-02 is a high-performance audio component that has garnered attention from audiophiles and music enthusiasts worldwide. This exquisite model, a part of Esoteric’s renowned lineup, exemplifies the brand's commitment to delivering unparalleled sound quality through innovative technology and superior craftsmanship.One of the standout features of the A-02 is its powerful amplification capabilities. This component is designed to deliver a robust output, ensuring that even the most dynamic music passages are reproduced with precision and clarity. With a power output of 100 watts per channel into 8 ohms, it offers the necessary headroom to drive a wide range of speakers, maintaining fidelity even at higher volumes.
The architecture of the A-02 employs a balanced, fully differential design that minimizes distortions and noise while providing a wider dynamic range. This attention to signal integrity is crucial in achieving the best possible auditory experience. The use of premium components, including high-grade capacitors and resistors, further enhances the unit's overall performance, making it a true powerhouse in any high-fidelity setup.
Another impressive aspect of the A-02 is its exceptional build quality. Housed in a sturdy chassis, the design is not only aesthetically pleasing but also serves to reduce vibration and interference, factors that could negatively impact sound performance. The meticulous attention to detail in its construction reflects Esoteric's dedication to quality, resulting in a unit that is both visually striking and functionally superior.
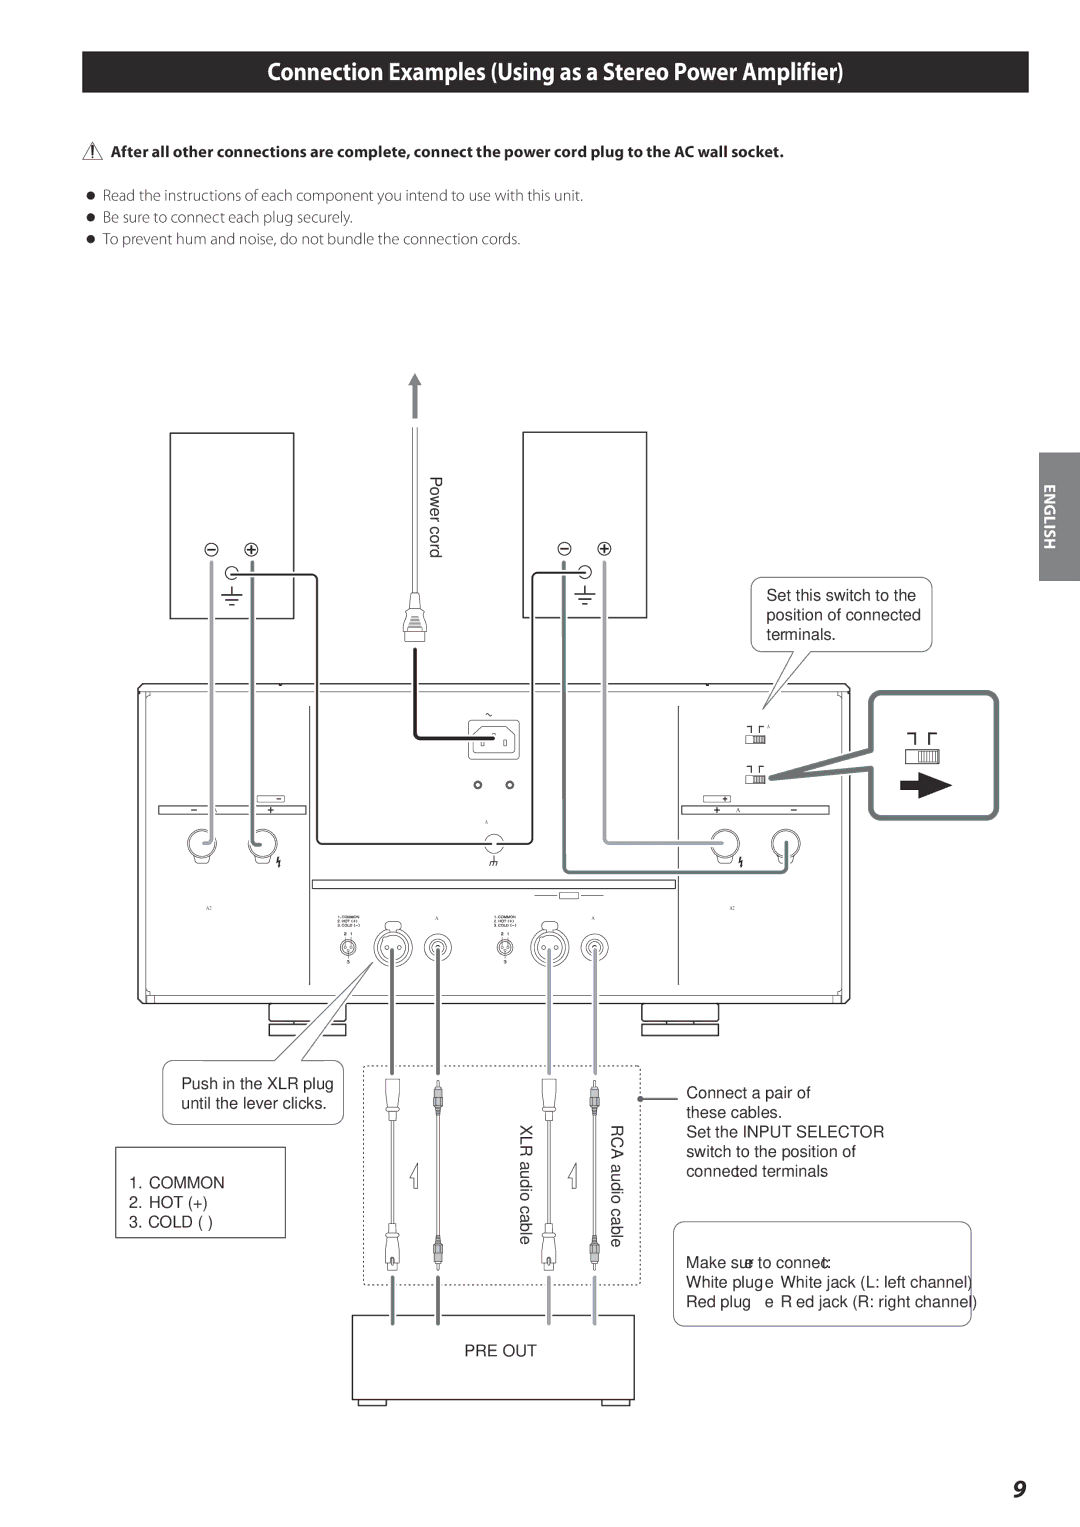
In terms of connectivity, the Esoteric A-02 offers a range of options suitable for various audio setups. It comes equipped with both XLR and RCA inputs, allowing users to integrate it seamlessly into their existing systems. This flexibility is essential for audiophiles who demand versatility in their equipment.
Ultimately, the Esoteric A-02 is a convergence of innovative technology and refined craftsmanship. Its powerful amplification, balanced design, superior build quality, and versatile connectivity options make it a standout choice for those who seek an exceptional listening experience. Whether used in a dedicated audio system or as part of a multi-channel setup, the A-02 promises to elevate the way users experience their favorite music, ensuring that every note is delivered with clarity, depth, and emotional impact.