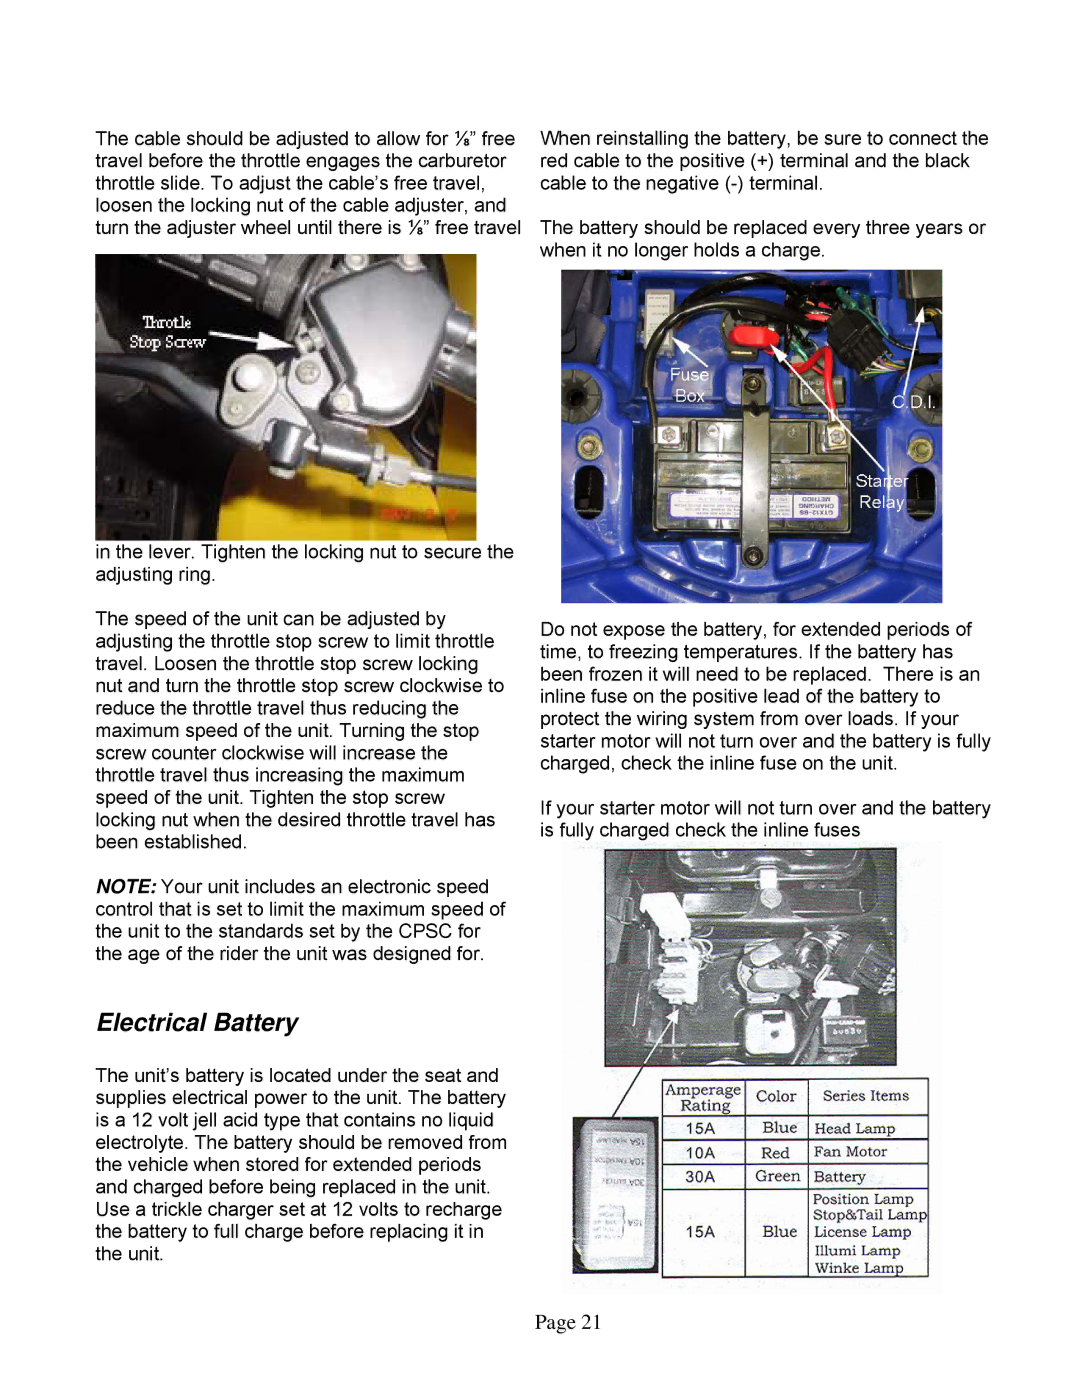
The cable should be adjusted to allow for ⅛” free travel before the throttle engages the carburetor throttle slide. To adjust the cable’s free travel, loosen the locking nut of the cable adjuster, and turn the adjuster wheel until there is ⅛” free travel
in the lever. Tighten the locking nut to secure the adjusting ring.
When reinstalling the battery, be sure to connect the red cable to the positive (+) terminal and the black cable to the negative
The battery should be replaced every three years or when it no longer holds a charge.
The speed of the unit can be adjusted by adjusting the throttle stop screw to limit throttle travel. Loosen the throttle stop screw locking nut and turn the throttle stop screw clockwise to reduce the throttle travel thus reducing the maximum speed of the unit. Turning the stop screw counter clockwise will increase the throttle travel thus increasing the maximum speed of the unit. Tighten the stop screw locking nut when the desired throttle travel has been established.
NOTE: Your unit includes an electronic speed control that is set to limit the maximum speed of the unit to the standards set by the CPSC for the age of the rider the unit was designed for.
Electrical Battery
The unit’s battery is located under the seat and supplies electrical power to the unit. The battery is a 12 volt jell acid type that contains no liquid electrolyte. The battery should be removed from the vehicle when stored for extended periods and charged before being replaced in the unit. Use a trickle charger set at 12 volts to recharge the battery to full charge before replacing it in the unit.
Do not expose the battery, for extended periods of time, to freezing temperatures. If the battery has been frozen it will need to be replaced. There is an inline fuse on the positive lead of the battery to protect the wiring system from over loads. If your starter motor will not turn over and the battery is fully charged, check the inline fuse on the unit.
If your starter motor will not turn over and the battery is fully charged check the inline fuses
Page 21
