●C
| ●G |
|
| ●D | ●I |
●F |
| ●A |
|
| |
●E | ●H | ●J |
| ||
|
| |
●B |
|
|
●C
![]() ●I
●I
●A
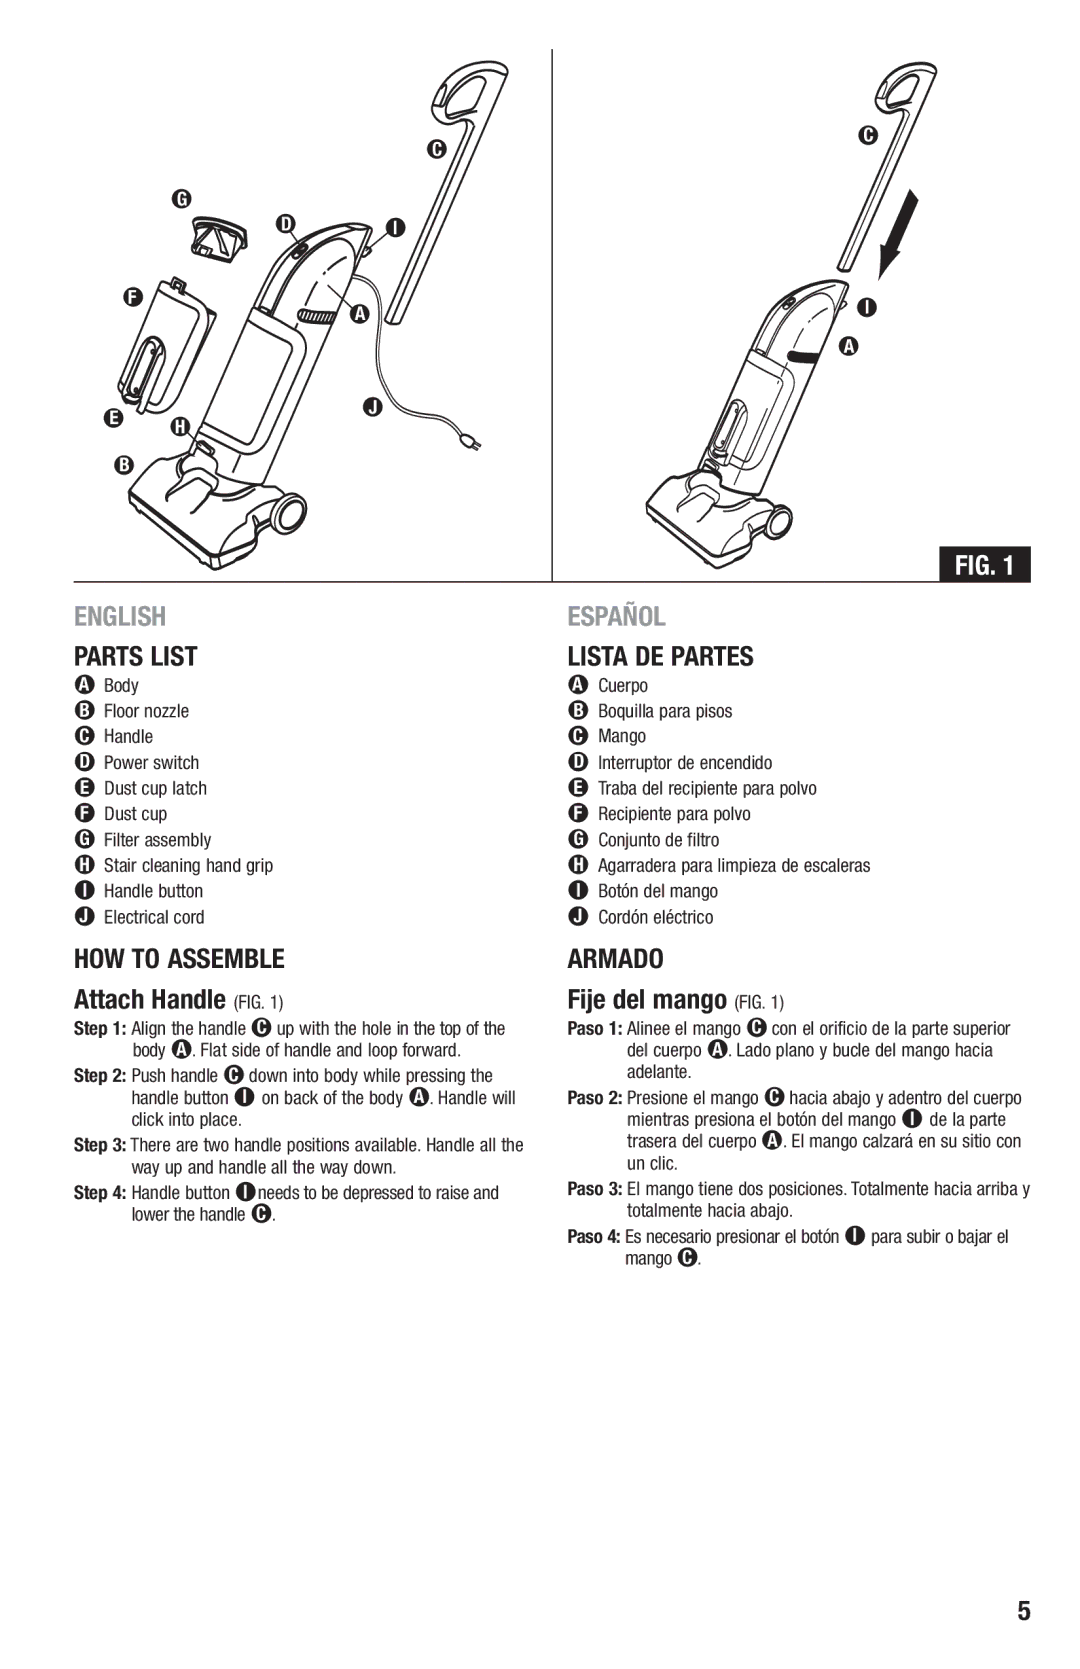
FIG. 1
ENGLISH | ESPAÑOL |
PARTS LIST | LISTA DE PARTES |
● Body | ● Cuerpo |
● Floor nozzle | ● Boquilla para pisos |
● Handle | ● Mango |
● Power switch | ● Interruptor de encendido |
● Dust cup latch | ● Traba del recipiente para polvo |
● Dust cup | ● Recipiente para polvo |
● Filter assembly | ● Conjunto de filtro |
● Stair cleaning hand grip | ● Agarradera para limpieza de escaleras |
● Handle button | ● Botón del mango |
● Electrical cord | ● Cordón eléctrico |
HOW TO ASSEMBLE
Attach Handle (FIG. 1)
Step 1: Align the handle ● up with the hole in the top of the body ●. Flat side of handle and loop forward.
Step 2: Push handle ● down into body while pressing the handle button ● on back of the body ●. Handle will click into place.
Step 3: There are two handle positions available. Handle all the way up and handle all the way down.
Step 4: Handle button ●needs to be depressed to raise and lower the handle ●.
ARMADO
Fije del mango (FIG. 1)
Paso 1: Alinee el mango ● con el orificio de la parte superior del cuerpo ●. Lado plano y bucle del mango hacia adelante.
Paso 2: Presione el mango ● hacia abajo y adentro del cuerpo mientras presiona el botón del mango ● de la parte trasera del cuerpo ●. El mango calzará en su sitio con un clic.
Paso 3: El mango tiene dos posiciones. Totalmente hacia arriba y totalmente hacia abajo.
Paso 4: Es necesario presionar el botón ● para subir o bajar el mango ●.
5
