Drop bottom of tubing through
on the sole or top plates adjacent to the tubing. See “Installation Step Six: Install the tubing” and complete tubing installation as much as possible. After the walls are finished and painted, plaster guards can be removed and inlet valves installed. The tubing system may be completed at that time and the power unit installed.
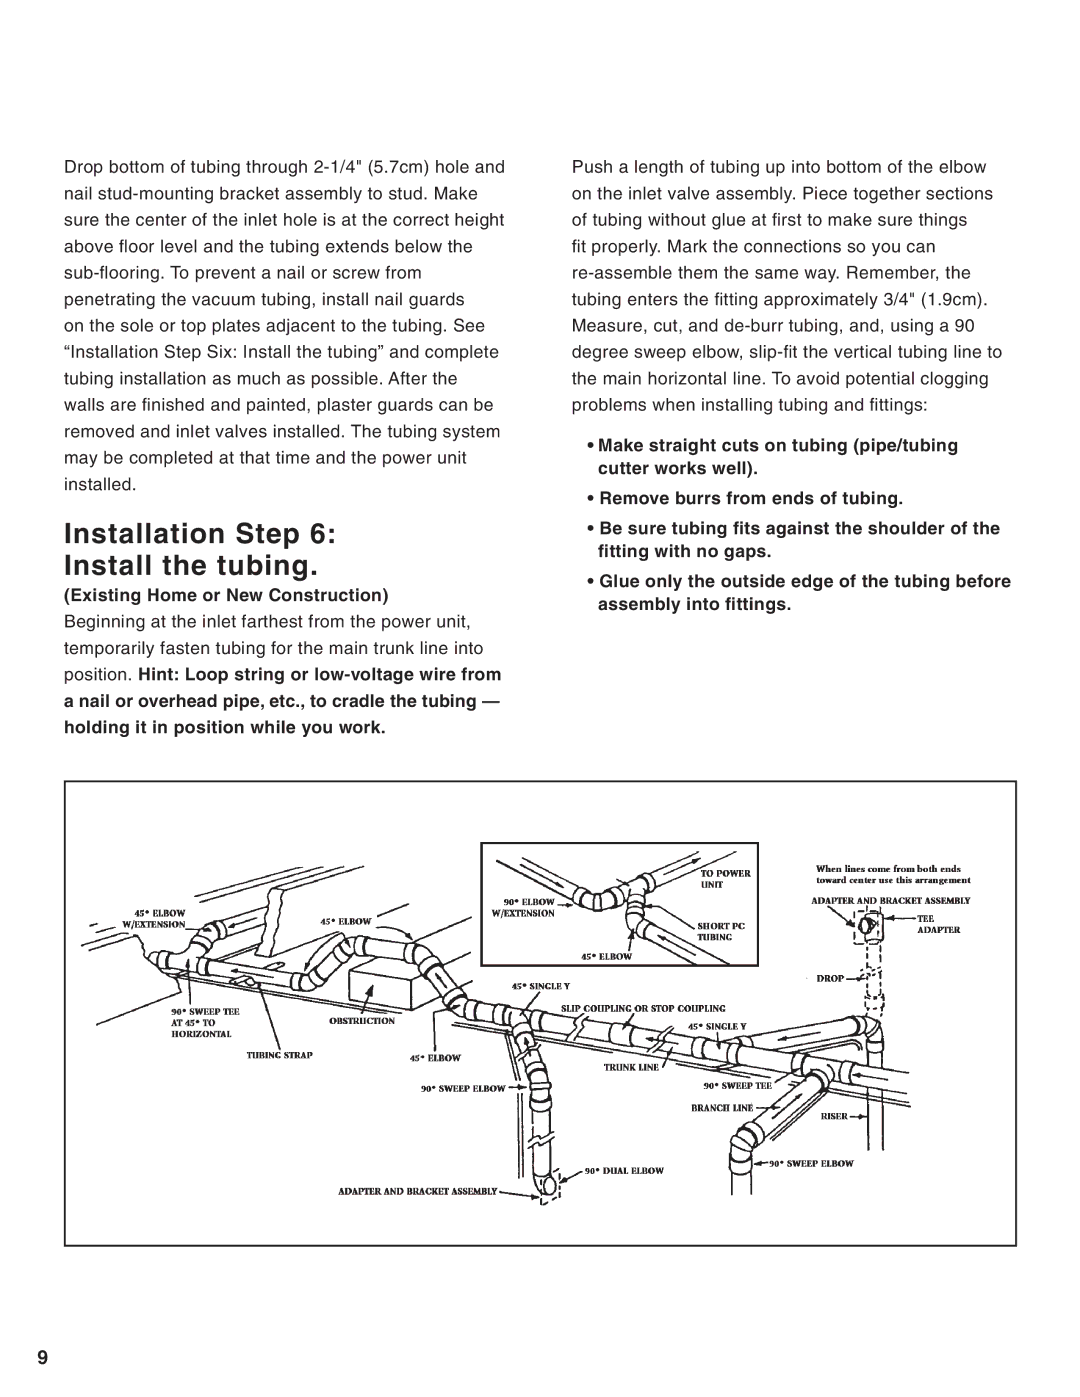
Installation Step 6:
Install the tubing.
(Existing Home or New Construction)
Beginning at the inlet farthest from the power unit, temporarily fasten tubing for the main trunk line into position. Hint: Loop string or
Push a length of tubing up into bottom of the elbow on the inlet valve assembly. Piece together sections of tubing without glue at first to make sure things fit properly. Mark the connections so you can
•Make straight cuts on tubing (pipe/tubing cutter works well).
•Remove burrs from ends of tubing.
•Be sure tubing fits against the shoulder of the fitting with no gaps.
•Glue only the outside edge of the tubing before assembly into fittings.
9