
BL770 specifications
The Euro-Pro BL770 is a versatile and powerful blender designed to cater to a wide variety of culinary tasks, making it a popular choice among home cooks and professional chefs alike. It combines sleek design with high performance, featuring a robust motor that delivers impressive blending capabilities.One of the standout characteristics of the Euro-Pro BL770 is its powerful 1,000-watt motor, which offers ample strength to tackle everything from smoothies and soups to nut butters and frozen desserts. This capacity allows users to effortlessly blend tough ingredients, ensuring a creamy consistency without any chunks. The motor is complemented by a range of speed settings, giving users precise control over the blending process. With options for low, medium, and high speeds, as well as a pulse function, the Euro-Pro BL770 adapts to various recipes, allowing for customization based on individual preferences.
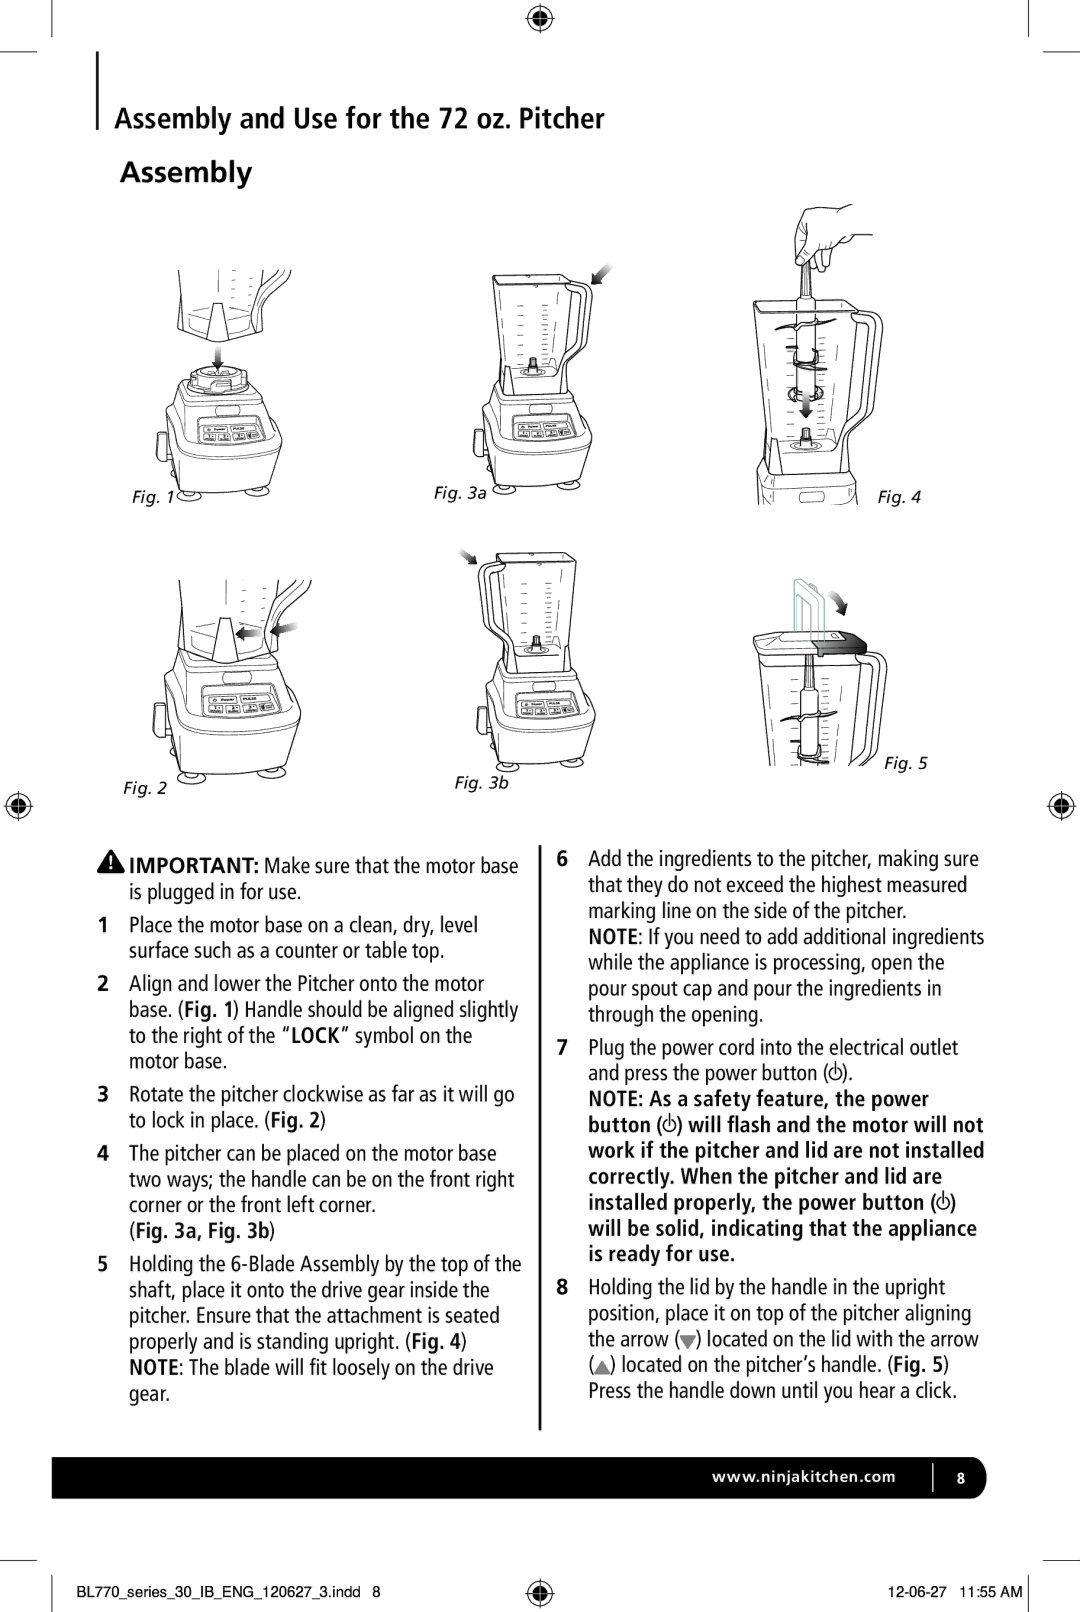
Equipped with durable stainless steel blades, the BL770 enhances the blending experience by providing consistent results every time. The blades are designed to easily crush ice, pulverize fruits and vegetables, and create smooth blends without much effort. Additionally, the blades are detachable, making cleaning a breeze and contributing to the overall longevity of the appliance.
The design of the Euro-Pro BL770 also prioritizes user convenience. It features a large capacity pitcher, typically around 72 ounces, which is perfect for preparing family-sized portions or batch cooking. The pitcher is made from BPA-free plastic, ensuring safety while maintaining transparency for easy viewing during blending. Furthermore, the design includes a secure lid that prevents spills and splatters, enhancing the overall blending experience.
Another key feature of the Euro-Pro BL770 is the inclusion of pre-programmed settings. These settings allow users to select specific functions, such as crushing ice or making smoothies, simplifying the blending process. With a simple press of a button, users can achieve the perfect texture without needing to monitor the blending manually.
Overall, the Euro-Pro BL770 stands out as a reliable and efficient blender that combines power, versatility, and user-friendly features. From its powerful motor and stainless steel blades to its large capacity and pre-programmed settings, this blender is designed to meet the demands of modern kitchens, making it a worthy addition for anyone looking to elevate their culinary skills.