
EP621HR, EP621H specifications
The Euro-Pro EP621H and EP621HR are two stand-out vacuum cleaner models designed for efficient cleaning and ease of use. Both products embody the brand's commitment to combining advanced technology with consumer-friendly design, making cleaning tasks effortless.The EP621H is a lightweight and compact vacuum cleaner, ideal for homes with various surfaces including carpets, hardwood floors, and tiles. One of its main features is its powerful suction technology, which effectively captures dust, dirt, and allergens. The multi-cyclonic filtration system enhances performance by separating dirt from air, ensuring consistent suction power without clogging.
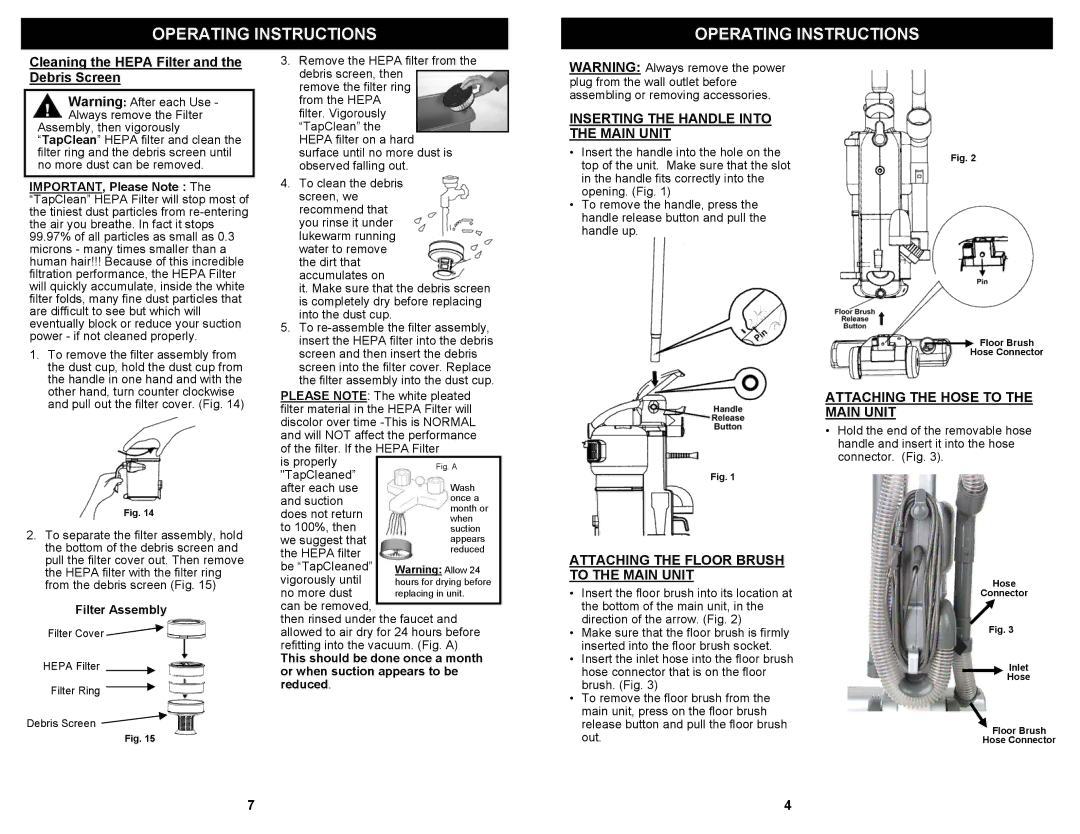
A notable characteristic of the EP621H is its ergonomic design, featuring a comfortable handle and a user-friendly control interface. This model is equipped with a large dirt container, eliminating the need for frequent emptying during use. Additionally, its washable filters provide convenience and cost efficiency, as they can be reused without the need for replacements.
On the other hand, the EP621HR incorporates similar foundational features but includes enhanced technologies for those seeking a more advanced cleaning solution. This model boasts a pet hair attachment, which is especially beneficial for households with furry companions. The attachment is designed to effectively remove pet hair from upholstery and carpets, reducing allergens and maintaining a cleaner living environment.
Both models share a robust set of characteristics that further enhance user experience. The EP621H and EP621HR are both equipped with a range of accessories, including crevice tools and dusting brushes, allowing users to tackle different surfaces and hard-to-reach areas effortlessly. Their compact size means they can be easily stored in small spaces, making them perfect for city apartments or homes with limited storage capacity.
In terms of performance, both vacuum cleaners are designed for quiet operation, enabling users to clean without disturbing others in the home. The durable construction of the Euro-Pro EP621H and EP621HR ensures longevity and robustness, making them a worthwhile investment for any household.
In conclusion, the Euro-Pro EP621H and EP621HR are excellent choices for consumers seeking reliable, powerful, and versatile vacuum cleaners. With their advanced features, ergonomic designs, and pet-friendly options, they are well-suited for meeting the diverse cleaning needs of modern households.