OPERATING INSTRUCTIONS cont.

DRY IRONING

All marked settings on the temperature dial can be used for dry ironing.

1.Plug the cord into a household electrical outlet (see page 3 for voltage settings). The pilot light light will go “On”, indicating that the iron is heating up.

2.Set Temperature Control Dial to desired temperature setting.

3.Place garment steamer/iron on its heel (on a stable, protected surface) while iron is warming to desired temperature.

4.When the iron has reached the desired temperature, the pilot light will go “Off”.

OPERATING INSTRUCTIONS cont.

Using the Swivel Handle

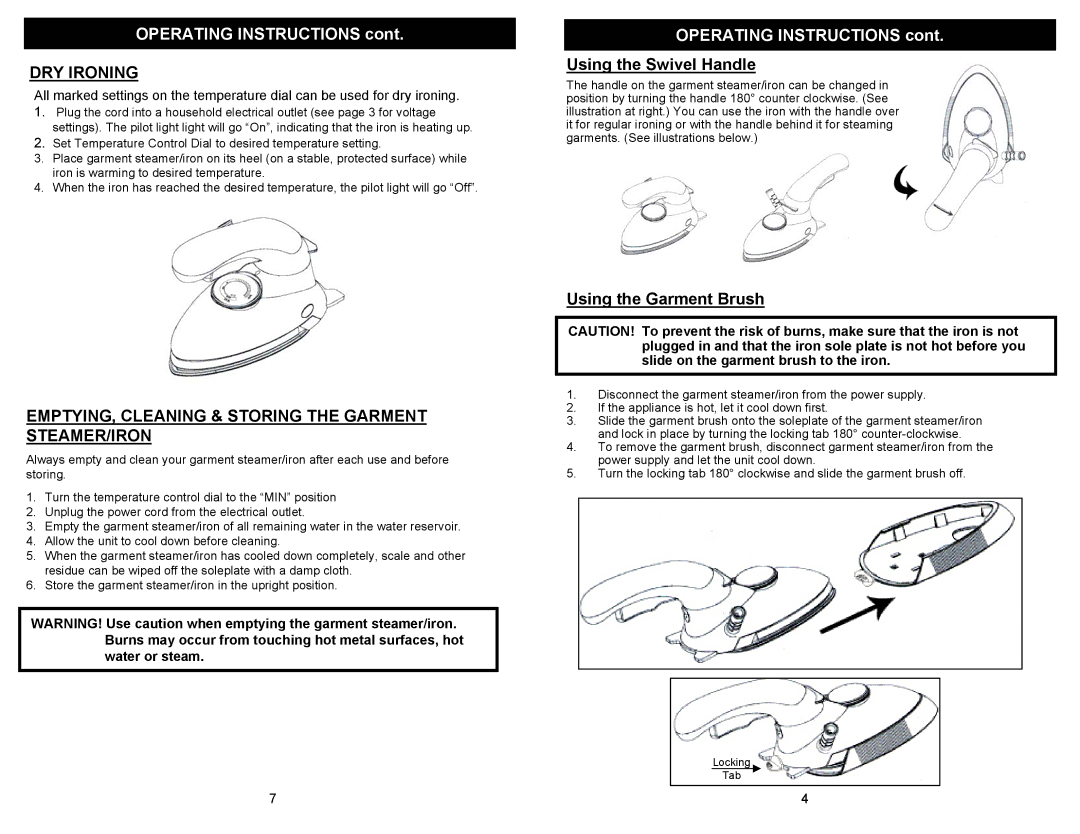
The handle on the garment steamer/iron can be changed in position by turning the handle 180° counter clockwise. (See illustration at right.) You can use the iron with the handle over it for regular ironing or with the handle behind it for steaming garments. (See illustrations below.)

EMPTYING, CLEANING & STORING THE GARMENT STEAMER/IRON

Always empty and clean your garment steamer/iron after each use and before storing.

1.Turn the temperature control dial to the “MIN” position

2.Unplug the power cord from the electrical outlet.

3.Empty the garment steamer/iron of all remaining water in the water reservoir.

4.Allow the unit to cool down before cleaning.

5.When the garment steamer/iron has cooled down completely, scale and other residue can be wiped off the soleplate with a damp cloth.

6.Store the garment steamer/iron in the upright position.

WARNING! Use caution when emptying the garment steamer/iron. Burns may occur from touching hot metal surfaces, hot water or steam.

7

Using the Garment Brush

CAUTION! To prevent the risk of burns, make sure that the iron is not plugged in and that the iron sole plate is not hot before you slide on the garment brush to the iron.

1.Disconnect the garment steamer/iron from the power supply.

2.If the appliance is hot, let it cool down first.

3.Slide the garment brush onto the soleplate of the garment steamer/iron and lock in place by turning the locking tab 180° counter-clockwise.

4.To remove the garment brush, disconnect garment steamer/iron from the power supply and let the unit cool down.

5.Turn the locking tab 180° clockwise and slide the garment brush off.

Locking

Tab

4

Page 5
Image 5
Euro-Pro GI460 W warranty DRY Ironing, Using the Swivel Handle, EMPTYING, Cleaning & Storing the Garment STEAMER/IRON

GI460 W specifications

The Euro-Pro GI460 W is a cutting-edge kitchen appliance designed to revolutionize the way you cook delicious meals with ease and efficiency. At the heart of its design is a powerful heating element that ensures prompt and even cooking, allowing you to prepare a variety of dishes without the long wait times often associated with traditional cooking methods.

One of the standout features of the GI460 W is its advanced multi-functional capabilities. This versatile appliance functions as a grill, griddle, and panini press, making it ideal for a wide range of culinary creations, from juicy burgers and crispy sandwiches to perfect pancakes and stir-fried vegetables. The ability to switch between cooking modes adds significant versatility to your kitchen toolkit.

Another impressive feature of the Euro-Pro GI460 W is its non-stick cooking surface. This technology not only enhances the cooking experience by preventing food from sticking but also simplifies the cleaning process afterward. The appliance is designed for easy maintenance, allowing you to wipe it down quickly after use, saving you valuable time in the kitchen.

The temperature control system of the GI460 W is another significant characteristic worth highlighting. It features several adjustable heat settings, providing you with precise control over the cooking process. This level of customization ensures that your food is cooked to perfection, whether you prefer to sear, simmer, or toast.

In terms of design, the Euro-Pro GI460 W boasts a sleek and compact profile, making it a welcome addition to any kitchen countertop. Its lightweight construction allows for easy portability, meaning you can effortlessly move it around or store it away when not in use.

Safety features are integral to the design of the GI460 W, which include cool-touch handles to prevent burns and an auto shut-off mechanism that provides peace of mind during cooking.

In summary, the Euro-Pro GI460 W stands out with its multifunctional capabilities, non-stick cooking surface, precise temperature controls, and user-friendly design. Whether you're an experienced chef or a cooking novice, this appliance brings convenience and innovation to your culinary adventures, making it a must-have for any modern kitchen.