Attacher le support du boyau supérieur

TROUBLESHOOTING

INSTRUCTIONS D’ASSEMBLAGE

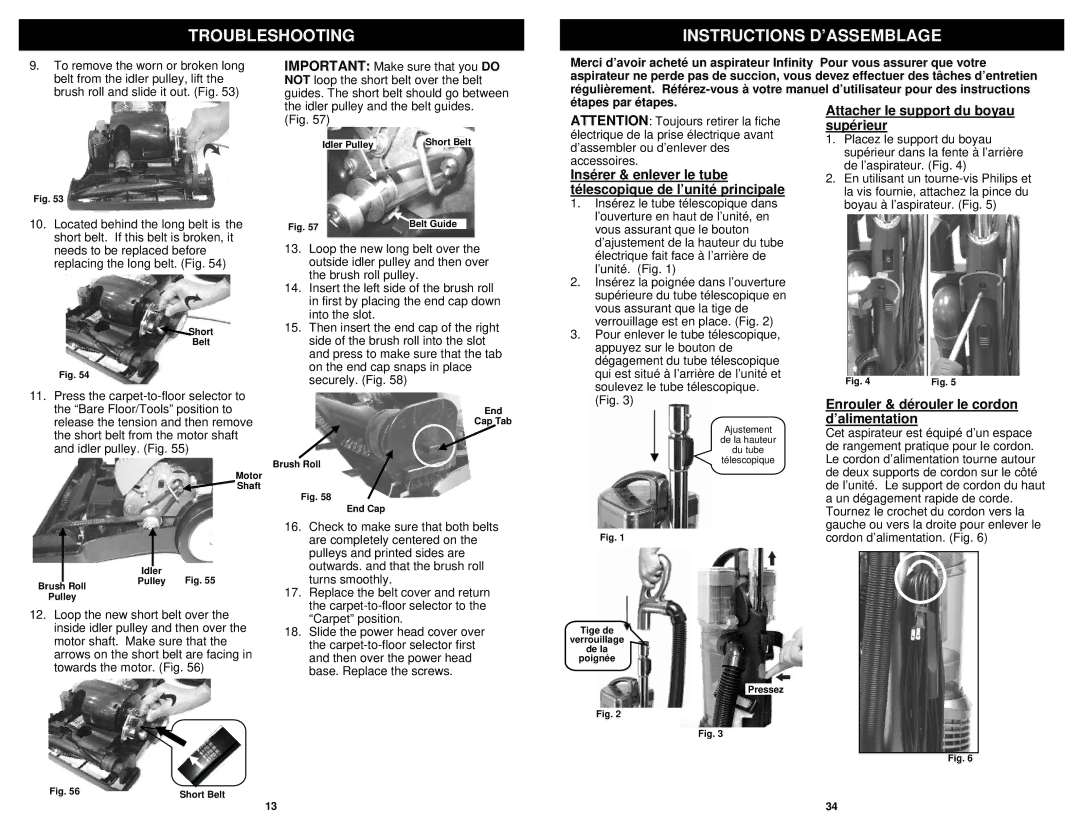
9.To remove the worn or broken long belt from the idler pulley, lift the brush roll and slide it out. (Fig. 53)

IMPORTANT: Make sure that you DO NOT loop the short belt over the belt guides. The short belt should go between the idler pulley and the belt guides.

Merci d’avoir acheté un aspirateur Infinity Pour vous assurer que votre aspirateur ne perde pas de succion, vous devez effectuer des tâches d’entretien régulièrement. Référez-vous à votre manuel d’utilisateur pour des instructions étapes par étapes.

Fig. 53

10.Located behind the long belt is the short belt. If this belt is broken, it needs to be replaced before replacing the long belt. (Fig. 54)

Short

Belt

Fig. 54

11.Press the carpet-to-floor selector to the “Bare Floor/Tools” position to release the tension and then remove the short belt from the motor shaft and idler pulley. (Fig. 55)

Motor

Shaft


Idler

Fig. 55

Brush Roll

Pulley

Pulley


12.Loop the new short belt over the inside idler pulley and then over the motor shaft. Make sure that the arrows on the short belt are facing in towards the motor. (Fig. 56)

(Fig. 57)


Short Belt

Idler Pulley


Fig. 57

Belt Guide


13.Loop the new long belt over the outside idler pulley and then over the brush roll pulley.

14.Insert the left side of the brush roll in first by placing the end cap down into the slot.

15.Then insert the end cap of the right side of the brush roll into the slot and press to make sure that the tab on the end cap snaps in place securely. (Fig. 58)

End

Cap Tab

Brush Roll

Fig. 58

End Cap

16.Check to make sure that both belts are completely centered on the pulleys and printed sides are outwards. and that the brush roll turns smoothly.

17.Replace the belt cover and return the carpet-to-floor selector to the “Carpet” position.

18.Slide the power head cover over the carpet-to-floor selector first and then over the power head base. Replace the screws.

ATTENTION: Toujours retirer la fiche électrique de la prise électrique avant d’assembler ou d’enlever des accessoires.

Insérer & enlever le tube télescopique de l’unité principale

1.Insérez le tube télescopique dans l’ouverture en haut de l’unité, en vous assurant que le bouton d’ajustement de la hauteur du tube électrique fait face à l’arrière de l’unité. (Fig. 1)

2.Insérez la poignée dans l’ouverture supérieure du tube télescopique en vous assurant que la tige de verrouillage est en place. (Fig. 2)

3.Pour enlever le tube télescopique, appuyez sur le bouton de dégagement du tube télescopique qui est situé à l’arrière de l’unité et soulevez le tube télescopique. (Fig. 3)

Ajustement

de la hauteur

du tube

télescopique

Fig. 1

Tige de

verrouillage

de la

poignée

Pressez

Fig. 2

Fig. 3

1.Placez le support du boyau supérieur dans la fente à l’arrière de l’aspirateur. (Fig. 4)

2.En utilisant un tourne-vis Philips et la vis fournie, attachez la pince du boyau à l’aspirateur. (Fig. 5)

Fig. 4

Fig. 5

Enrouler & dérouler le cordon d’alimentation

Cet aspirateur est équipé d’un espace de rangement pratique pour le cordon. Le cordon d’alimentation tourne autour de deux supports de cordon sur le côté de l’unité. Le support de cordon du haut a un dégagement rapide de corde. Tournez le crochet du cordon vers la gauche ou vers la droite pour enlever le cordon d’alimentation. (Fig. 6)

Fig. 6

Fig. 56

Short Belt

13

34

Page 14
Image 14
Euro-Pro NV30 owner manual Troubleshooting Instructions D’ASSEMBLAGE, Enrouler & dérouler le cordon d’alimentation

NV30 specifications

The Euro-Pro NV30 is a cutting-edge home cleaning device designed to elevate household maintenance through innovative technology and user-friendly features. This vacuum cleaner is part of Euro-Pro's commitment to delivering high-quality products that simplify cleaning tasks while ensuring exceptional performance.

One of the standout features of the Euro-Pro NV30 is its powerful suction capability. Integrated with a high-efficiency motor, the NV30 is capable of picking up even the most stubborn dirt, debris, and pet hair. This makes it an ideal choice for pet owners and households with children, where messes are a common occurrence. The vacuum's advanced filtration system ensures that not only is dirt removed from surfaces, but allergens and fine particles are also trapped, contributing to a healthier home environment.

The design of the Euro-Pro NV30 is both functional and aesthetically pleasing. With a lightweight build, it offers ease of movement and maneuverability around furniture and tight spaces. The vacuum features an ergonomic handle, providing comfort during extended cleaning sessions. Additionally, its compact size allows for easy storage when not in use.

Another notable characteristic of the Euro-Pro NV30 is its versatility. It comes with multiple attachments, including a crevice tool, dusting brush, and upholstery nozzle, enabling users to clean various surfaces, from carpets to hard floors to delicate fabrics. This ensures that users can tackle any cleaning task with the appropriate tool at hand.

Enhanced user experience is one aspect that sets the Euro-Pro NV30 apart from other vacuum cleaners. The vacuum is designed for minimal noise operation, making it a discreet option for those who prefer quiet cleaning. Additionally, the vacuum features a large-capacity dust bin that is easy to empty and clean, reducing the frequency of maintenance.

The Euro-Pro NV30 operates on a simple plug-and-play mechanism, meaning that it requires minimal setup and can be ready to use in no time. With an emphasis on user-friendliness, this model is suitable for individuals of all ages and cleaning skill levels.

In conclusion, the Euro-Pro NV30 combines powerful suction capabilities, advanced filtration technology, and versatile design to create an effective cleaning solution for any home. Whether dealing with everyday dust or deep-seated dirt, this vacuum cleaner promises a reliable performance that meets the diverse needs of modern households.