OPERATING INSTRUCTIONS

OPERATING INSTRUCTIONSRUCTIONS

Assembling the Pressure Washer Trolley (cont)

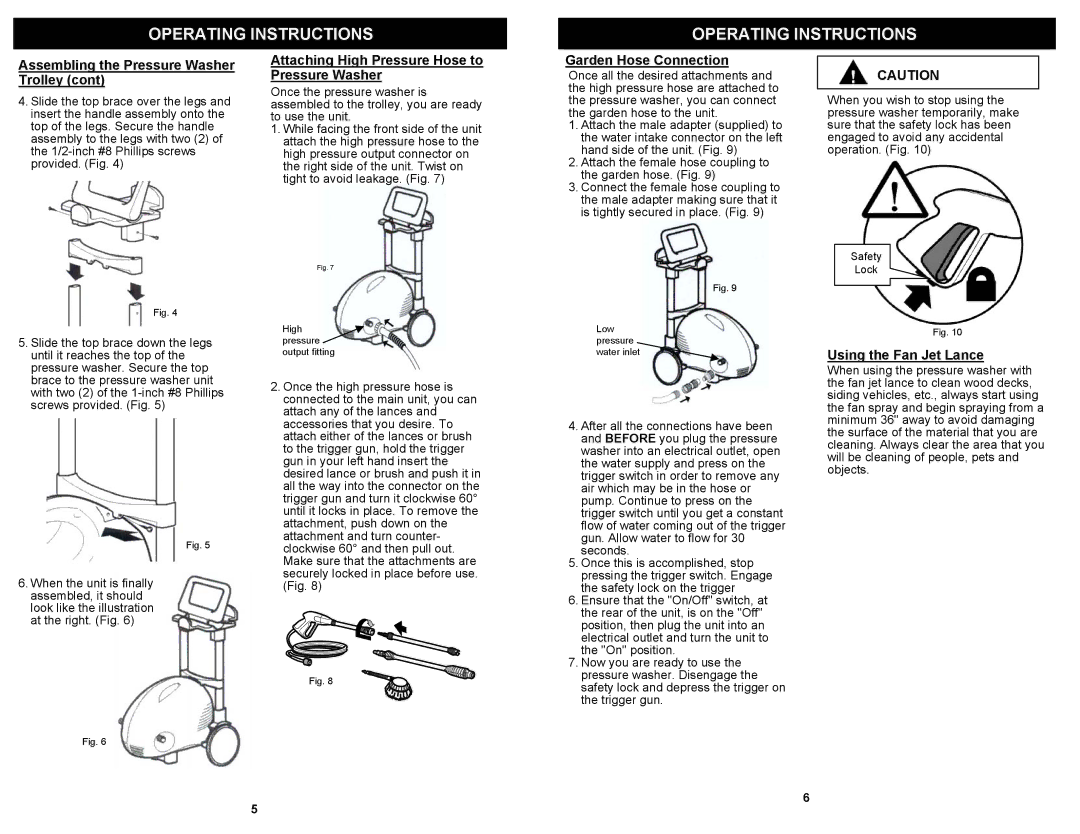
4.Slide the top brace over the legs and insert the handle assembly onto the top of the legs. Secure the handle assembly to the legs with two (2) of the 1/2-inch #8 Phillips screws provided. (Fig. 4)

Attaching High Pressure Hose to Pressure Washer

Once the pressure washer is assembled to the trolley, you are ready to use the unit.

1.While facing the front side of the unit attach the high pressure hose to the high pressure output connector on the right side of the unit. Twist on tight to avoid leakage. (Fig. 7)

Garden Hose Connection

Once all the desired attachments and the high pressure hose are attached to the pressure washer, you can connect the garden hose to the unit.

1.Attach the male adapter (supplied) to the water intake connector on the left hand side of the unit. (Fig. 9)

2.Attach the female hose coupling to the garden hose. (Fig. 9)

3.Connect the female hose coupling to the male adapter making sure that it is tightly secured in place. (Fig. 9)

CAUTION

When you wish to stop using the pressure washer temporarily, make sure that the safety lock has been engaged to avoid any accidental operation. (Fig. 10)

Safety

Fig. 4

5.Slide the top brace down the legs until it reaches the top of the pressure washer. Secure the top brace to the pressure washer unit with two (2) of the 1-inch #8 Phillips screws provided. (Fig. 5)

Fig. 5

6.When the unit is finally assembled, it should look like the illustration at the right. (Fig. 6)

Fig. 7

High pressure output fitting

2.Once the high pressure hose is connected to the main unit, you can attach any of the lances and accessories that you desire. To attach either of the lances or brush to the trigger gun, hold the trigger gun in your left hand insert the desired lance or brush and push it in all the way into the connector on the trigger gun and turn it clockwise 60° until it locks in place. To remove the attachment, push down on the attachment and turn counter- clockwise 60° and then pull out. Make sure that the attachments are securely locked in place before use. (Fig. 8)

Fig. 9

Low pressure water inlet

4. After all the connections have been

and BEFORE you plug the pressure

washer into an electrical outlet, open

the water supply and press on the

trigger switch in order to remove any

air which may be in the hose or

pump. Continue to press on the

trigger switch until you get a constant

flow of water coming out of the trigger

gun. Allow water to flow for 30

seconds.

5. Once this is accomplished, stop

pressing the trigger switch. Engage

the safety lock on the trigger

6. Ensure that the "On/Off" switch, at

the rear of the unit, is on the "Off"

position, then plug the unit into an

electrical outlet and turn the unit to

the "On" position.

7. Now you are ready to use the

pressure washer. Disengage the

Lock

Fig. 10

Using the Fan Jet Lance

When using the pressure washer with the fan jet lance to clean wood decks, siding vehicles, etc., always start using the fan spray and begin spraying from a minimum 36" away to avoid damaging the surface of the material that you are cleaning. Always clear the area that you will be cleaning of people, pets and objects.

Fig. 8

Fig. 6

5

safety lock and depress the trigger on

the trigger gun.

6

Page 6
Image 6
Euro-Pro VPW43 Operating Instructions Operating Instructionsructions, Attaching High Pressure Hose to Pressure Washer

VPW43 specifications

The Euro-Pro VPW43 is a highly efficient and versatile vacuum cleaner designed to meet the demands of modern households. With its sleek design and advanced features, the VPW43 stands out as a reliable cleaning solution that combines power, convenience, and performance.

One of the main features of the Euro-Pro VPW43 is its powerful suction capability. The vacuum is equipped with a robust motor that delivers strong suction power, allowing it to effectively pick up dirt, dust, and debris from various surfaces. Whether it’s vacuuming carpets, hardwood floors, or upholstery, the VPW43 ensures a thorough clean, making it ideal for homes with pets or high foot traffic.

A significant technological advancement in the VPW43 is its multi-cyclonic filtration system. This innovative technology separates dirt and dust from the air, significantly improving the vacuum's efficiency and minimizing clogging. The HEPA filter captures fine particles, including allergens, providing cleaner air and a healthier living environment. This feature is particularly beneficial for allergy sufferers, as it helps reduce airborne irritants.

The Euro-Pro VPW43 also boasts a bagless design, which eliminates the need for disposable vacuum bags. Instead, it features an easy-to-empty dust container that allows users to quickly dispose of collected debris without the hassle of dealing with bags. This not only saves money but also reduces waste, making it an eco-friendly choice for environmentally conscious consumers.

Ease of use is another hallmark of the VPW43. The vacuum comes with various attachments and tools, including a crevice tool, dusting brush, and upholstery nozzle, allowing for versatile cleaning in hard-to-reach areas. Its lightweight design and ergonomic handle make maneuvering the vacuum around furniture and tight spaces effortless, enhancing the overall cleaning experience.

Moreover, the VPW43 features a retractable cord, which eliminates the clutter of tangling cords and simplifies storage after cleaning. The vacuum also includes a variable speed control, giving users the flexibility to adjust suction power based on the specific cleaning task at hand.

In summary, the Euro-Pro VPW43 is a powerful and efficient vacuum cleaner that combines advanced technologies with user-friendly features. Its multi-cyclonic filtration system, bagless design, and versatile cleaning attachments make it a perfect addition to any home, providing exceptional cleaning performance while ensuring ease of use and maintenance.