Replacing the Filters
2Sets
2 Sets Post Motor Filters
Warning: To reduce the risk of electric shock, the power cord must be disconnected before changing the bag or performing maintenance/ troubleshooting.
Replacing the Filters
2 Sets
2 Sets Post Motor Filters
Warning: To reduce the risk of electric shock, the power cord must be disconnected before changing the bag or performing maintenance/ troubleshooting.
Changing & Cleaning the
Pre-Motor Filter
Your vacuum is equipped with a filtration system to reduce dust and pollen in your home as you clean. The
This is a
1.Push the Power On/Off button to the "Off" position and disconnect the power cord from the wall outlet.
2.To remove, open the dust bag compartment cover and remove the
3.Rinse in lukewarm water and let it air dry completely for 24 hours. Do not use a washing machine to rinse the filter. Do not use a hair dryer to dry it. Air dry only. When the
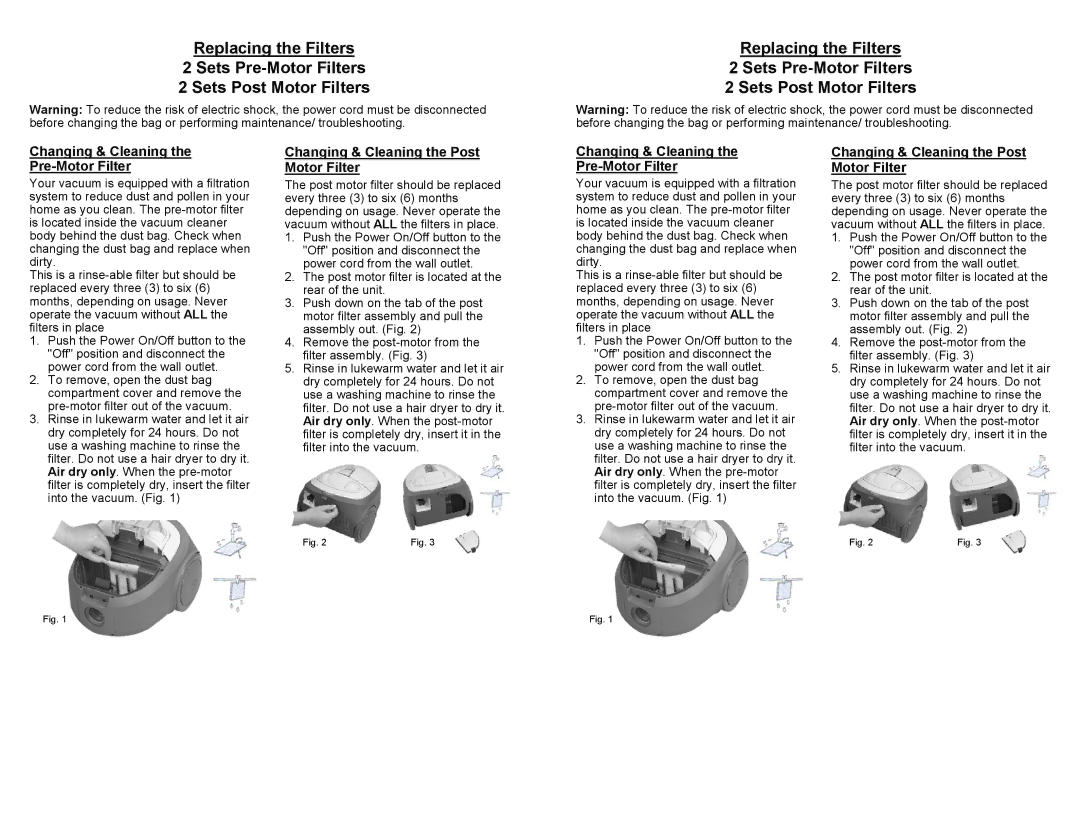
Changing & Cleaning the Post Motor Filter
The post motor filter should be replaced every three (3) to six (6) months depending on usage. Never operate the vacuum without ALL the filters in place.
1.Push the Power On/Off button to the "Off" position and disconnect the power cord from the wall outlet.
2.The post motor filter is located at the rear of the unit.
3.Push down on the tab of the post motor filter assembly and pull the assembly out. (Fig. 2)
4.Remove the
5.Rinse in lukewarm water and let it air dry completely for 24 hours. Do not use a washing machine to rinse the filter. Do not use a hair dryer to dry it. Air dry only. When the
Changing & Cleaning the
Your vacuum is equipped with a filtration system to reduce dust and pollen in your home as you clean. The
This is a
1.Push the Power On/Off button to the "Off" position and disconnect the power cord from the wall outlet.
2.To remove, open the dust bag compartment cover and remove the
3.Rinse in lukewarm water and let it air dry completely for 24 hours. Do not use a washing machine to rinse the filter. Do not use a hair dryer to dry it. Air dry only. When the
Changing & Cleaning the Post Motor Filter
The post motor filter should be replaced every three (3) to six (6) months depending on usage. Never operate the vacuum without ALL the filters in place.
1.Push the Power On/Off button to the "Off" position and disconnect the power cord from the wall outlet.
2.The post motor filter is located at the rear of the unit.
3.Push down on the tab of the post motor filter assembly and pull the assembly out. (Fig. 2)
4.Remove the
5.Rinse in lukewarm water and let it air dry completely for 24 hours. Do not use a washing machine to rinse the filter. Do not use a hair dryer to dry it. Air dry only. When the
Fig. 2 | Fig. 3 |
Fig. 1
Fig. 2 | Fig. 3 |
Fig. 1