C H A P T E R 3 O S D M E N U A N D C O N F I G U R A T I O N
3.3 OSD Menu Setup
Please make sure control key selection switch is at OSD position.
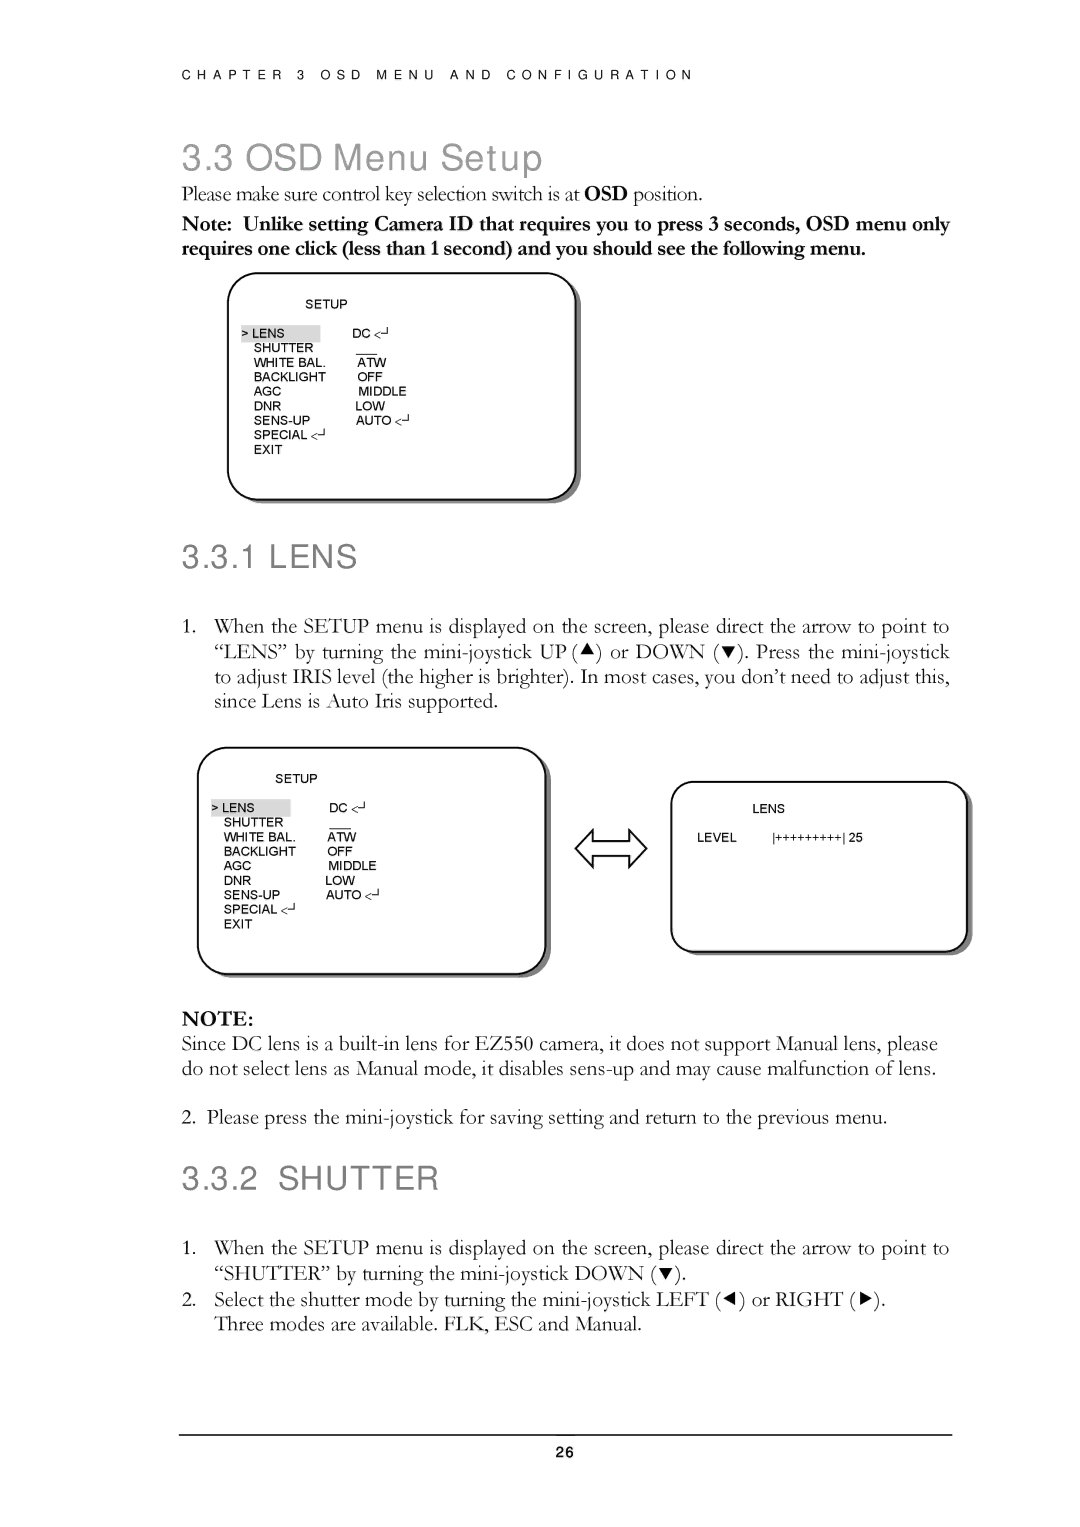
Note: Unlike setting Camera ID that requires you to press 3 seconds, OSD menu only requires one click (less than 1 second) and you should see the following menu.
SETUP |
| |
| DC <┘ | |
> LENS |
| |
SHUTTER |
| ___ |
WHITE BAL. | ATW | |
BACKLIGHT | OFF | |
AGC | MIDDLE | |
DNR | LOW | |
AUTO <┘ | ||
SPECIAL <┘ |
| |
EXIT |
| |
3.3.1 LENS
1.When the SETUP menu is displayed on the screen, please direct the arrow to point to “LENS” by turning the
SETUP |
|
|
| |
|
|
|
| |
> LENS |
| DC <┘ |
| LENS |
SHUTTER |
| ___ |
|
|
WHITE BAL. | ATW | LEVEL | +++++++++ 25 | |
BACKLIGHT | OFF |
|
| |
AGC | MIDDLE |
|
| |
DNR | LOW |
|
| |
AUTO <┘ |
|
| ||
SPECIAL <┘ |
|
|
| |
EXIT |
|
|
| |
NOTE:
Since DC lens is a
2.Please press the
3.3.2SHUTTER
1.When the SETUP menu is displayed on the screen, please direct the arrow to point to “SHUTTER” by turning the
2.Select the shutter mode by turning the
26
