Table of contents
Installation Guide | 2 |
Using Hardware Accelerated Voice Chat | 3 |
Configuring the Killer Xeno | 5 |
Setting the Lag and Latency Reduction (LLR) mode | 6 |
Setting Link Speed | 7 |
Setting Duplex Mode | 8 |
Configuring Advanced Setting | 9 |
Configuring Killer Bandwidth Control | 10 |
Configuring Killer Firewall | 14 |
Changing Alert Settings | 15 |
Adding Killer Firewall Exceptions | 16 |
Deleting Killer Firewall Exceptions | 16 |
Technical Support | 17 |
Warranty Information | 17 |
EVGA Advanced RMA (EAR) Program | 17 |
EVGA Online Community | 17 |
EVGA FAQ | 17 |
EVGA Gaming | 17 |
FOLDING@EVGA | 17 |
MODS RIGS | 18 |
Compliance Information | 18 |
Trademark Information | 18 |
1 |
|
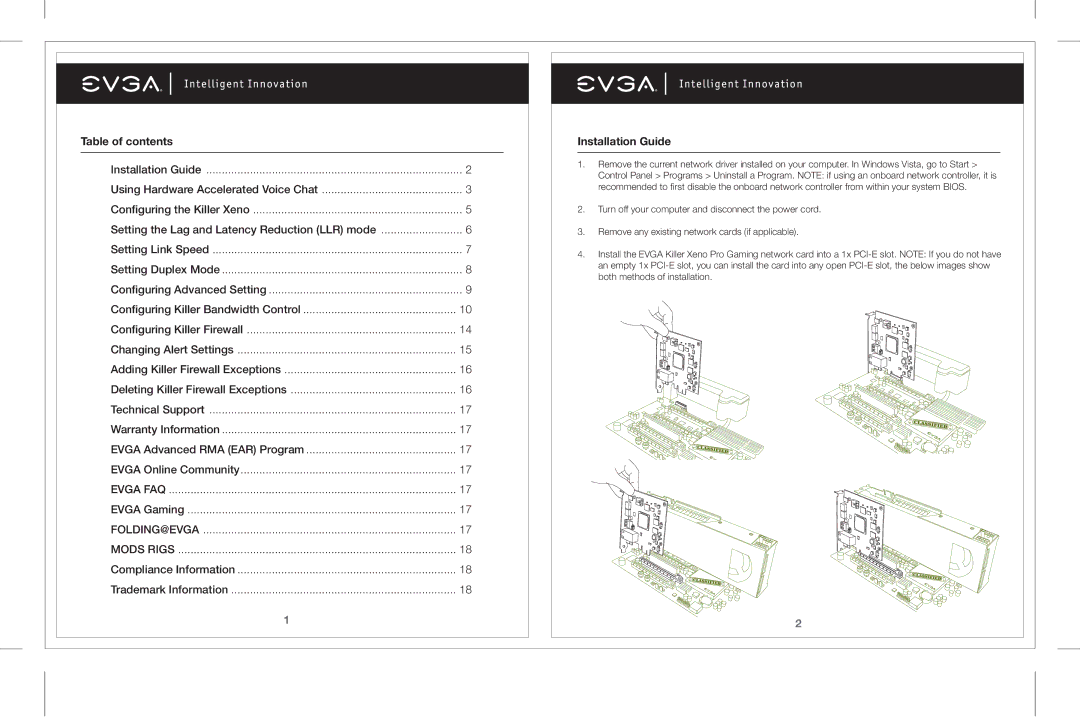
Installation Guide
1.Remove the current network driver installed on your computer. In Windows Vista, go to Start > Control Panel > Programs > Uninstall a Program. NOTE: if using an onboard network controller, it is recommended to first disable the onboard network controller from within your system BIOS.
2.Turn off your computer and disconnect the power cord.
3.Remove any existing network cards (if applicable).
4.Install the EVGA Killer Xeno Pro Gaming network card into a 1x
2