5.Reinstall the cover on your computer and reconnect any cables that you removed earlier in the installation.
6.Plug an Ethernet Cable into the EVGA Killer Xeno Pro.
7.Power up your computer.
8.Insert the driver installation CD or double click on the EVGA Killer Xeno Pro driver executable file that can be downloaded at www.evga.com/support/drivers. The setup program takes over and will walk you through the driver installation process.
9.You may need to reboot your PC once the driver installation is complete.
Using Hardware Accelerated Voice Chat
If you are going to use the EVGA Killer Xeno Pro’s built in hardware voice chat, you will need to connect the included audio input/outputs correctly. There are two options for doing this, and internal, or external cable. NOTE: You only need to use one of the below two options.
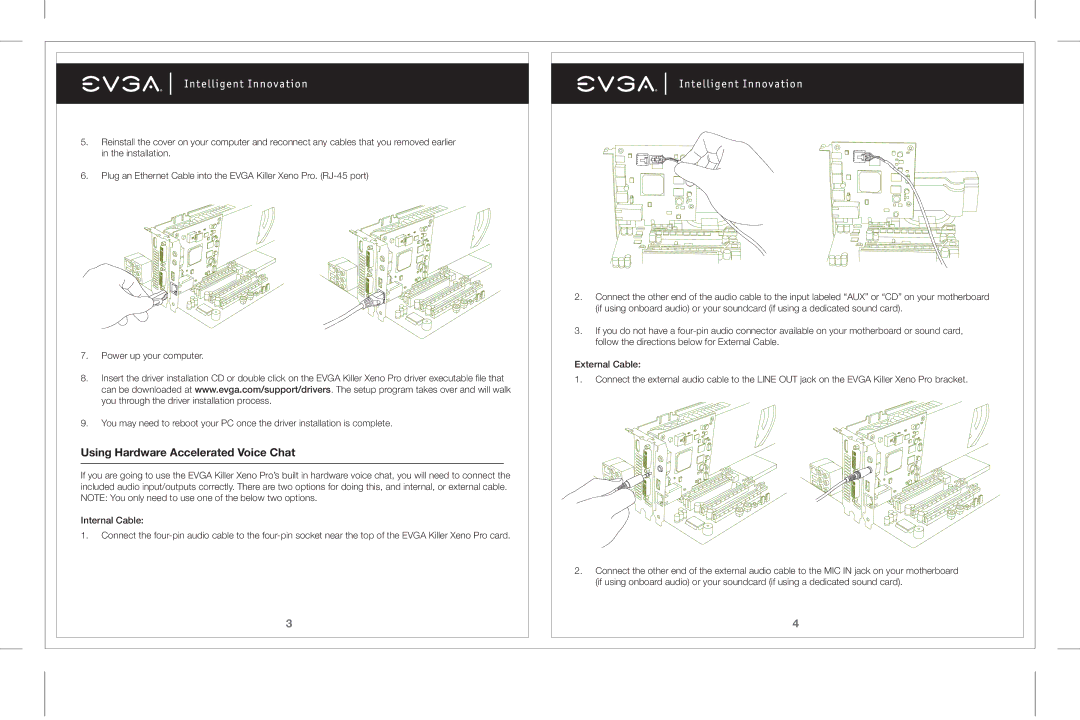
Internal Cable:
1.Connect the
3
2.Connect the other end of the audio cable to the input labeled “AUX” or “CD” on your motherboard (if using onboard audio) or your soundcard (if using a dedicated sound card).
3.If you do not have a
External Cable:
1.Connect the external audio cable to the LINE OUT jack on the EVGA Killer Xeno Pro bracket.
2.Connect the other end of the external audio cable to the MIC IN jack on your motherboard (if using onboard audio) or your soundcard (if using a dedicated sound card).
4