assembly instructions
ASSEMBLY
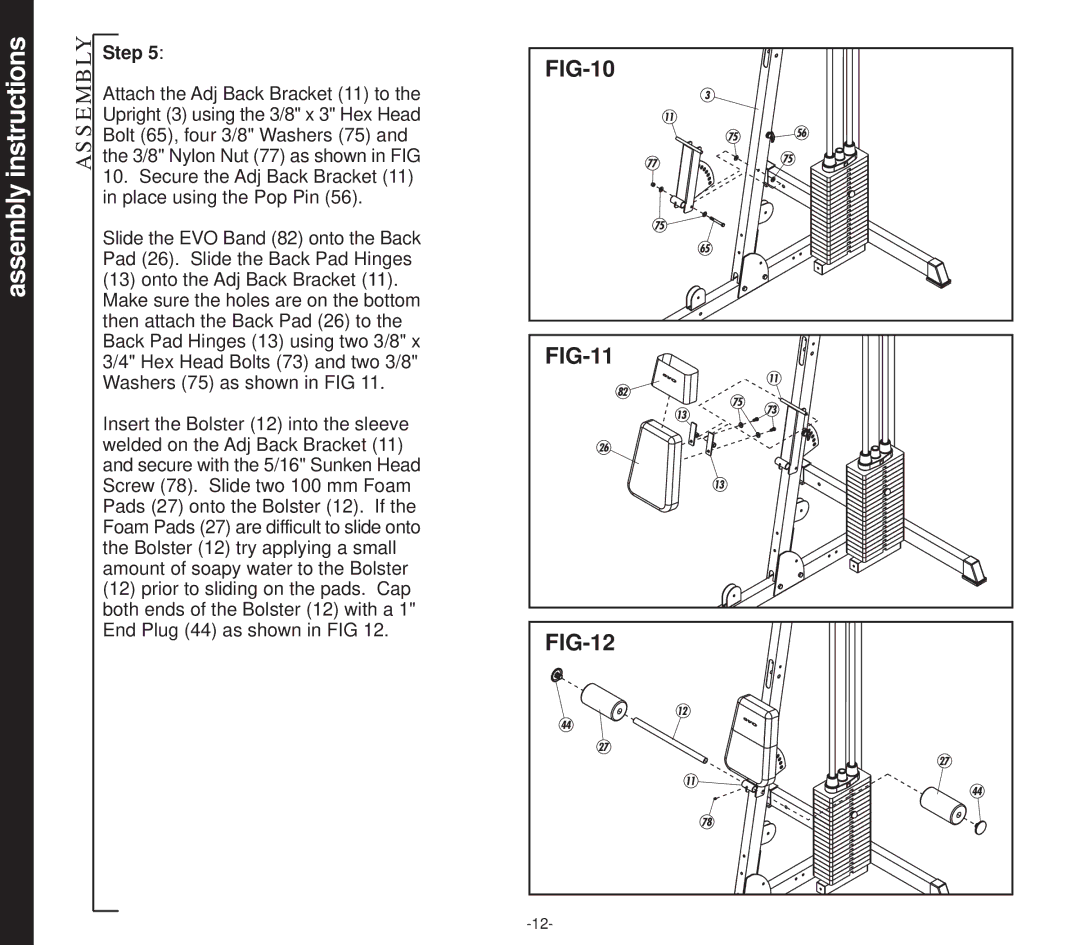
Step 5:
Attach the Adj Back Bracket (11) to the Upright (3) using the 3/8" x 3" Hex Head Bolt (65), four 3/8" Washers (75) and the 3/8" Nylon Nut (77) as shown in FIG
10.Secure the Adj Back Bracket (11) in place using the Pop Pin (56).
Slide the EVO Band (82) onto the Back Pad (26). Slide the Back Pad Hinges
(13)onto the Adj Back Bracket (11). Make sure the holes are on the bottom then attach the Back Pad (26) to the Back Pad Hinges (13) using two 3/8" x 3/4" Hex Head Bolts (73) and two 3/8" Washers (75) as shown in FIG 11.
Insert the Bolster (12) into the sleeve welded on the Adj Back Bracket (11) and secure with the 5/16" Sunken Head Screw (78). Slide two 100 mm Foam Pads (27) onto the Bolster (12). If the Foam Pads (27) are difficult to slide onto the Bolster (12) try applying a small amount of soapy water to the Bolster
(12)prior to sliding on the pads. Cap both ends of the Bolster (12) with a 1" End Plug (44) as shown in FIG 12.