Maintenance

Wheel Hub - Slotted Nut Torque Specification

Service Interval: After the first 100 hours Every 500 hours thereafter

Torque the slotted nut to 211-260 ft-lb (286-352 N-m).

Note: Do Not use anti-seize on wheel hub.

Lubricate Caster Wheel Hubs

Service Interval: As required

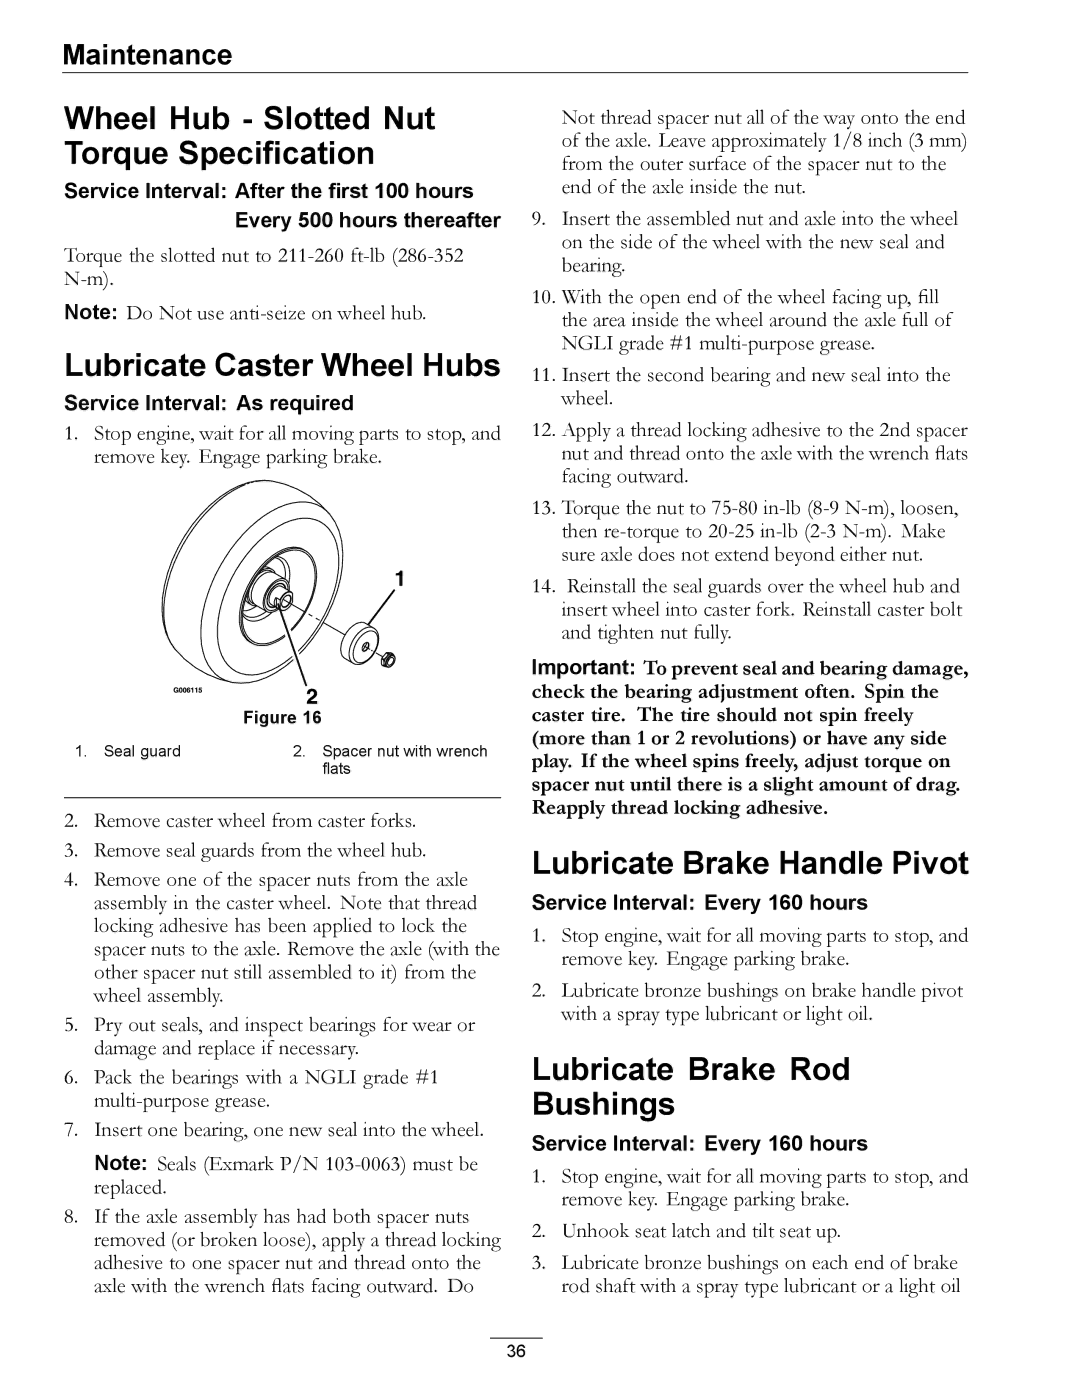
1.Stop engine, wait for all moving parts to stop, and remove key. Engage parking brake.


Figure 16

1. Seal guard

2. Spacer nut with wrench


flats

2.Remove caster wheel from caster forks.

3.Remove seal guards from the wheel hub.

4.Remove one of the spacer nuts from the axle assembly in the caster wheel. Note that thread locking adhesive has been applied to lock the spacer nuts to the axle. Remove the axle (with the other spacer nut still assembled to it) from the wheel assembly.

5.Pry out seals, and inspect bearings for wear or damage and replace if necessary.

6.Pack the bearings with a NGLI grade #1 multi-purpose grease.

7.Insert one bearing, one new seal into the wheel.

Note: Seals (Exmark P/N 103-0063) must be replaced.

8.If the axle assembly has had both spacer nuts removed (or broken loose), apply a thread locking adhesive to one spacer nut and thread onto the axle with the wrench flats facing outward. Do

Not thread spacer nut all of the way onto the end of the axle. Leave approximately 1/8 inch (3 mm) from the outer surface of the spacer nut to the end of the axle inside the nut.

9.Insert the assembled nut and axle into the wheel on the side of the wheel with the new seal and bearing.

10.With the open end of the wheel facing up, fill the area inside the wheel around the axle full of NGLI grade #1 multi-purpose grease.

11.Insert the second bearing and new seal into the wheel.

12.Apply a thread locking adhesive to the 2nd spacer nut and thread onto the axle with the wrench flats facing outward.

13.Torque the nut to 75-80 in-lb (8-9 N-m), loosen, then re-torque to 20-25 in-lb (2-3 N-m). Make sure axle does not extend beyond either nut.

14.Reinstall the seal guards over the wheel hub and insert wheel into caster fork. Reinstall caster bolt and tighten nut fully.

Important: To prevent seal and bearing damage, check the bearing adjustment often. Spin the caster tire. The tire should not spin freely (more than 1 or 2 revolutions) or have any side play. If the wheel spins freely, adjust torque on spacer nut until there is a slight amount of drag. Reapply thread locking adhesive.

Lubricate Brake Handle Pivot

Service Interval: Every 160 hours

1.Stop engine, wait for all moving parts to stop, and remove key. Engage parking brake.

2.Lubricate bronze bushings on brake handle pivot with a spray type lubricant or light oil.

Lubricate Brake Rod

Bushings

Service Interval: Every 160 hours

1.Stop engine, wait for all moving parts to stop, and remove key. Engage parking brake.

2.Unhook seat latch and tilt seat up.

3.Lubricate bronze bushings on each end of brake rod shaft with a spray type lubricant or a light oil

36

Page 36
Image 36
Exmark LZDS manual Wheel Hub Slotted Nut Torque Specification, Lubricate Caster Wheel Hubs, Lubricate Brake Handle Pivot

LZDS specifications

The Exmark LZDS stands as a benchmark in the world of commercial lawn care equipment. Designed specifically for landscape professionals, the LZDS combines power, efficiency, and precision to deliver exceptional results in varied conditions. One of its hallmark features is the robust engine, engineered to handle large-scale mowing tasks without sacrificing reliability. The Exmark LZDS is equipped with a powerful Kohler Command Pro engine, which provides superior torque and smooth operation, making it ideal for tackling tough terrains.

The LZDS showcases Exmark’s signature UltraCut deck technology, which is designed to enhance cutting performance and deliver a clean, even cut. The deck comes in various sizes, allowing users to choose the perfect fit based on their specific mowing requirements. The heavy-duty construction ensures durability, while the unique design minimizes clumping and provides improved airflow, contributing to a flawless finish on every lawn.

One of the standout characteristics of the Exmark LZDS is its zero-turn capability. This feature allows for unparalleled maneuverability, enabling operators to navigate complex landscapes with ease. The intuitive controls and comfortable seating position reduce operator fatigue, allowing for longer work sessions without discomfort. The ergonomic control layout makes it easy to adjust settings on the fly, enhancing overall productivity and precision.

In addition to its mechanical advantages, the LZDS also incorporates sophisticated technologies aimed at optimizing the mowing process. The mower features a practical SmartPower system, which automatically adjusts the engine’s power output based on the load, ensuring optimal performance and fuel efficiency. This technology helps professionals achieve the best results while reducing operational costs.

Safety is a paramount consideration in the design of the LZDS, which includes features like a rollover protection system and easy-to-reach controls positioned for quick access. The mower’s durable design is complemented by easy-access maintenance points, making routine servicing straightforward.

In conclusion, the Exmark LZDS embodies the perfect fusion of innovation, power, and efficiency. With its high-performance engine, advanced cutting technology, and user-friendly features, it is tailored for professionals seeking reliable and effective solutions for lawn care. Whether it's maintaining expansive commercial properties or tackling intricate residential landscapes, the Exmark LZDS delivers outstanding performance that caters to the demanding needs of the landscaping industry.