Operating the Blade and the Self-Propel Drive
Note: The
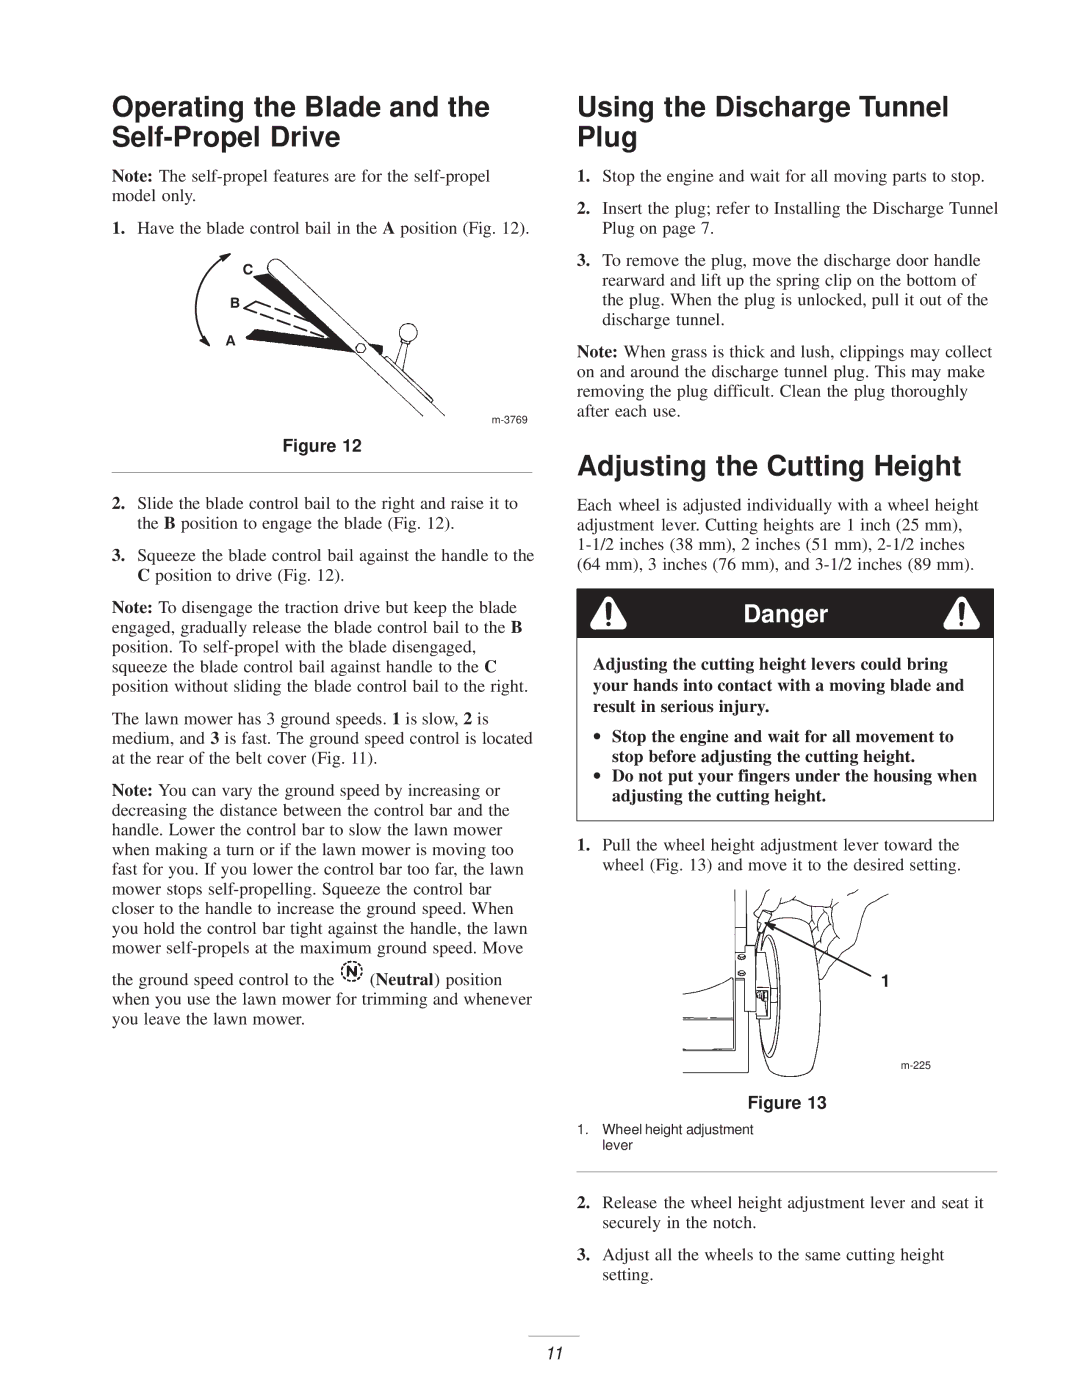
1.Have the blade control bail in the A position (Fig. 12).
C
B![]()
A
Figure 12
2.Slide the blade control bail to the right and raise it to the B position to engage the blade (Fig. 12).
3.Squeeze the blade control bail against the handle to the C position to drive (Fig. 12).
Note: To disengage the traction drive but keep the blade engaged, gradually release the blade control bail to the B position. To
The lawn mower has 3 ground speeds. 1 is slow, 2 is medium, and 3 is fast. The ground speed control is located at the rear of the belt cover (Fig. 11).
Note: You can vary the ground speed by increasing or decreasing the distance between the control bar and the handle. Lower the control bar to slow the lawn mower when making a turn or if the lawn mower is moving too fast for you. If you lower the control bar too far, the lawn mower stops
the ground speed control to the ![]() (Neutral) position when you use the lawn mower for trimming and whenever you leave the lawn mower.
(Neutral) position when you use the lawn mower for trimming and whenever you leave the lawn mower.
Using the Discharge Tunnel Plug
1.Stop the engine and wait for all moving parts to stop.
2.Insert the plug; refer to Installing the Discharge Tunnel Plug on page 7.
3.To remove the plug, move the discharge door handle rearward and lift up the spring clip on the bottom of the plug. When the plug is unlocked, pull it out of the discharge tunnel.
Note: When grass is thick and lush, clippings may collect on and around the discharge tunnel plug. This may make removing the plug difficult. Clean the plug thoroughly after each use.
Adjusting the Cutting Height
Each wheel is adjusted individually with a wheel height adjustment lever. Cutting heights are 1 inch (25 mm),
Danger
Adjusting the cutting height levers could bring your hands into contact with a moving blade and result in serious injury.
•Stop the engine and wait for all movement to stop before adjusting the cutting height.
•Do not put your fingers under the housing when adjusting the cutting height.
1.Pull the wheel height adjustment lever toward the wheel (Fig. 13) and move it to the desired setting.
1
Figure 13
1.Wheel height adjustment lever
2.Release the wheel height adjustment lever and seat it
securely in the notch.
3.Adjust all the wheels to the same cutting height setting.
11
