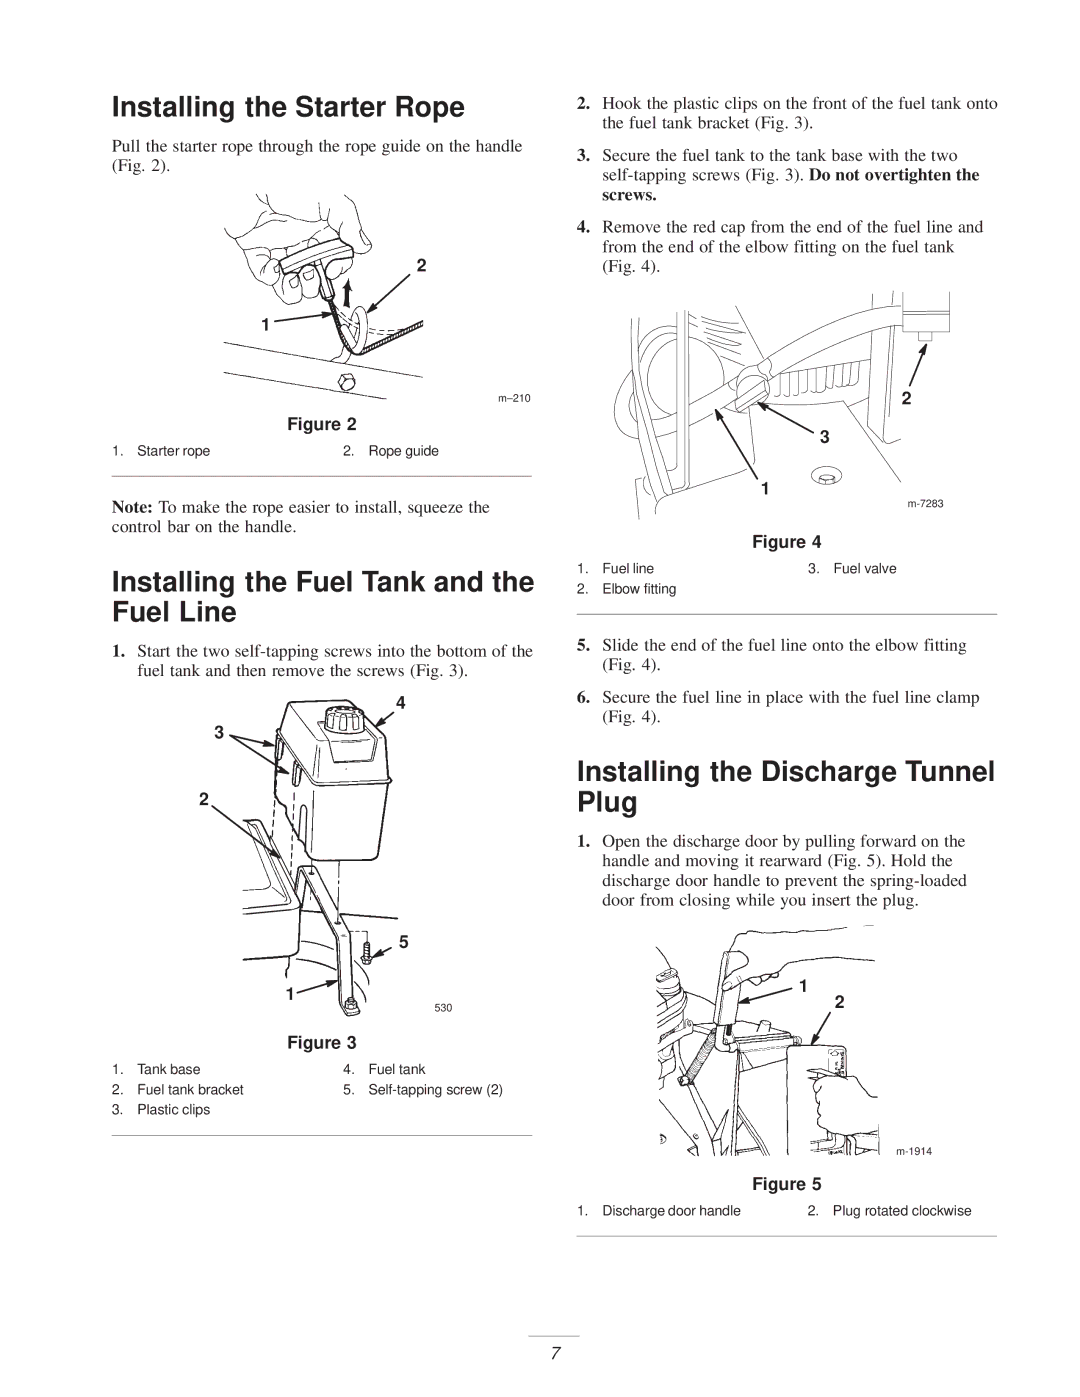
Installing the Starter Rope
Pull the starter rope through the rope guide on the handle (Fig. 2).
2
1
m±210
Figure 2
1. Starter rope | 2. Rope guide |
|
|
Note: To make the rope easier to install, squeeze the control bar on the handle.
Installing the Fuel Tank and the Fuel Line
1.Start the two
4
3
2
|
|
| 5 |
|
| 1 | 530 |
|
|
| |
|
| Figure 3 |
|
1. | Tank base | 4. | Fuel tank |
2. | Fuel tank bracket | 5. | |
3. | Plastic clips |
|
|
|
|
|
|
2.Hook the plastic clips on the front of the fuel tank onto the fuel tank bracket (Fig. 3).
3.Secure the fuel tank to the tank base with the two
4.Remove the red cap from the end of the fuel line and from the end of the elbow fitting on the fuel tank (Fig. 4).
2
3
1
Figure 4
1. Fuel line | 3. Fuel valve |
2. Elbow fitting
5.Slide the end of the fuel line onto the elbow fitting (Fig. 4).
6.Secure the fuel line in place with the fuel line clamp (Fig. 4).
Installing the Discharge Tunnel Plug
1.Open the discharge door by pulling forward on the handle and moving it rearward (Fig. 5). Hold the discharge door handle to prevent the
1
2
Figure 5
1. Discharge door handle | 2. Plug rotated clockwise |
|
|
7