Cabling and Installing the AAPs
![]() NOTE: The online Connectivity Configurator, available at
NOTE: The online Connectivity Configurator, available at
www.extron.com, offers guidance as to the fit of AAPs into this space.
The various Extron single space and double space AAP devices, including the various RGB 580xi AAPs, can be mounted to the HSA 822. See “Reference Information” for RGB 580xi AAP part numbers.
The screws for installing an AAP are built into its AAP panel, so no additional screws are needed.
![]() WARNING: Ensure that AC power is disconnected before
WARNING: Ensure that AC power is disconnected before ![]() servicing the HSA unit.
servicing the HSA unit.
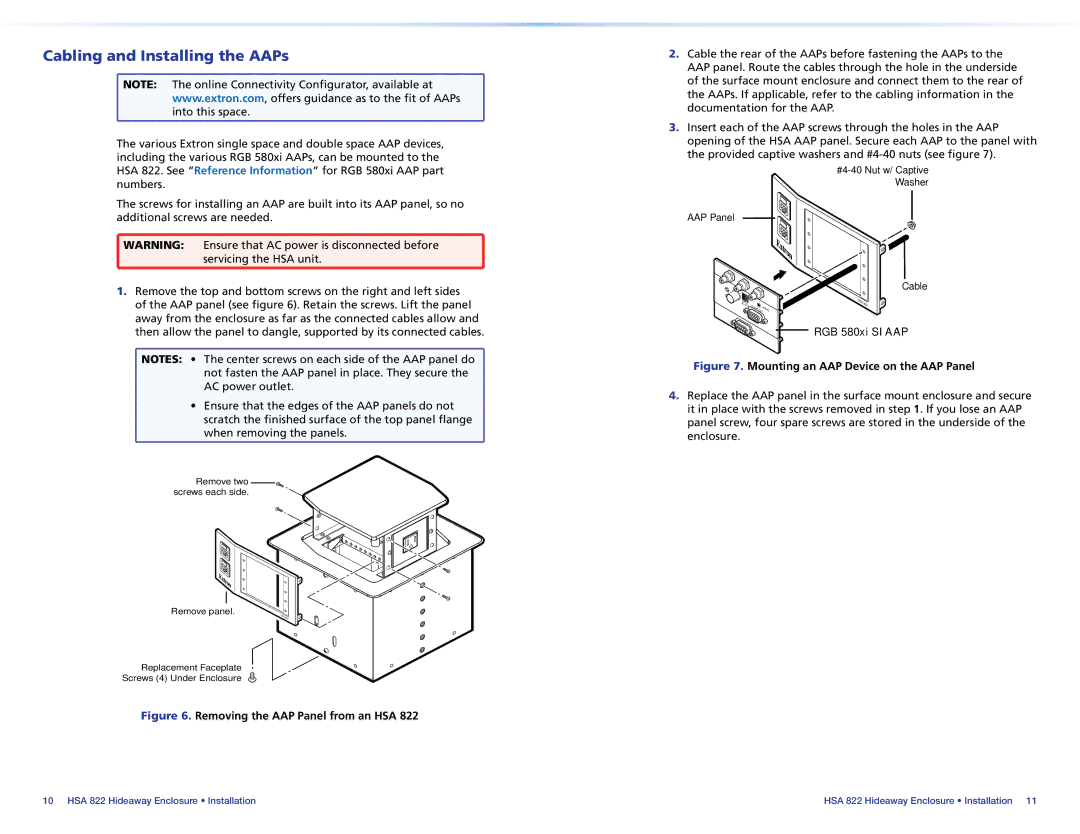
1.Remove the top and bottom screws on the right and left sides of the AAP panel (see figure 6). Retain the screws. Lift the panel away from the enclosure as far as the connected cables allow and then allow the panel to dangle, supported by its connected cables.
![]() NOTES: • The center screws on each side of the AAP panel do
NOTES: • The center screws on each side of the AAP panel do
not fasten the AAP panel in place. They secure the AC power outlet.
• Ensure that the edges of the AAP panels do not scratch the finished surface of the top panel flange when removing the panels.
Remove two ![]()
![]() screws each side.
screws each side.
Remove panel. | HSA |
| 822 |
Replacement Faceplate
Screws (4) Under Enclosure
Figure 6. Removing the AAP Panel from an HSA 822
2.Cable the rear of the AAPs before fastening the AAPs to the AAP panel. Route the cables through the hole in the underside of the surface mount enclosure and connect them to the rear of the AAPs. If applicable, refer to the cabling information in the documentation for the AAP.
3.Insert each of the AAP screws through the holes in the AAP opening of the HSA AAP panel. Secure each AAP to the panel with the provided captive washers and
AAP Panel
Cable
INPUT |
| HSA | 822 |
SELECT | COMPUTERAUDIO |
| |
|
|
|
 RGB 580xi SI AAP
Figure 7. Mounting an AAP Device on the AAP Panel
4.Replace the AAP panel in the surface mount enclosure and secure it in place with the screws removed in step 1. If you lose an AAP panel screw, four spare screws are stored in the underside of the enclosure.
10 HSA 822 Hideaway Enclosure • Installation | HSA 822 Hideaway Enclosure • Installation 11 |