SINELPEUCT
T COMPUTERAUDIO
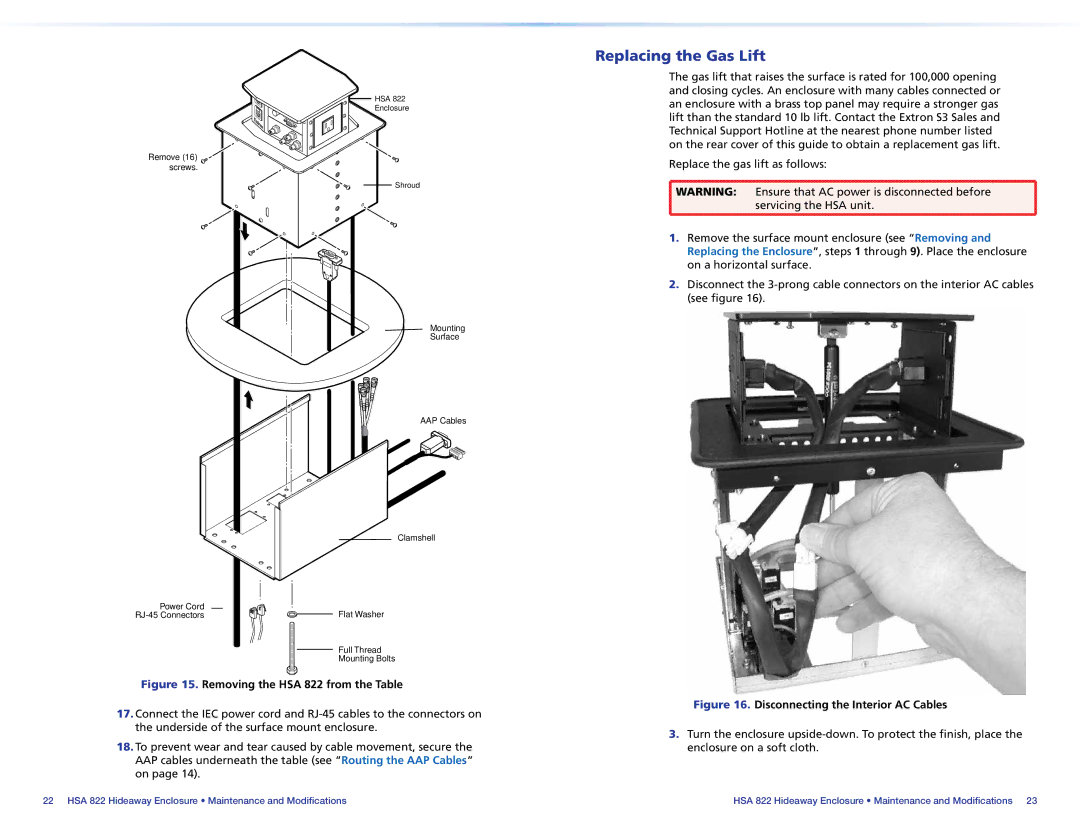
Remove (16) screws. ![]()
HSA 822
Enclosure
Shroud
Replacing the Gas Lift
The gas lift that raises the surface is rated for 100,000 opening and closing cycles. An enclosure with many cables connected or an enclosure with a brass top panel may require a stronger gas lift than the standard 10 lb lift. Contact the Extron S3 Sales and Technical Support Hotline at the nearest phone number listed on the rear cover of this guide to obtain a replacement gas lift.
Replace the gas lift as follows:
![]() WARNING: Ensure that AC power is disconnected before
WARNING: Ensure that AC power is disconnected before ![]() servicing the HSA unit.
servicing the HSA unit.
1.Remove the surface mount enclosure (see “Removing and Replacing the Enclosure”, steps 1 through 9). Place the enclosure on a horizontal surface.
2.Disconnect the
Mounting
Surface
AAP Cables
Clamshell
Power Cord | Flat Washer |
Full Thread
Mounting Bolts
Figure 15. Removing the HSA 822 from the Table
17.Connect the IEC power cord and
18.To prevent wear and tear caused by cable movement, secure the AAP cables underneath the table (see “Routing the AAP Cables” on page 14).
Figure 16. Disconnecting the Interior AC Cables
3.Turn the enclosure
22 HSA 822 Hideaway Enclosure • Maintenance and Modifications | HSA 822 Hideaway Enclosure • Maintenance and Modifications 23 |